Google
 
Showing posts with label seasonal cooking and baking. Show all posts

Thursday, 29 January 2009

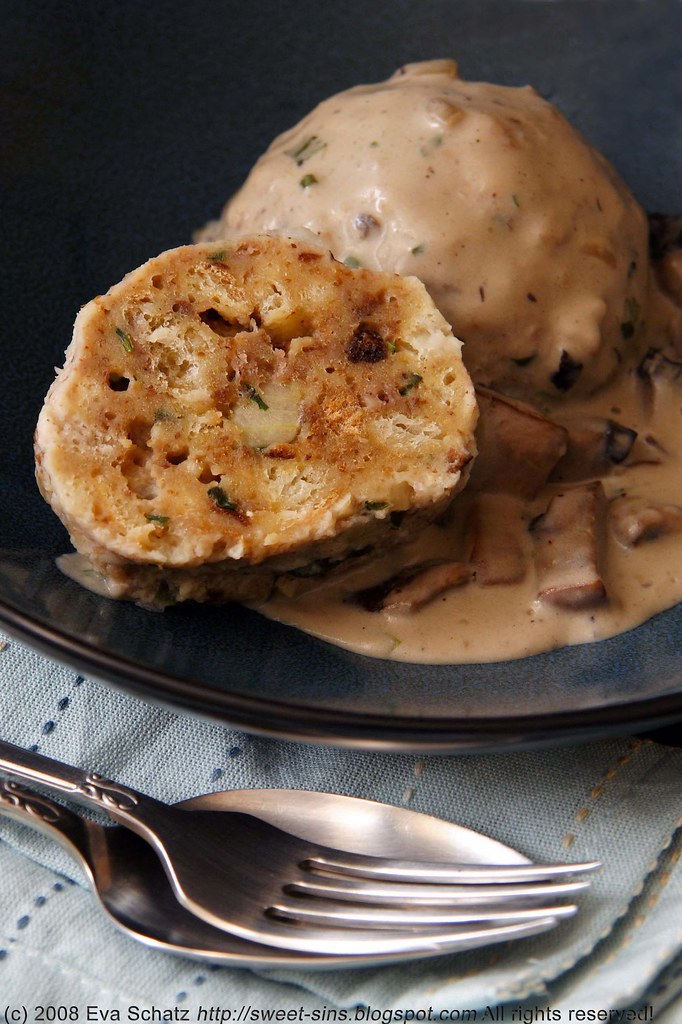
Bread Dumplings with Mushroom Sauce


During the last few days, all of Sydney has been suffering under the sweltering heat - even at night, temperatures wouldn't go down. And without a breeze lifting the suffocating blanket of humid hot air, we had to resort to the fan to be able to sleep at times.

Knowing that, bread dumplings with mushroom sauce might not be the dinner of choice at the moment, I grant you that. Admittedly, I made these in the midst of the Australian winter, some time last June, when the cold rain wouldn't stop for days - then these hearty dumplings are exactly what you need.

I was instantly reminded of them when talking to my family about the pretty rough winter they have at the moment in Europe. Usually my family lives in an area of Germany with a moderate climate so cold it might get but not bone-chillingly so. However, this year the temperatures dropped way beyond zero for quite a while. Listening to descriptions of a walk through snowy landscape while wiping away the sweat on your own brow feels quite funny!

So this one is for all the people that are currently shivering in the Northern hemisphere - enjoy and keep warm!


Bread Dumplings with Mushroom Sauce

The ingredients

Dumplings
In Sydney, I usually never have leftover bread rolls (get eaten too quickly) but leftover bread works just as well. Just make sure to cut it finely - you may have to remove very hard rinds - and let it soak long enough.

10 medium-sized bread rolls (about 500g), cut into fine slices
salt
3/8 to 1/2 l milk, warmed
2 tbsp onion, diced
plenty of chopped parsley
1 tbsp butter
4-5 eggs
1 tbsp flour

1
Put the finely cut bread rolls into a big bowl, sprinkle with salt and pour the warm milk on top. The exact amount of milk needed depends on how dry the rolls are. The drier the rolls, the more milk is needed and the longer it will take them to absorb it all. The soaking will take at least 30 minutes. Stir the mixture every now and then.

2
Gently fry the onions and parsley in the butter until softened. Note: If in a hurry, you can skip this step - the dumplings will still taste delicious.

3
Add the onions and parsley to the bread rolls, followed by the eggs and the flour. If your eggs are very big, use only four. Using a bare hand, mix together until evenly combined. If you can still feel lots of hardened bread roll pieces, let your mixture soak a little longer.

The resulting mixture will be quite soft but should not be too soggy. If it is too liquid, the dumplings won't hold their shape. If necessary add a tablespoon of bread crumbs but don't add too much at a time.

4
With wet hands, shape the dough into round dumplings. They should be about the same size to ensure even cooking. Whenever the dough begins to stick to your hands, wet your hands again in cold water.

5
While shaping bring a pot with three liters of salted water to the boil. If you're unsure about the consistency of your dumplings, put only one in the pot, reduce the temperature, and let it simmer for roughly 20 minutes. Check after a few minutes that the dumpling doesn't stick to the bottom of the pot. It will be ready when it floats on top.

If you're happy with the consistency of your trial dumpling, simmer the remaining ones. They need to have enough space to float freely so work in batches if necessary.

6
Lift out the dumplings using a slotted spoon and serve immediately with creamy mushroom sauce or a hearty meat stew.


Mushroom Sauce

Butter
Onions
Parsley
Mushrooms of your choice
Dairy of your choice

There's no recipe - it's your choice if you first sautee onions and mushrooms and then deglaze the pan with cream, sour cream, milk whatever or if you make a roux out of butter and a little flour and then go from there.
Just one bit of advice: I've long tried to make a somewhat diet-friendly mushroom sauce - forget it, it always tasted awful. I think that's one of these cases when you need to use real cream!


The source
Hedwig Maria Stuber: Ich helf Dir kochen

The hint
Making dumplings might sound a little irksome but it isn't difficult at all. I don't even bother making a trial dumpling.

If you have leftover dumplings, you can slice them up, turn in beaten egg and fry until browned. Together with a green salad, it makes for a quick and tasty lunch.

Wednesday, 24 December 2008

Merry Christmas!

Have a wonderful Christmas with all your loved ones and try to eat as many cookies as you can - CU again after the holidays!

Monday, 22 December 2008

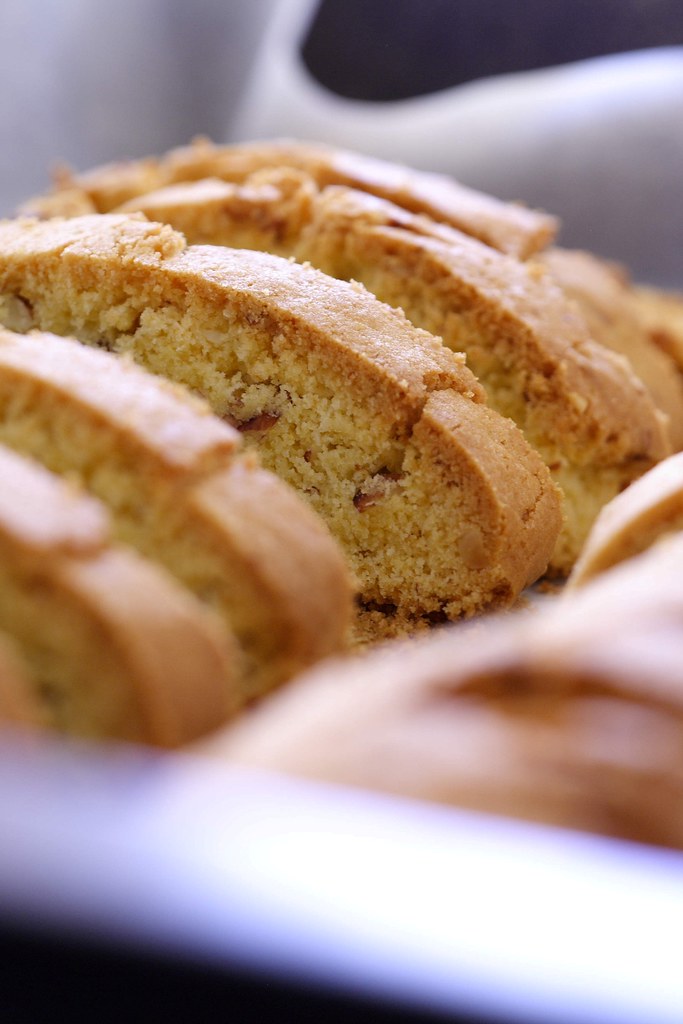
Biscotti - definitely twice baked


Twice baked - and I mean it! And that's got nothing to do with the regular procedure to bake them, slice them, and then return them to the oven for added crunch and a golden glow.

Having seen lots of biscotti recipes in blogland, I wanted to know if they were really that good. My only encounter so far had been the rock-hard store bought kind that almost cost me a tooth. So, one of these days, I decided to give them a go. However, these biscuits turned out to be not quite as easy to make as I had thought. Not willing to be conquered by some cookies, I decided to start again a few days later, albeit again with mixed results.

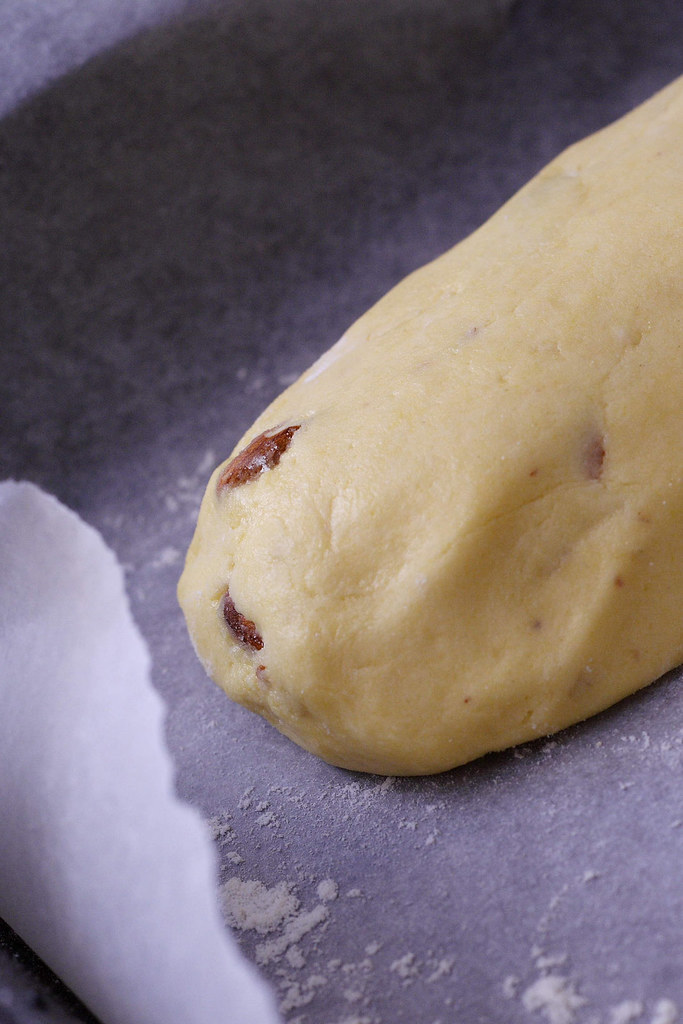
But let's start with the first batch. Emerging from its first stint in the oven, it looked just perfect - from above, that is. Once I had the logs sliced up, I noticed that I almost burned the bottom sides. Cursing under my breath - it clearly must be the oven's fault - I returned them to the heat but carefully laid them out side wise as not to brown the bottoms any further.

For the second batch, I decided to turn down the heat and use the fan-bake setting. But disaster struck once more. When I took the logs out of the oven - pale golden but with darker edges - to be sliced up for the second browning, it turned out that this batch wasn't even done all the way. I quickly returned the uncut logs and peeped anxiously through the oven door. Luckily the baking powder was still doing its job and the logs rose some more. However, a little too much as it turned out. When fully baked, this batch with its cracked surface and less than smooth texture had a rather "rustic" charm to it - at least that's what I think smart people call their baked goods that aren't picture-perfect...

Taste-wise though, I almost preferred the charred batch. The over-the-top caramelization of the crust added more depth of flavour. Therefore, a third batch is in order some time soon - once I'm done with all the Christmas baking - and then with a double-layer of baking sheets!

Almond Biscotti

I started out with a recipe from delicious days and kept to its instructions but made a couple of modifications regarding the ingredients, most notably the addition of maize flour.

The ingredients

90g unpeeled almonds, partly whole and partly chopped
100g butter, softened
100g caster sugar
50g lemon caster sugar (in a jar, mix sugar with lemon zest and let it sit for a few days)
2 eggs
5 drops of bitter almond essence
pinch of salt
200g flour
80g fine maize flour

Thursday, 25 September 2008

Here I am again... with Broad Beans!

Poah, that's been a long absence... Now I'm definitely happily married and will be writing more about our second go once I've got the photos - let me just just say it was w-o-n-d-e-r-f-u-l! (Meanwhile you can read about our first wedding here.)

After a long but oh-it-seemed-so-short stay, we had to kiss our families and friends good-bye and were off to Sydney. While living in this preparing-for-and-then-getting-married-bubble, one could forget that elsewhere life goes on, you're just too busy to notice. That's also true for the food blogging world - I've had a lot of catching up to do! Always amongst the first to check is Nora's Life's Smorgasbord. I had already eyed her lavender shortbread - full of envy, of course, as I always forget to look out for culinary lavender - no matter how often I've longingly read blog posts about the creative use of this herb.

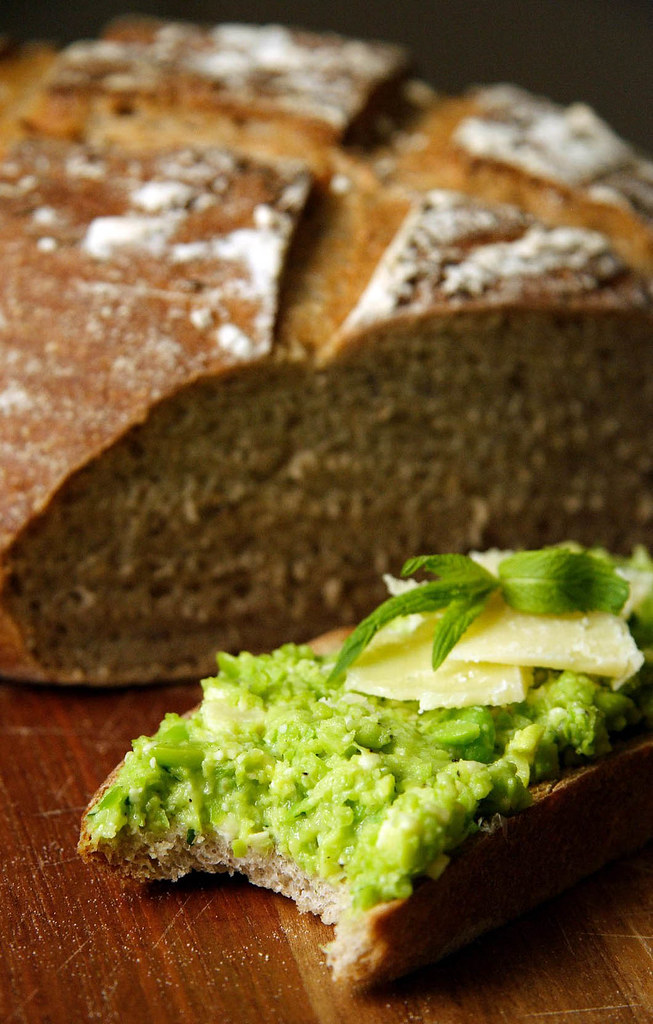
This time I read loads of stuff about broad beans that sounded utterly appetizing. What's more, Nora said that the season for broad beans is almost over! That's why I decided to do something about it now instead of saving the recipe for later (which usually means much, much later) . Off I went to the shops to buy broad beans, mint, and pecorino, and made myself a simply wonderful dinner. Granted, the whole shelling business does take a while but on the other hand it lifted my spirits to do something elaborate just for myself. With my new/old husband away on a business trip, dinners aren't such an enjoyable thing - however, these broad beans totally made my evening!


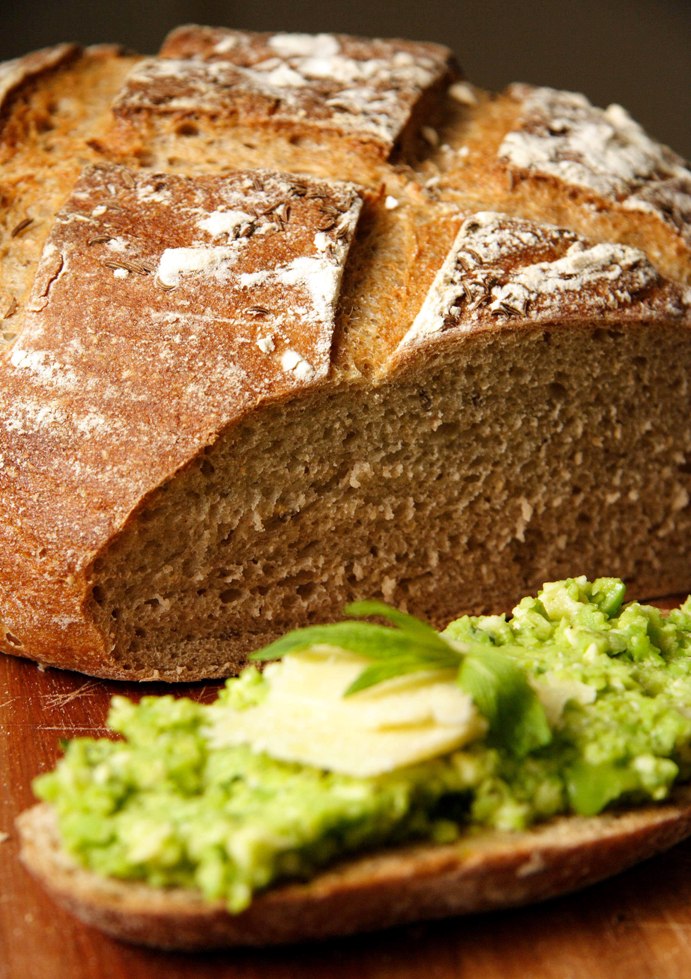
PS: Nora provided three different recipes so no need for me to type it down again (I chose Maggie Beers' version with some lemon juice added and some garlic rubbed onto the sourdough bread after toasting - lovely!). I'd rather tell you about the sourdough bread that was just baking away when I read about how to use it for dinner..;-)

Light Rye Sourdough Bread

The ingredients

250g water
360g white sourdough, 100% hydration
300g bread flour
100g rye flour
100g wholewheat flour
1.5 tsp salt (or a little more than that)
1 tbsp whole caraway seeds

1
I used my breadmaker for mixing the dough and letting it rise. The first rising was about 3 hours (the bread maker provided some warmth during the first hour). At the end of the rising time, the dough had a bit more than doubled.

2
Take the dough out of the bread maker and turn onto a lightly floured work surface. I treated it to a round of stretch&fold (for a stronger texture) and then shaped it into a round loaf.

3
Place the loaf seam side-up into a floured proofing basket (or a bowl lined with a floured tea towel). Cover and let rise until well doubled in size. This took roughly 2.5 hours. To be sure, make a light dent into to the surface of the loaf. As soon as the dough doesn't spring back completely and still shows a little dent, the loaf is ready for baking.
Meanwhile, preheat the oven with a baking sheet or pizza stone to 220 degrees Celsius (I usually use the highest setting available as I will always lose some heat during steaming).

4
Carefully unmold the loaf onto a bread peel or an upturned baking sheet (covered with parchment paper or sprinkled with cornmeal). Slash in a criss-cross pattern.
Let the loaf glide onto the hot baking sheet/pizza stone and quickly shut the door. Open once more and splash a cup of water onto the bottom of the oven - be aware of the hot steam! Again, quickly shut the door to keep heat and moisture in.

5
Bake at 220 degrees Celsius for 30 minutes. Then change to 200 degrees fan-bake for a further 15 minutes. The fan will get the remaining moisture out of the oven for a crisper crust. If you want a thicker crust, bake a little longer at 220 degrees before changing to fan-bake.

6
Let the loaf cool completely on a rack before slicing.

The source
Inspired by Dan Lepard's Barley and Rye Bread

Friday, 15 February 2008

A Heart for my Valentine... or two


Celebrating Valentine's Day is not considered a German tradition. In recent years, it seems to have caught on a bit but you probably won't see many of the last-minute, rose-buying, desperate-feeling boyfriends storming into a flower shop. Whilst I understand that many men think it ridiculous to buy completely overpriced stuff just because it's the 14th of February, I still think it's never too late to have a bit more romance in your life!

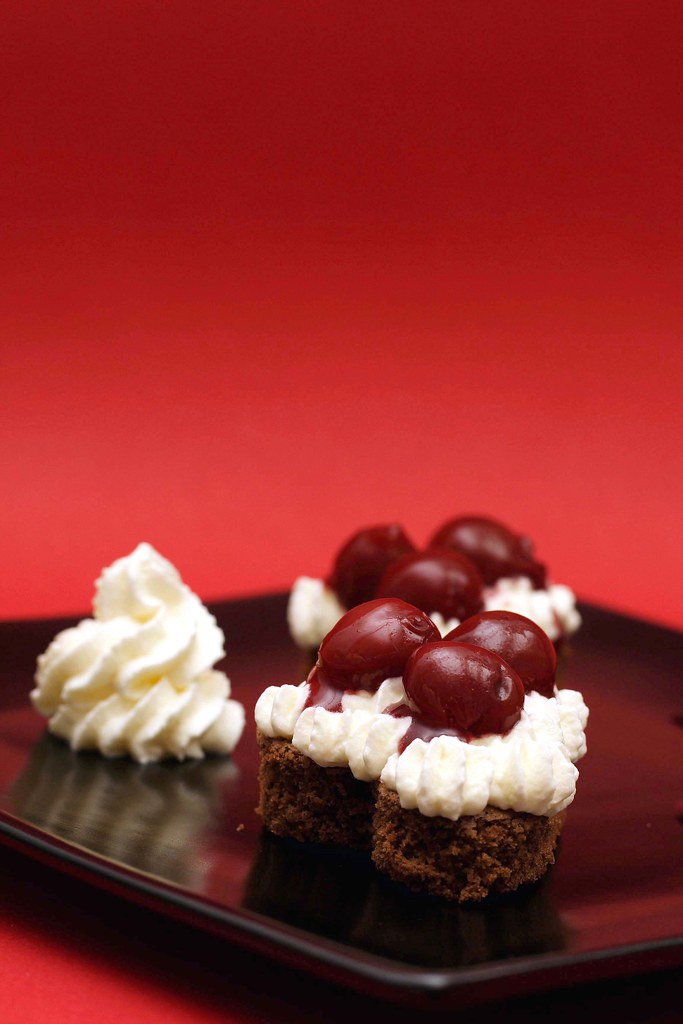
When I saw Zorra's announcement of A Heart for Your Valentine , I knew that I had to participate. With my boyfriend coming from the Black Forest Area, I also knew instantly what to make for him. The only problem, I didn't have any kirsch which is more or less the crucial ingredient for a proper Black Forest Cake. However, love is all about ignoring little imperfections, right..;-)

With only a cookie cutter in heart-shape, this black forest cake comes in very small portions but it's entirely up to you how many you'll eat...

Zorra is posting the round-up continuously in two parts, so check-out all the wonderful heart-shaped creations!


Black Forest Cake

The ingredients

6 eggs, separated
pinch of salt
175g caster sugar
90g butter
140g dark chocolate, in pieces
150g flour
1 tsp baking powder (optional)
vanilla (optional)

For assembly:
canned cherries (I like to use the juice, too, slightly thickened with cornstarch, and a hint of cinnamon)
whipped cream, sweetened to taste with vanilla sugar

optional:
kirsch for dousing the cake
chocolate shavings

1
Preheat oven to 175 degrees Celsius (no fan-bake).

2
Melt the butter. Once the butter isn't bubbling anymore, add chocolate. Stir until chocolate is melted and evenly combined. Let cool until lukewarm but still liquid.

3
Using a heatproof bowl resting on a hot water bath, beat egg yolks and sugar until pale, creamy and voluminous. This will take a couple of minutes.

4
Using another bowl and clean beaters, beat egg whites with salt until soft peaks form.

5
Sift the flower and baking powder (if using) onto the foamy egg yolks. Pour the chocolate-butter mixture on top. Do not mix at this stage.

6
Add one third of the meringue and stir in to lighten the batter. Lightly fold in the remaining meringue.

7
Pour into a baking pan (26 cm in diametre or a baking sheet) that's buttered only at the bottom. To be safe, use baking paper, too. Bake immediately. A round cake takes roughly 35 minutes, a sheet cake a bit shorter. The cake is done when the top feels springy. Don't overbake or the cake will dry out.

8
Once cooled, cut out little hearts and assemble or fill one large cake with cherries and cream.

The source
GU: "Die grosse Schule des Backens"

The hint
Some recipes specify that you can also add kirsch to the cream. If you want to really taste the kirsch that way, you'll have to add a lot and I recommend stabilizing the cream with gelatin. Many, many years ago, I added too much kirsch, the cream wouldn't become stiff, I kept beating and ended up with kirsch-flavoured butter...

Tuesday, 28 August 2007

SHF#34 - Going Local

A long time ago, when I first thought about moving to the other side of the world, my boyfriend would always start to chuckle: "I´d love to see you explaining to some Aussie bloke who never ever left Australia, from which particular, tiny area in Bavaria you´re from!" Well, if there´s one thing I´m getting missionary about then it´s the cultural diversity of my home country. Mind you, I´m not making any judgements - I just love to get to know all these little, graspable things that are part of this very abstract concept of identity. And let me tell you, there´s a lot to be proselytized - not even the people from our neighbouring state (on the Western side of southern Germany) knew enough about us.

Ladies and Gentlemen, let me introduce you to one of the seven districts of Bavaria which is located next to the Czech border: the Upper Palatinate (aka Oberpfalz)!

Ok, I know it´s pretty small. It´s not even an economically important area - once blooming industries like porcelain and lead crystal manufacturing are now wilting; and the long time in the shadow of the Iron Curtain wasn´t a good thing to begin with. There even is a rather mean saying that all the area has in abundance is stones on the fields.

However, with their limited supplies (milk products, potatoes, and apples were a staple) the people from the Upper Palatinate not only managed to get by but also produced some really tasty, hearty country fair.

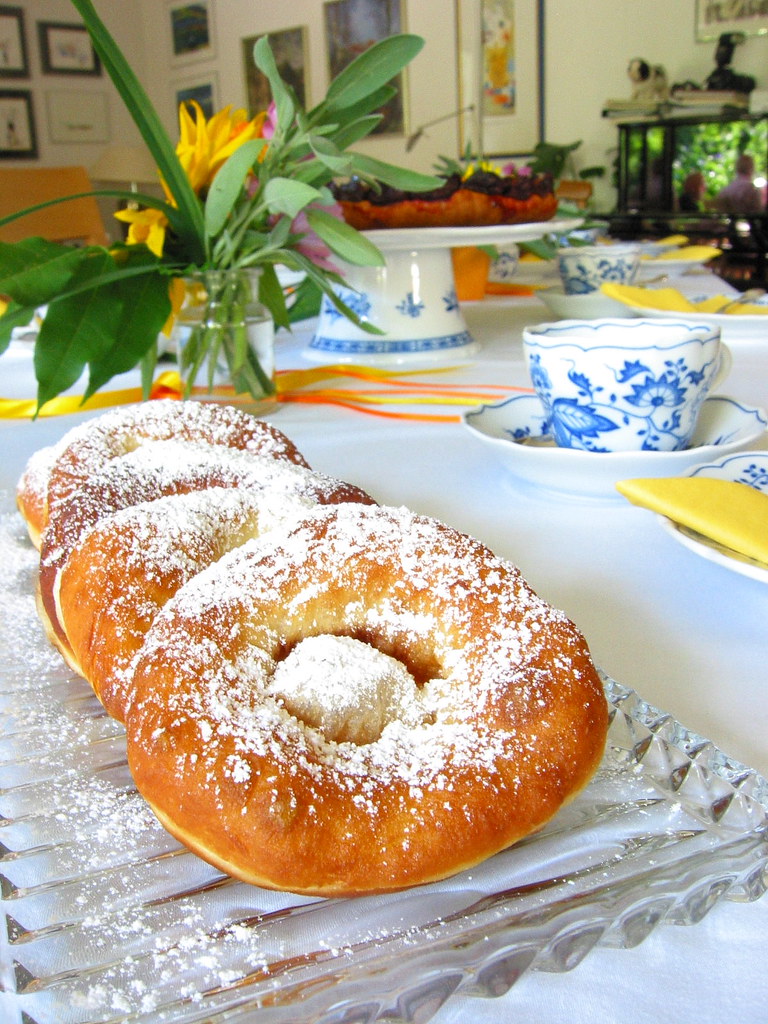
Whenever there is a feast in this area it won´t be complete without some of the local doughnuts (which don´t have a hole in the middle but a very thinly stretched piece of dough). One of the bigger feasts was the annual church anniversary where the whole village would come together and party for an extended weekend. This occasion would call for another traditional cake, the so called "Church Anniversary Cake" or "Parish Fair Cake" - I can´t even find a proper translation for that one... The pronounciation in my home dialect may seem a bit weird: it´s "Kirbakejchln" (doughnuts) and "Kirbakoucha" (cake).


The doughnuts are very crispy in the middle, buttery-soft in the thicker parts, and not sickly sweet. As a kid, the first thing to do when visiting my grand mother, was looking into her pantry for some of these doughnuts...


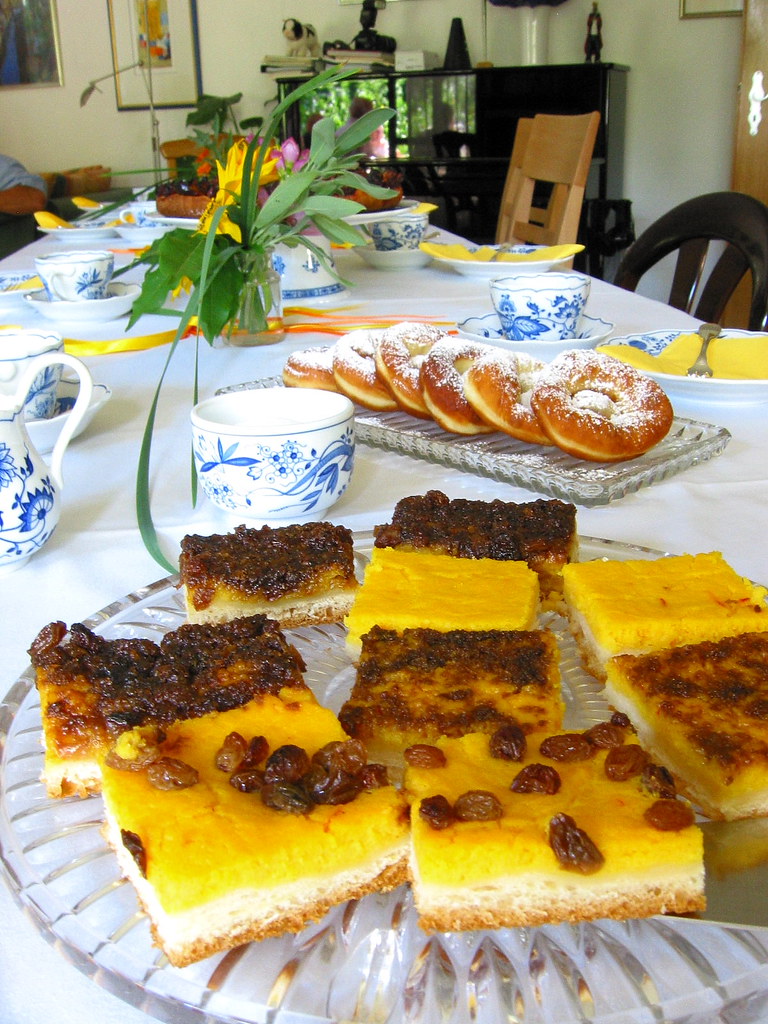
Whilst doughnuts are well-known allover the world in some way or other, I bet that this cake with its peculiar yellow colour won´t be know to many people outside my area. The colour of the semolina pudding layer comes from the generous use of saffron. This traditional spice is still rather expensive and that´s probably the reason why people had this cake only once per year. Saffron also makes for a particular taste that I didn´t cherish as a kid (but I do now). You can have this cake to your liking either plain, topped with raisins, with a mixture of brown sugar, ginger bread crumbs, and syrup or with simply everything. Enjoy!


Although I´m pretty late, this is my entry for this month´s Sugar High Friday invented by the Domestic Goddess herself and this time hosted by Johanna from The Passionate Cook. Her theme of local specialties was just perfect for last weekend when I made these things for the 60th birthday party of my father which happened to be on the same day as our local parish party!

PS: Hidden behind the flowers is a traditional plum cake - I told you, I don´t do anything but eating...

PPS: Please excuse the subpar pictures, without the camera I´m used to, I´m pretty hopeless...


Parish Fair Doughnuts


You can use your preferred recipe for sweet yeast dough like this one. The only adjustment for soft doughnuts is to make a very soft dough by adding more liquid including alcohol. For 500g of flour add a shot of rum or kirsch and at least double the amount of milk (depending on your preferences).

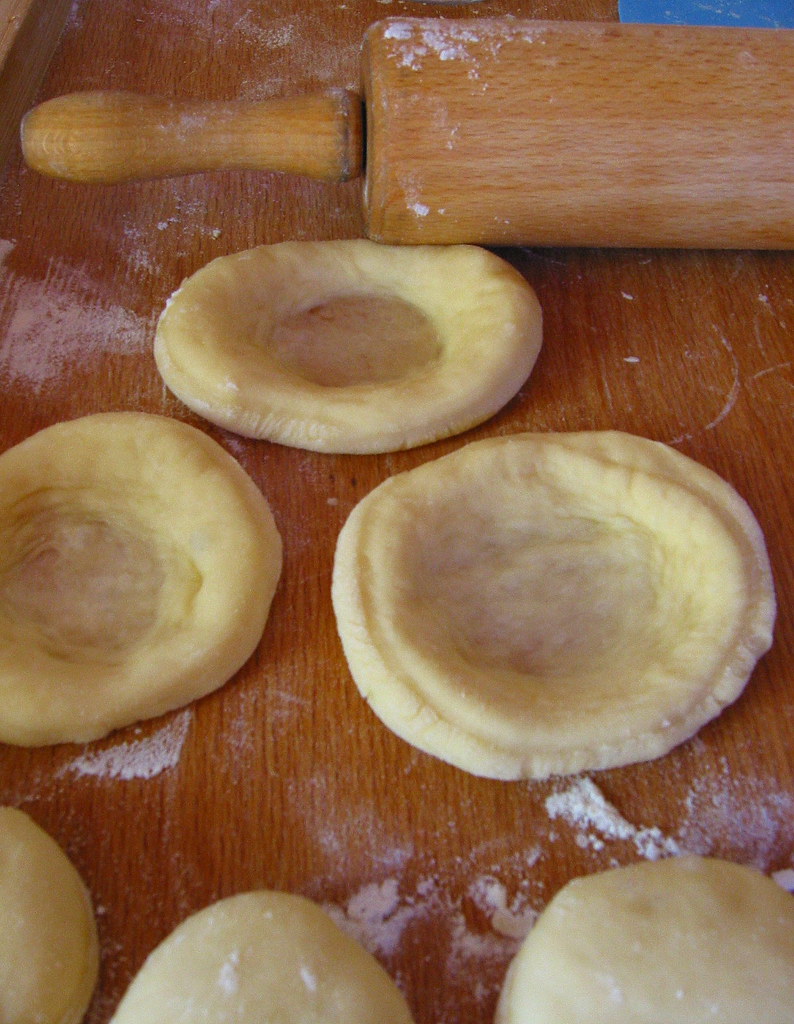
After the first rise, roll out the dough to almost one centimetre in thickness on a lightly floured worksurface. Using a small drinking glass, cut out rounds. Cover with a towel and let rise until doubled. Now comes the tricky part that I haven´t quite mastered yet: You have to turn and stretch the round piece of dough between your thumbs and index fingers until the middle is like a window pane and the rim is of an even thickness (well, more or less). Deep-fry each round on one side until golden brown, then turn around. It is important that there is no hot oil in the cavity after the turn (otherwise the middle won´t stay yellow). Let cool down on sheets of kitchen towel and serve with lots of icing sugar. The next day, refresh in the hot oven for a couple of minutes.


Church Anniversary Cake

Again, use your favourite sweet yeast dough as a base but make sure that this one isn´t too soft.

The ingredients

1.5 l milk
225g soft semolina
sugar to your liking
0.5g saffron (or a little bit more)
250g butter
5 eggs, separated

2 big pieces of ginger bread
400g light brown sugar
1-3 tbsp sugar beet molasses
250g raisins
rum (optional)

This makes enough to cover two big baking sheets as seen above.

1
Cook a thick semolina pudding, stir in butter, saffron, and sugar to your liking.

2
Add egg yolks. Beat egg whites until they hold soft peaks and gently fold in.

3
Roll out the dough onto your baking sheets and let rise for 15-20 minutes, cover with yellow semolina mixture.

4
Depending on your preferences, either bake plain or with raisins plumped in rum or with a sticky mixture of brown sugar/crumbled ginger bread/molasses or put everything on top.

5
Fan-bake at 150 degrees Celsius until the edges of the dough are golden brown.


The source
Adapted from a local cookbook: "Weidener Kuechengeheimnisse"


The hint
Tightly wrapped, the cake keeps very well for several days. The doughnuts can be frozen.

Monday, 9 April 2007

Easter - Downsized Celebration

This year’s Easter is a bit of a boring story – I’m home alone, my boyfriend is overseas, and my family is as far away as usual. So embarking on all sorts of culinary Easter adventures didn’t seem to make much sense – after all, who’s gonna eat it? Furthermore, half of the long Easter weekend is occupied by work. However, lucky me, on the two free days I’ve been invited to an Easter brunch as well as a chocolate fondue, thanks to Katherine and Nora! You see, all is not lost!

And trying to see the brighter side of things, I quickly decided to dye the four remaining eggs in my fridge. I wanted to do it with natural colour and used turmeric, hoping for a bright yellow. Unfortunately, after letting them soak for a whole night, there is not much of a yellow colour to be seen. However, they have some yellowish spots here and there so they will hopefully qualify as Easter eggs.

Back home, I would have spent the evening of Good Friday with my mom, dying dozens of eggs in all sorts of colours. The following day, we would bake as much as possible – my family is used to eat cake rather by the square meter… Having no seasonal fruits yet, we would usually make two big baking sheets covered with yeast dough, topped with juicy quark filling, and crunchy streusel. With 1.5 kg of flour as the basic ingredient for the dough, we would have enough dough leftover to make two sweet Easter breads: one with raisins and candid orange or lemon peel for my parents and my brother and another one just with almonds for my sister and me (being both raisins and mixed peel haters). Traditionally, those breads get shaped into round loaves, slashed in the pattern of a cross, and brushed with egg yolk for a nice, golden brown colour. The sweet breads we would have for breakfast with butter and honey or just plain, and the cake for afternoon tea or whenever you happened to pass the pantry...

This year, there was neither the time nor the need to engage myself for several hours in a yeasty adventure of that sort. Luckily, I can at least show you our typical baking sheet-size cheesecake because I made it for a friend’s birthday a couple of weeks ago and never posted about it.
Finding European-style quark in Australia is rather difficult and in any case very expensive. Thus, you could substitute it with ricotta but make sure to choose a rather sour one and not the ricotta recommended for baked cheesecake. The real European quark gives a slightly sour note which is the necessary counterpart to the overall sweetness of filling and streusel topping.

Happy Easter!


Easter yeast cake with quark filling and streusel topping

I use my regular yeast dough recipe but you can also use your preferred brioche recipe or a less rich version if you feel like eating healthy. If you don’t feel like eating healthy at all, then add your favourite streusel topping – you won’t regret it!

The quark filling

Here, you can experiment as much as you want adding raisins, mixed peel (if you really like it) or a finely chopped apple.

4 egg whites
Pinch of salt
75g butter
200g caster sugar
2 sachets of vanilla sugar (or 1 tbsp vanilla essence)
4 egg yolk
1 kg quark or ricotta
100-200g sour cream
1 tbsp cornstarch (semolina works fine, too)
A few drops of rum essence or 1-2 tbsp rum (optional)

Yield: enough filling for a big baking sheet

1
Beat egg whites with salt until stiff.

2
In another bowl, cream butter with sugar and vanilla sugar until pale and fluffy, gradually add egg yolks mixing well after each addition.

3
Add quark and sour cream to the butter mixture, mixing well. Add cornstarch and rum essence, if using. At this point, you could also add raisins etc.

4
Gently fold in beaten egg whites.

5
Spread filling on the rolled-out yeast dough and cover with streusel if desired. Fan-bake at 150 degrees Celsius for about 45 minutes.

The source
Loosely based on "Hedwig Maria Stuber: Ich helf dir kochen"

The hint
Check the dough base on the edges for doneness: It should be golden yellow and not dark. The quark filling will stay whitish and only get a golden yellow colour on some spots. If you are like me and pile up as much streusel topping as possible, then the entire surface will be covered with a crunchy, golden crust...hmmm...

The streusel topping

250g flour
150g sugar (for crunchy streusel, don't choose caster sugar)
100-150g butter, cold, diced
1 sachet vanilla sugar

1
Put all ingredients into a bowl and quickly rub the butter into the flour using your fingers. If the mixture is too crumbly and doesn't come together at all, add a little more butter. If you work too slowly and the butter starts melting, don't add more flour (unless you want your streusel concrete-style). Rather pop the bowl into the fridge or freezer (depending on your patience) until the butter has firmed up again.

2
Crumble mixture on top of your cake. Leftover streusel can be frozen.

The source
My mom's creation

Thursday, 15 February 2007

SHF#28: Sweet Seduction


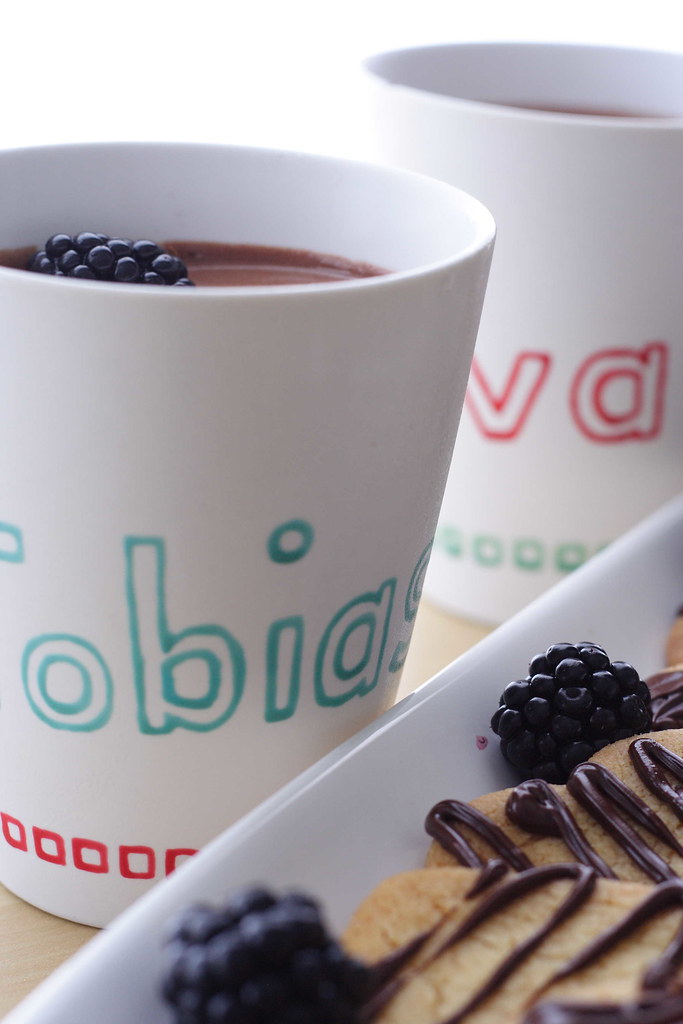
They may not look like it – but those mugs are well travelled. They’ve found their first home in a shared house back in Germany, got separated and after one and a half year were finally reunited in Australia. Hey, and they’re not even chipped, right?

Those mugs may not look elegant – in fact, they’re handmade by myself. They were part of the first Christmas present for my boyfriend after discovering that he did not own a single piece of crockery let alone cookware. Of course, while living in a shared house this wasn’t really necessary. But to me, at least having my own coffee cup would have been utterly necessary to feel at home. Knowing that in three months time he would leave Germany in order to move to Australia, I thought I had better paint my name on… So off he went taking the cup with my name with him and leaving me (and the other cup) behind. Ok, that does sound too pathetic. We knew already that I would come and join him later. However, we didn’t know that it would really take that long. Since then, the two mugs are quietly sharing the shelf with each other (and a couple of other mugs, too). We’re not quite sure yet where we will live in the next couple of years but I’ll make sure that those mugs come along.


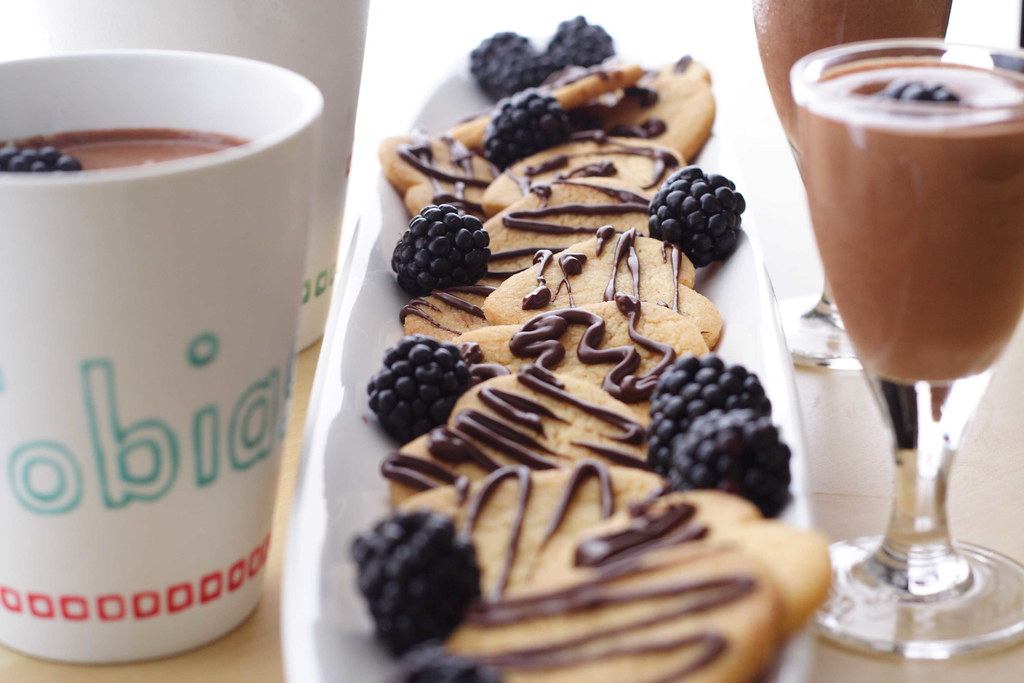
While thinking hard about what to make for Sugar High Friday No. 28 "Sweet Seduction" - hosted by Jasmine of Cardamom Addict - my good old mugs gave me the well-needed inspiration to make something that could be spooned out of them. My boyfriend strongly voted for something chocolatey - and there you go!


Valentine’s Day Chocolate Pudding (or Mousse or whatever you’d like to call it)

The ingredients

300ml milk
1 teaspoon instant espresso (I forgot it in the end)
50g dark chocolate, broken into pieces
50g caster sugar
1 small egg
1 teaspoon of vanilla extract or vanilla sugar
Pinch of salt
1 heaped tablespoon of cornstarch (for dipping consistency, otherwise use 2 tablespoons)
1 heaped tablespoon of cocoa
1 tablespoon Rum (I forgot this one, too…)

100ml cream, whipped (20% fat works well in here)
1 teaspoon of cocoa
1 sachet vanilla sugar
1 teaspoon caster sugar

To serve: Blackberries and chocolate-drizzled sugar cookies for dipping

Yield: rather 3 than 2 servings (or 4 if you're not too greedy)

1
Using a wire whisk, mix milk, cacao, cornstarch, and salt (the instant espresso should go in here as well). While stirring continually, let it come to a boil (all the lumps should vanish by now). When the mixture is noticeably thickened, set aside.

2
In a metal bowl, mix caster sugar and egg. Prop the bowl on top of the pot with the milk mixture (providing they have suitable sizes) and beat until pale and fluffy. Take the bowl off the pot and continue beating for 1-2 minutes.

3
Put the chocolate pieces into the milk mixture and stir until melted and thoroughly combined (at this stage, the rum should be stirred in, too) and let cool down.

4
Meanwhile, beat cream with cocoa, sugar and vanilla sugar until stiff.

5
Fold egg and sugar mixture and cream into the chocolate-milk mixture. Spoon into mugs and pop into the fridge until ready to serve.


The source

My own blend of several recipes found on Food&Wine


The hint

I have to admit that I was not patient enough to let everything cool down properly. This and the fact that I had only used one tablespoon of cornstarch led to a somewhat viscous texture. If you prefer it a bit more solid, I’ll recommend to follow the instructions and to wait patiently… However, the resulting pudding-mousse was not only rich and chocolatey but also very silky!


In case you want to know what we had as main course:

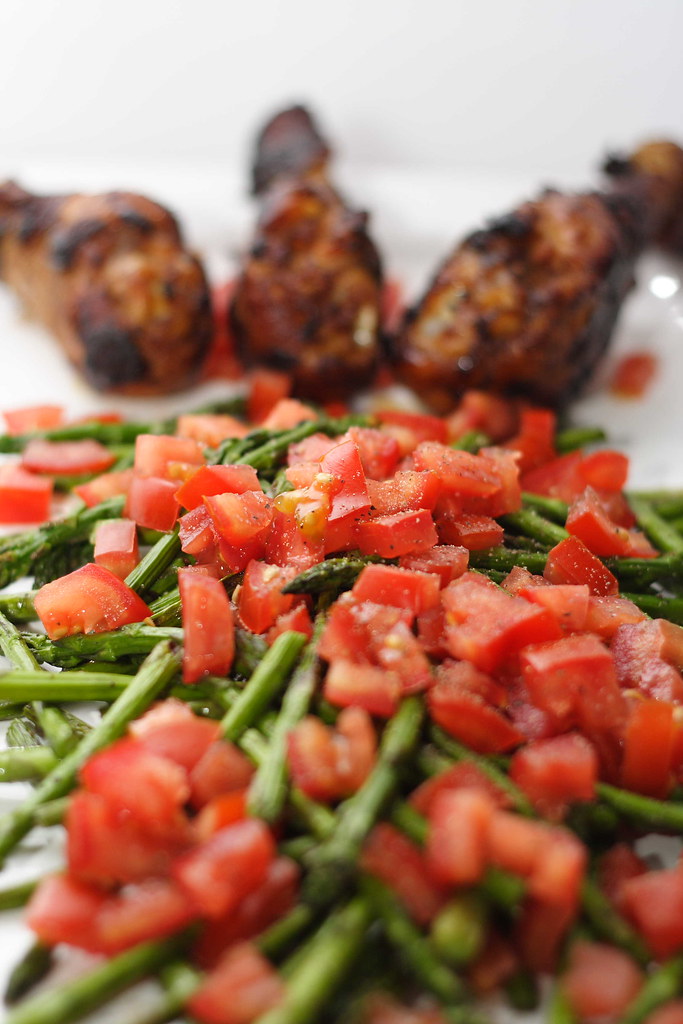
Roasted chicken drumsticks (marinated in honey, soy sauce, paprika, and chili flakes) with a salad of fried asparagus, diced tomato and croutons. I’m pretty sure it’s not a recommended match to have the Sparkling Shiraz of Bimbadgen Estate (Hunter Valley, Australia) with both courses – but Valentine’s Day was a perfect occasion to finally open this lovely bottle!

Tuesday, 2 January 2007

New Year's Resolutions...

Did I make a New Year’s Resolution? Not really. Usually, when the clock strikes midnight, I’m simply too busy admiring the fireworks, sipping champagne and hugging friends. However, afterwards there are always some thoughts coming up – as there are always things you thought about a hundred times but never got around to actually do. Anyway, there is something I will try my hands on this year: Hosting a really elaborate dinner party!

Sounds weird as some sort of New Year’s resolution? The truth is while I’m enjoying having friends over for dinner, I always tried to focus on a beautiful dessert (most important dish in my opinion) and kept the rest of the menu pretty casual. Sometimes I thought about doing some crazy stuff but chickened out in the end. I really admire people like Bea from La Tartine Gourmande who is capable of producing a dinner so stunning I can hardly imagine ever making on my own… So, what I wanna do this year is this: Improving my organizational skills as well as my plating skills and hosting a sophisticated dinner party – just to see if I got it in the end…

Hey, I just realized that this is actually not what I wanted to tell you in the first place! I did want to share a recipe! After all those Christmas goodies this year – and I also made and ate stuff I haven’t blogged about like that –

and all the alcohol of New Year’s Eve – and I did have my fair share this year, after all we made Feuerzangenbowle – and my sweet start into 2007,

there was the sudden insight to slow down a bit…

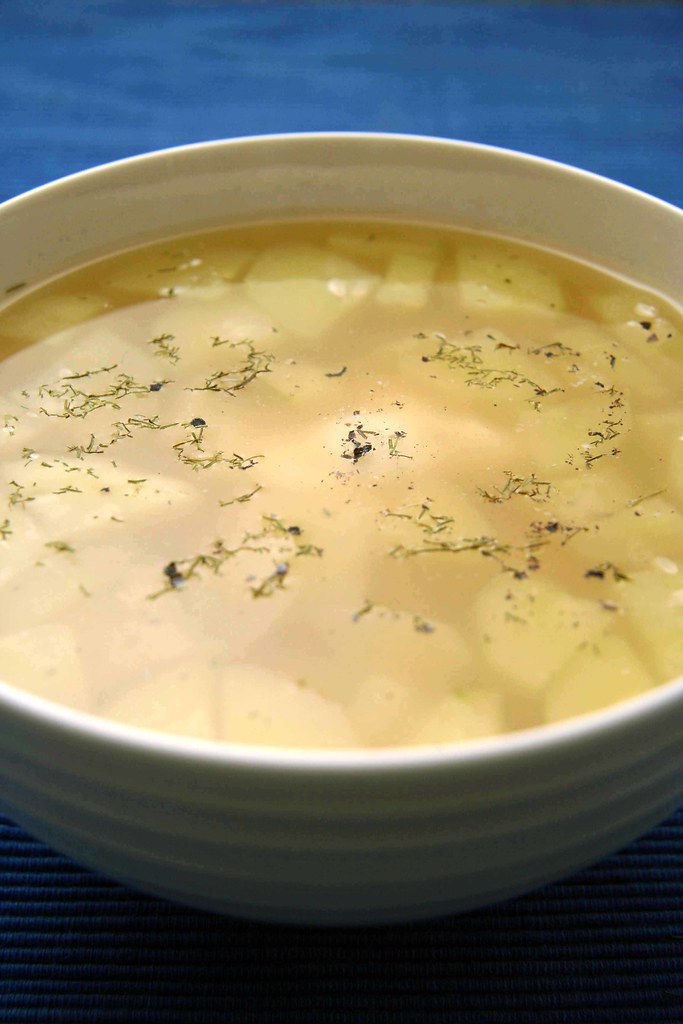
In case you want to eat something nice and quick that’s good for you, I highly recommend trying my cucumber soup with yoghurt!

The following recipe dates back to the time when I was studying and sometimes not really knowing what to make out the stuff in my fridge. This concoction sounds a bit weird and maybe doesn’t look extremely great but it’s tasty and very healthy. When I tried it for the first time, I was definitely not sure about it but ended up liking it a lot.

The cucumber is a bit of an uncommon soup ingredient but that’s what makes it all the more interesting. A few spoonfuls of yoghurt add a nice tartness and give the soup a bit more body.

However, I can’t state exact amounts in this recipe as it highly depends on how much is left in your fridge and how much you want to eat. Look at it that way, this recipe is truly foolproof!


Cucumber Soup with Yoghurt

The ingredients

Vegetable stock
Rice (I recommend wholemeal rice)
Cucumber, peeled and cut into quarter pieces
Dill, dried
Freshly ground pepper
Yoghurt (low-fat works fine in here)

1
Bring stock, rice, and dill to the boil and let simmer until rice is soft. Add cucumbers for the last couple of minutes (depending on how crunchy you like it).

2
Season to taste with freshly cracked pepper. Add a few spoonful of yoghurt.
Enjoy!


The source
My own creation

Friday, 29 December 2006

Dinner on Christmas Eve


Back again: I spent Christmas with my boyfriend and some other friends in a quite lonely spot in New South Wales: Manilla. It's a small country town but famous for its paragliding site, Mount Borah. Keep in mind even if it's called "Mount", it won't be higher than a couple of 100 metres...

We stayed five nights at the camping ground next to the mountain and had our Christmas Dinner there. Not really what you would call refined food - Swabian potato salad and steaks - but it was really tasty. As you can see, I just remembered to take a picture when we had already started to shovel in. Tobi (left) and Hubert don't even have time to smile for the photographer... Due to our limited kitchen tools/time/whatever I only managed to throw together a few bought items for dessert. We had a trifle consisting of sponge fingers, brandy custard, and canned fruit.

I hope you all had a Merry Christmas!

Thursday, 21 December 2006

Merry Christmas!

I'm heading off tomorrow morning to a spot in the middle of New South Wales, called Manilla. I'll be spending Christmas there - without a proper Christmas tree but at least with lots of cookies. I'll be back in a couple of days and I wish you all a Merry Christmas!
I'm not sure if I'm capable of that but I'll try to capture a picture of our Christmas Lunch - probably cooked on a camping stove...

Wednesday, 20 December 2006

Baking Christmas Cookies – Part II

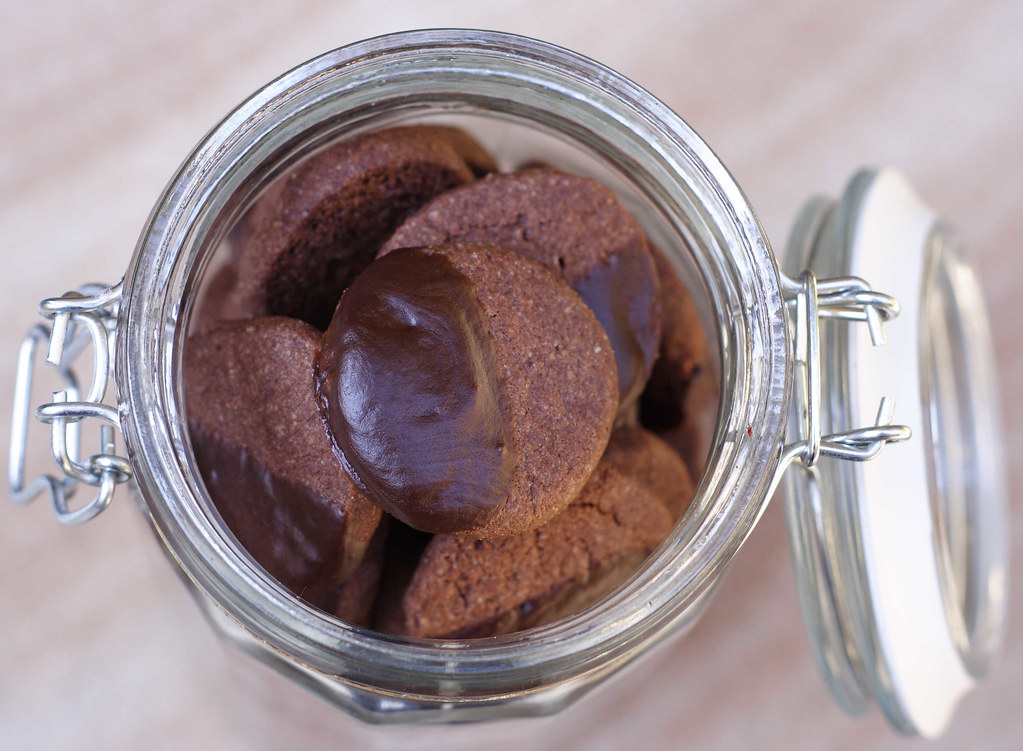
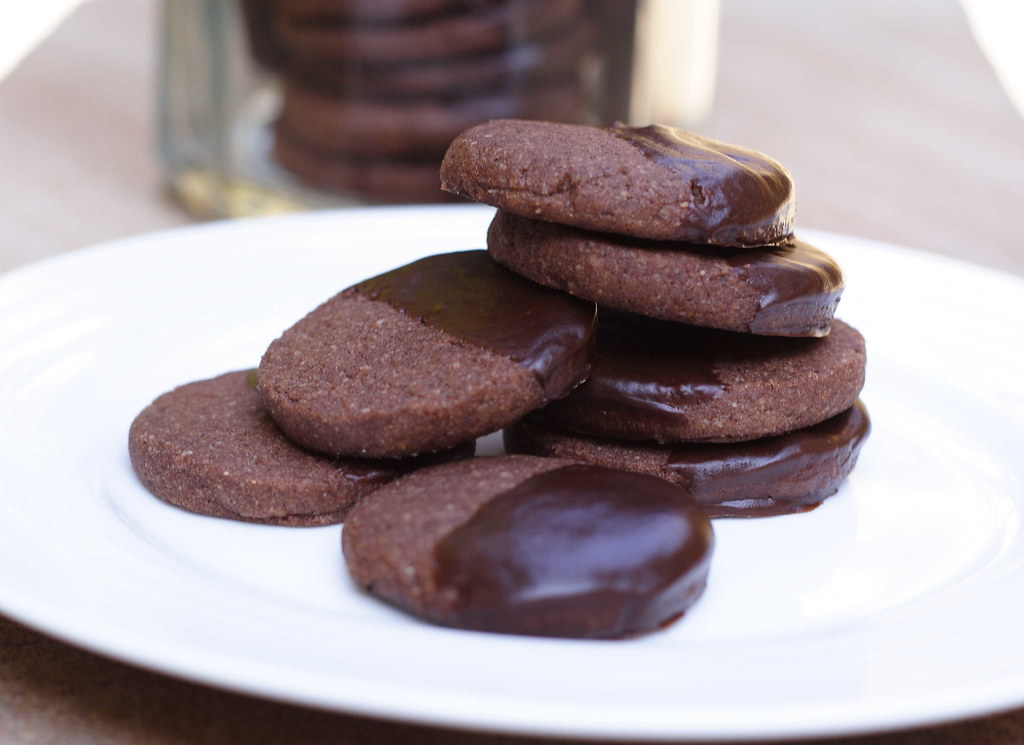
This year, I did do my share of baking for the upcoming holiday season: That's the second batch of my Christmas Cookies. I made the Chocolate Taler after my boyfriend had given me a not-so-subtle hint that he wouldn't mind an all-chocolate cookie... I haven't tried the recipe before and was very pleased with the result: chocolatey but not overly sweet, substantial but not too heavy for happily devouring one after another. Straight from the oven, they are pretty crunchy but get chewy after a few days. The original recipe didn't call for the dunking in rich chocolate ganache but we did not regret this little tweaking.

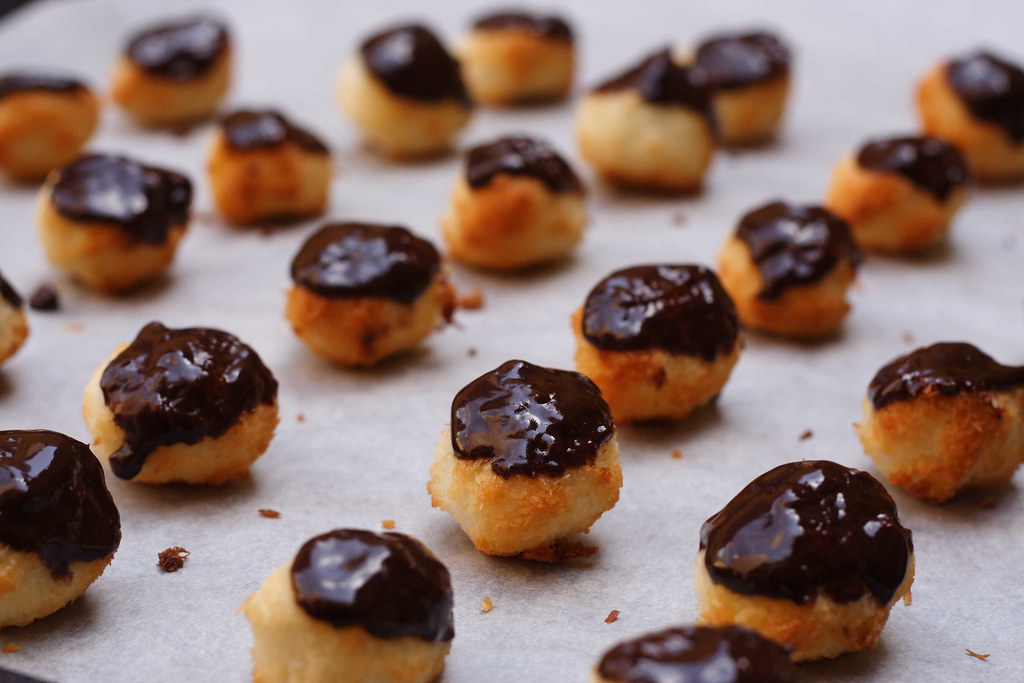
The other recipe for coconut macaroons is from Molly of Orangette. After reading this delicious description, I knew I had to try it. Alas, I didn't follow the recipe to the letter and the macaroons turned out to be not-so-great. I reckon I'm the one to blame that they were a bit dry - I made them bite-sized, much smaller than Molly did. However, I want to ask her about the details to figure out what exactly I have done wrong. After all, they're not entirely bad...


Chocolate Taler


The ingredients


125 g butter, cold, diced

150 g sugar
100 g ground almonds
250 g mix of flour and 3 tablespoons cocoa
5-10 tablespoons milk
1 teaspoon baking powder

Chocolate glaze

1
Mix dry ingredients on top of your work surface. Rub in butter and start kneading. Use as many tablespoons of milk as necessary for the dough to come together.

2
Form dough into four strands of equal thickness. Try to do this as quickly as possible so the butter doesn't start melting. Furthermore, try not to roll the dough strands to much as this will cause the strands to fall apart. Chill the dough at least 30 minutes.
Note: I once read that freezing the dough would enable you to cut off neat little discs. Let me tell you, this doesn't work.

3
Cut off slices about three millimetres in thickness and place on a baking sheet lined with parchment paper. Bake at 200 degrees Celsius for approximately ten minutes.
Note: If you bake the cookies at a lower temperature, they will get cracks. I baked the first batch at 150 degrees Celsius (fan bake) and the second batch as requested. The second batch looked much nicer.

4
Let cool and dunk in chocolate glaze. I used a chocolate ganache - it tastes wonderful but it doesn't get very firm. Here in Australia, I prefer to store them in the fridge (but let them get room temperature before serving).

The source
Vohenstrausser Kochbuch - an classic old-style cookbook from my homeland, the Upper Palatinate in Bavaria, Germany


Coconut Macaroons


It's best to follow Molly's instructions! Just one hint: She mentions that her recipe for chocolate ganache is much more than you need for dunking the macaroons. I used this ganache for dunking the macaroons, the Chocolate Taler, and for glazing the "Ischler Toertchen". It was just the right amount for all three batches and it tastes way better than any store-bought chocolate glaze!

Tuesday, 19 December 2006

Baking Christmas Cookies – Part I


With Christmas Eve coming up in less than a week, it was about time for me to start baking Christmas cookies. And I have to admit, it was the desperate attempt to get some sort of Christmas feeling, at last. I don’t insist on having a white Christmas – coming from an area in Northern Bavaria where you can’t bet on that – but having Christmas in summer is really another story. Additionally, you can’t get hold of any real pine tree in this climate zone so forget about having a proper Christmas tree. So far, I couldn’t get myself accustomed to the idea of putting presents underneath a plastic tree. Therefore, there won’t be any Christmas tree for me this year. To make matters even worse, I won’t see any members of my family as they will of course celebrate their Christmas back home in Germany.

After numerating this sad litany, I decided to cheer myself up a bit before getting another fit of severe self-pity. And what’s better than doing some baking? Unfortunately, it can’t get any of my beloved ones closer to me but there is some consolation in the fact that they will be eating just the same cookies.


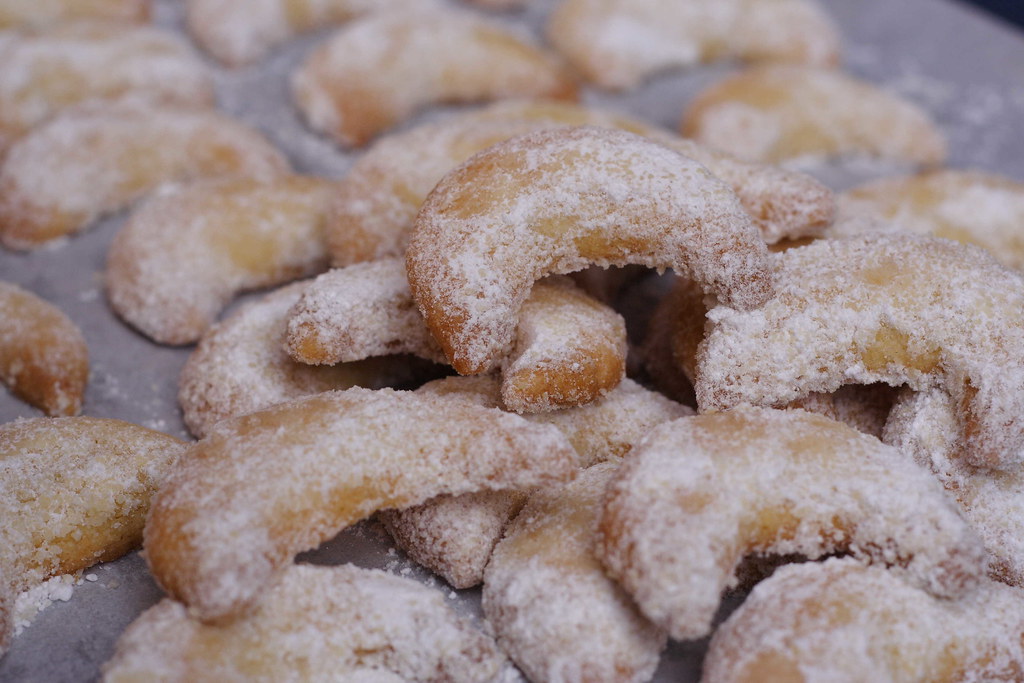
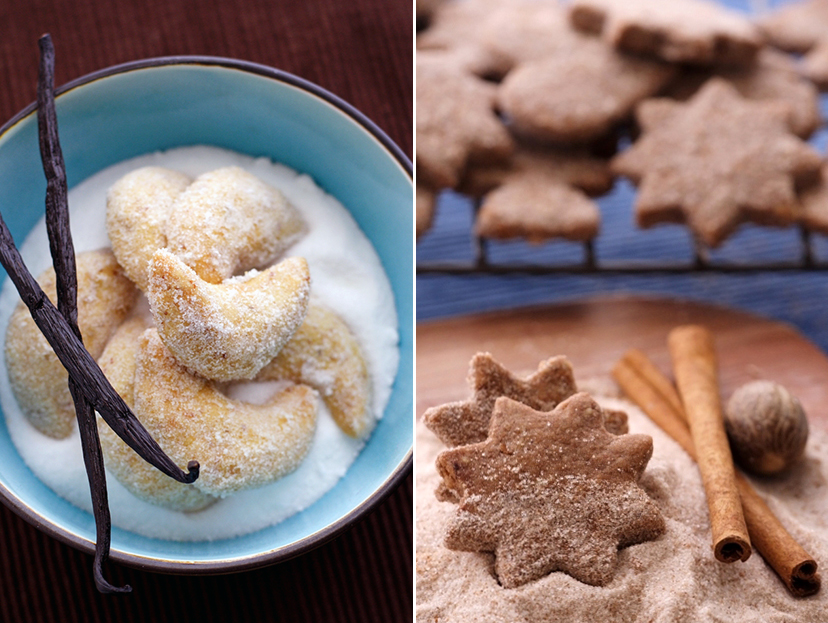
“Vanillekipferl” (Vanilla Crescents)

This recipe is a real classic. Its sweet vanilla scent is absolutely irresistible and the crunchy-crumbly feeling when biting into one of those – words can’t describe this… Another big advantage of this recipe is its versatility. The dough is pretty similar to the one of “Ischler Toertchen” (tartlets of Ischl, a town in Austria), another favourite cookie of mine. So I divided the dough into two halves and was able to make both types of cookies. This also saves you a considerable amount of time as intensive cookie baking can soon turn into some sort of kitchen slavery.

The ingredients

300 g flour
125 g sugar
1 sachet vanilla sugar (about a heaped tablespoon)
150 g ground almonds
250 g butter, cold, diced
3 egg yolks

Icing sugar, mixed with vanilla sugar

1
Sift flour onto your work surface, mix with sugar, vanilla sugar, and almonds.

2
Rub butter into the mixture, mix in egg yolks. Trying to work as fast as possible, knead until there are no butter lumps left. Chill the dough for at least 30 minutes (or put it into the freezer if you are in a hurry).

3
Form dough into two thin rolls (At this stage, you can save half of the dough for another purpose.). Try to get even strands but don’t roll the dough too long as it will fall apart. Cut dough strands into small pieces and form each into a small crescent. The middle part should be thicker than the ends.

4
Place crescents on a baking sheet lined with parchment paper. Make sure not to put them too close to each other as they will rise during the baking process. Fan bake at 150 degrees Celsius until light golden, approximately for ten to twelve minutes.

5
While still hot turn the crescents in a mixture of icing sugar and vanilla sugar until evenly coated. Handle with care, at this stage they can break easily.

The source

Hedwig Maria Stuber: Ich helf Dir kochen


“Ischler Toertchen” (Tartlets from Ischl)

As said before, you can easily use the dough from the vanilla crescents to save some time. However, the nutty almond flavour won’t be very strong because store-bought almond flour is usually made of peeled almonds. The original recipe calls for unpeeled almonds to be ground and that makes quite a difference.


The ingredients

140 g butter
140 g flour
70 g sugar
70 g unpeeled, ground almonds
Pinch of salt

Apricot jam
Chocolate glaze
Flaked almonds or peeled almond halves

1
Rub butter into mixture of dry ingredients. Working as fast as possible, knead until dough gets a smooth and even consistency. Chill for at least half an hour.

2
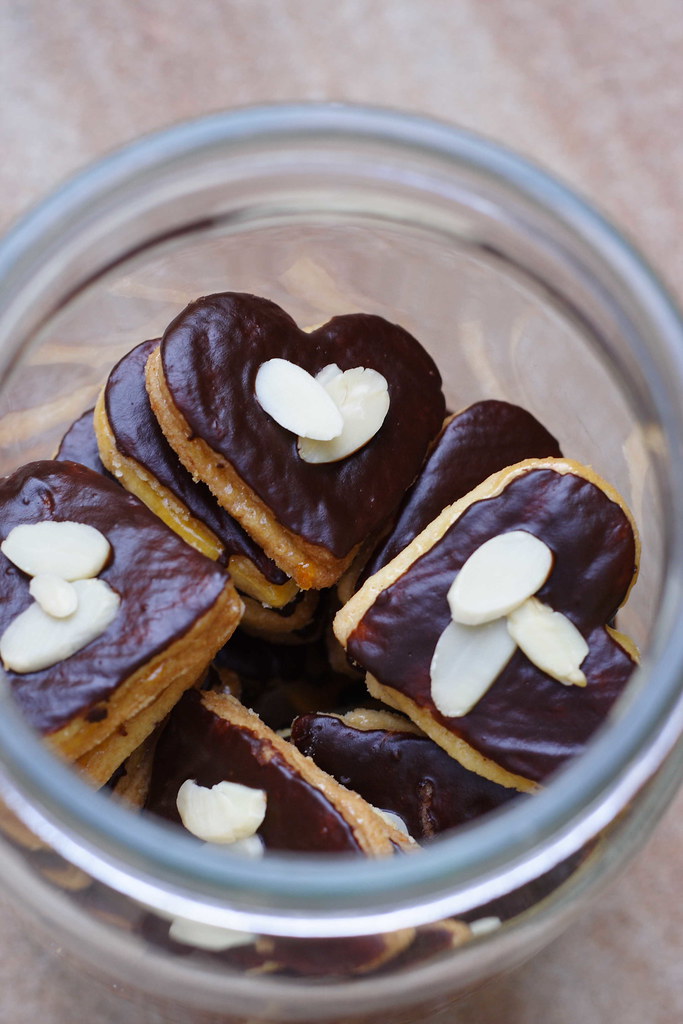
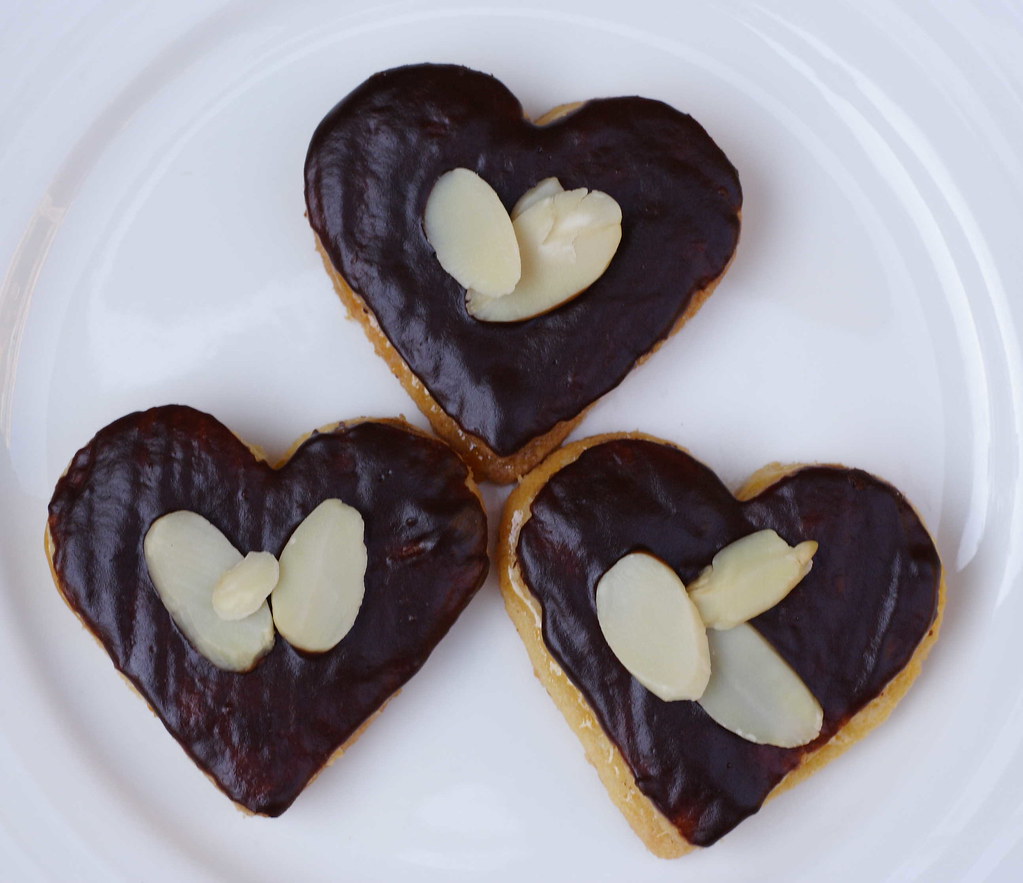
Roll out the dough using as little extra flour as possible. Cut out cookies using a flower shaped cookie cutter (I didn't have one so I used a heart-shaped one). Place on a baking sheet lined with parchment paper and fan bake at 150 degrees Celsius until light golden.

3
Let cool and sandwich together with apricot jam. To get a spreadable apricot jam, heat the jam with a little water, stirring constantly. You can strain the jam to get rid of fruit pieces but this is optional.

4
Spread chocolate glaze on top of the sandwiched cookies and decorate with almonds halves or flaked almonds.

The hints

If you can’t get store-bought almond flour made of unpeeled almonds and don’t own a food processor, you could substitute half of the almonds with ground hazelnuts.

This is the Christmas version of “Ischler Toertchen”. The original calls for a chocolate butter cream to sandwich in between.

In case you want more cookies and fewer calories when eating one: Forget the sandwiching and just glaze single ones with chocolate.

And, of course, if you opt for the original recipe, you could turn this dough into vanilla crescents as well.

Monday, 4 December 2006

That's Summer...


Currently, I'm a bit busy - unfortunately too busy to spend much time in the kitchen. Having quite a lot of work and a friend from Germany visiting me, we mostly decide to dine out. However, here comes a little picture that reminds me that it's summer out there. Sydney weather tends to forget that sometimes these days...