Google
 
Showing posts with label fruits. Show all posts

Friday, 27 June 2008

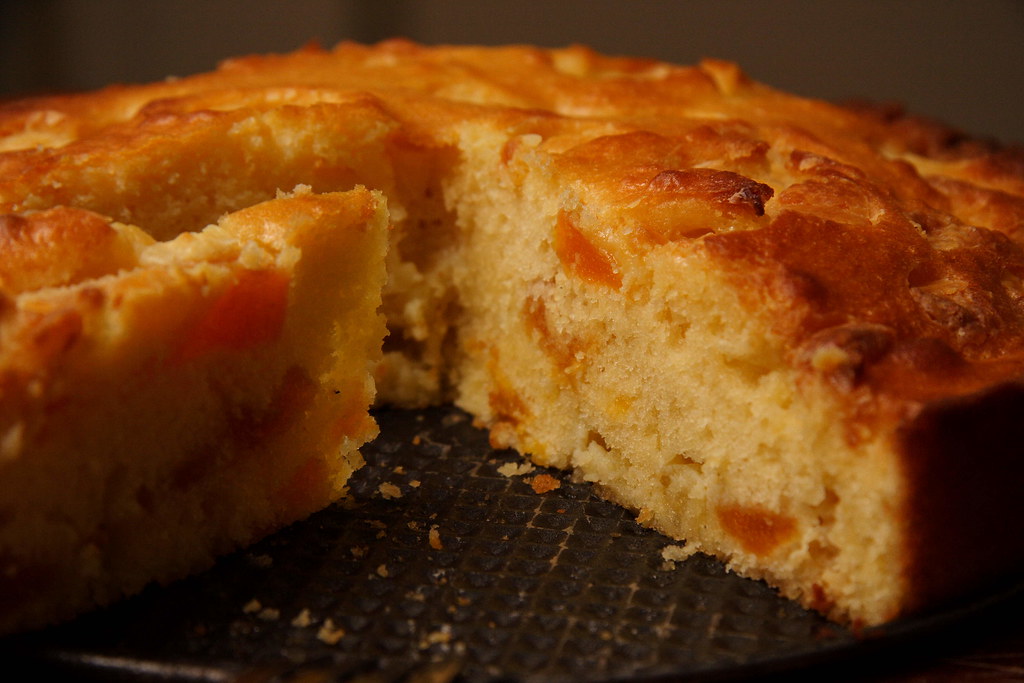
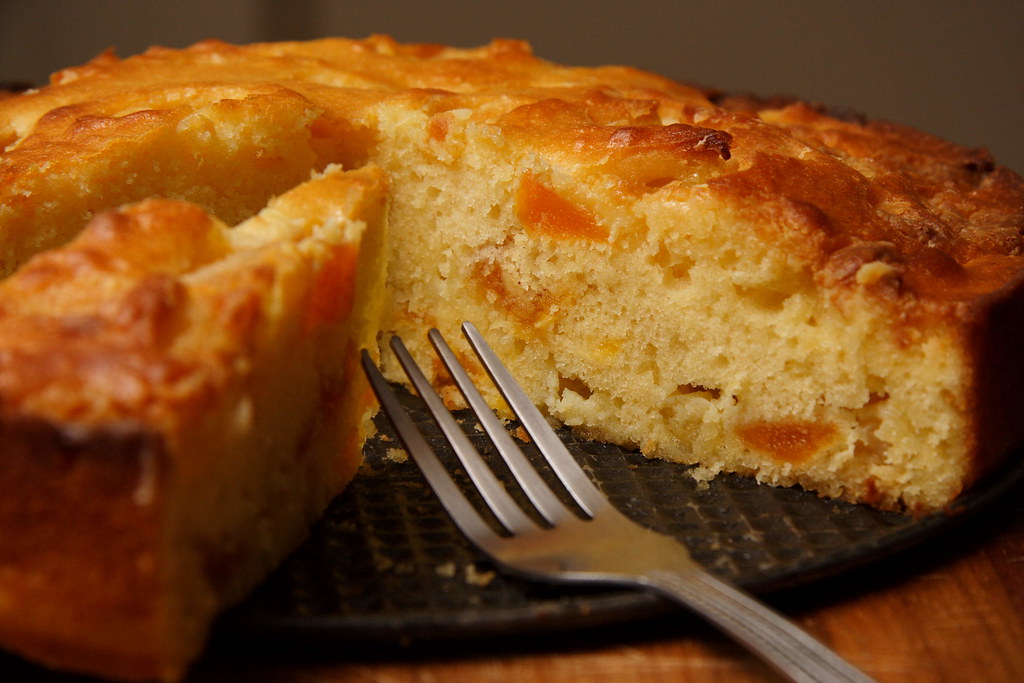
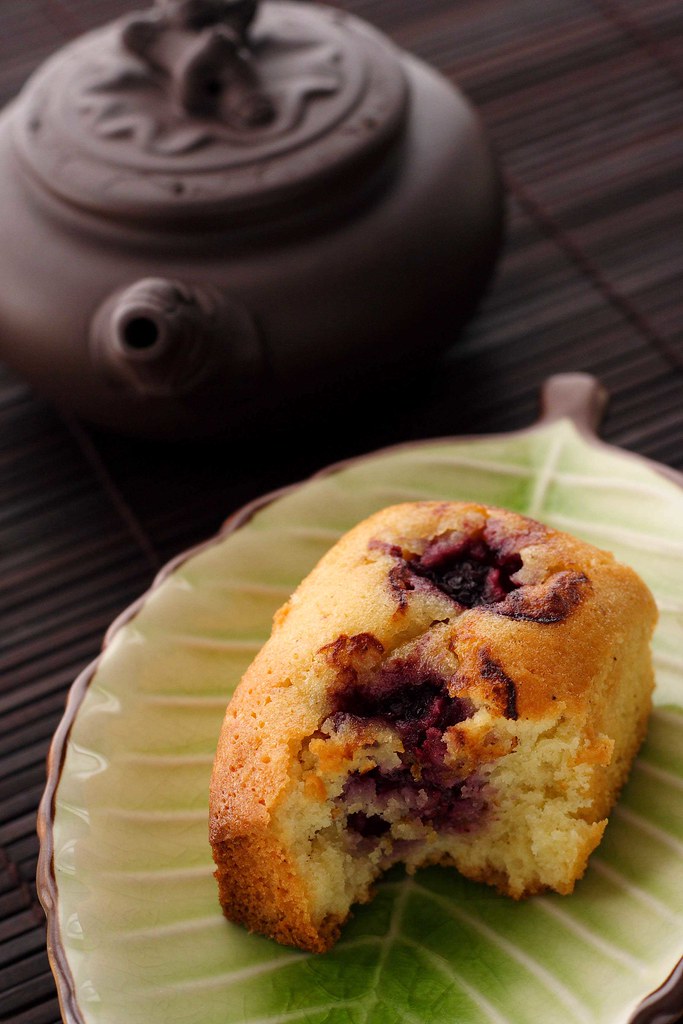
Buttermilk Cake with White Chocolate and Dried Apricots


Here comes another quick treat with the potential to brighten up a rainy weekend (unfortunately a regular occurrence during winter in Sydney). Basically it's the lucky result after trying to make the best use of a couple of leftovers: A few weeks ago, I had lots of buttermilk after this kitchen project, lots of white chocolate after this daunting affair, plus the weak resolve not to eat too heavy a cake this weekend...


After a quick online research, I used Orangette's version of a buttermilk cake to start out with. The major change was cutting down on the sugar and using more flour and buttermilk at the expense of the butter. Of course I knew that with all my tinkering, the white chocolate would still make for ample richness.

I'm not very experienced in baking with white chocolate and didn't know what to expect. However, this cake exceeded all expectations and proved to be really moreish for everyone who took part in devouring it. The biggest surprise were the white chocolate bits that had touched the pan during baking: They turned into caramelized, crispy, brown bits that were the best part of the cake!

Buttermilk Cake with White Chocolate and Dried Apricots

The ingredients

70g unsalted butter, at room temperature
125g granulated sugar
pinch of salt
1 vanilla sugar
3 large eggs
200g unbleached all-purpose flour
½ sachet baking powder (about 1 tsp)
125ml buttermilk
150g dried apricots, chopped
Lots of white chocolate, cut into chunks (at least 150g)

1
Briefly rehydrate apricots in a splash of boiling water. Meanwhile, cream butter with sugar, vanilla sugar, and salt.

2
Add eggs one by one, mixing well in between.

3
On low speed, mix in flour and baking powder. Slowly add buttermilk - the exact amount might vary according to the size of your eggs. The texture of the batter should neither be liquid nor too stiff (I hope that makes sense...).

4
Drain apricots and fold in. Fold in half of the white chocolate. Scrape batter into prepared baking tin, 24 cm in diameter). Sprinkle remaining chocolate on top.

5
Fan-bake at 150 degrees Celsius until golden on top and a wooden skewer inserted into the middle comes out clean (30-40 minutes).


The source
Loosely based on Orangette's Buttermilk Cake

The hint
I've also made this cake with fresh or tinned fruit instead of the apricots and white chocolate. Whitout chocolate, this cake is wonderfully light and fluffy - and finally counts as diet food which is not a bad thing in this particular case. However, this version is best eaten on the day it is made. Otherwise you could restore moistness by brushing it with a little syrup.

Monday, 23 June 2008

Ideas with Quark


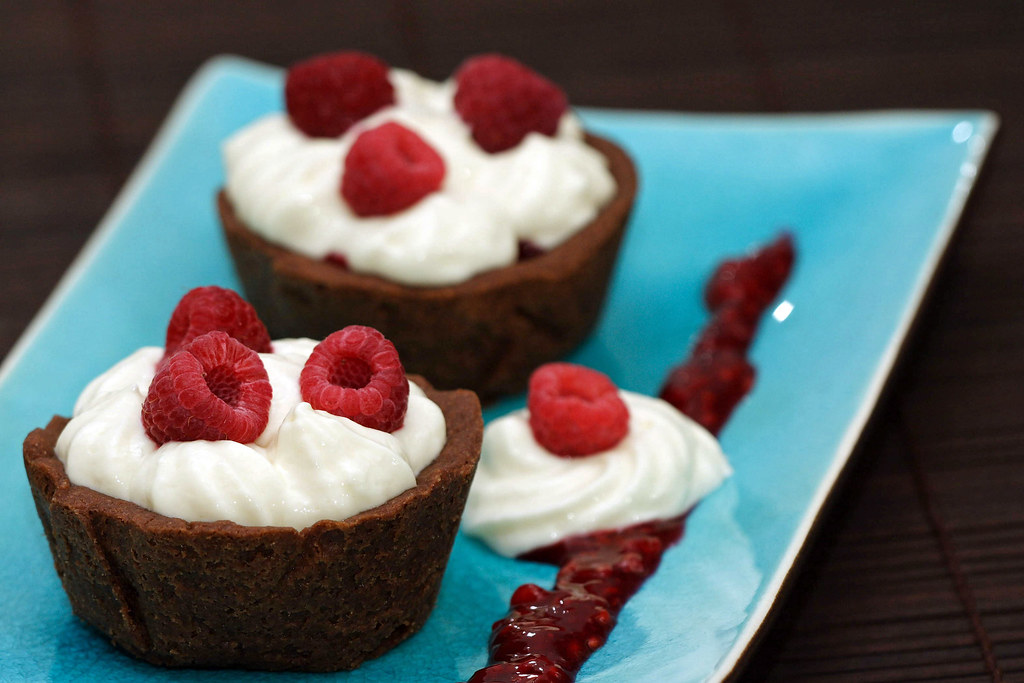
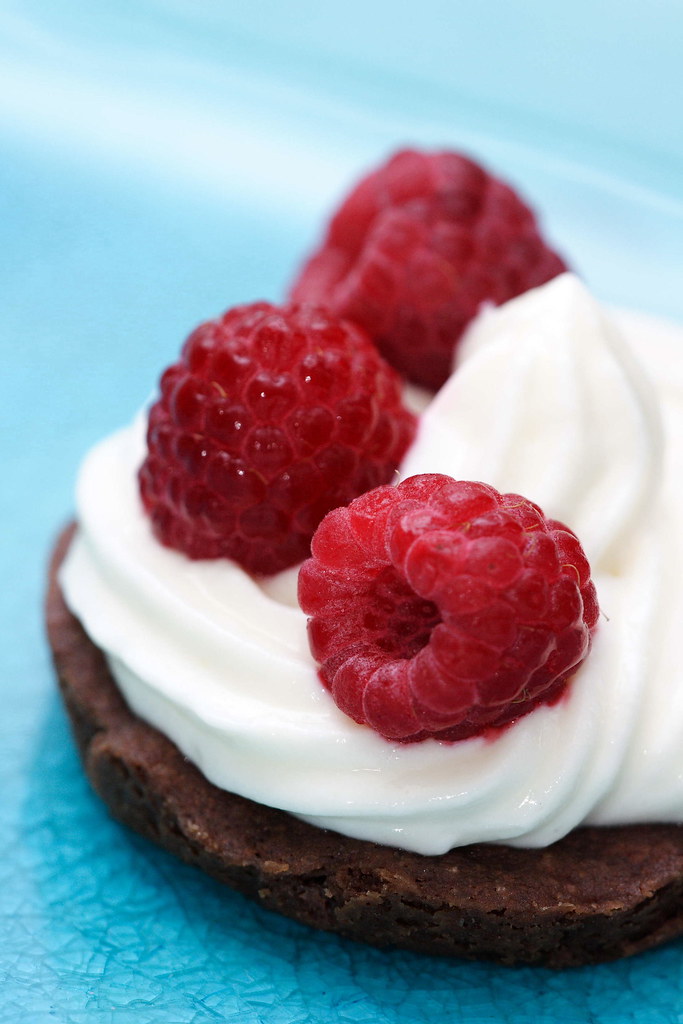
I guess it's time to see what I do with all the quark I've been making recently... The following isn't so much a recipe but rather an idea that might lead you to think up your own instant dessert. During one of the previous weekends, the urge to have a little sweet bite after dinner was positively unbearable, and I remembered having some chocolate shortbread dough and raspberries in the freezer plus newly made quark in the fridge. Dessert was only a matter of minutes.

I lined my muffin pan with small sheets of baking paper and the dough and (after a brief stint in the fridge) baked it at 175 degrees Celsius in a preheated oven (not fan-forced). Baking time varies according to size. However, once the pastry looses its shine, it's partially cooked so I then gave it another 5 minutes. Of course, these little tartelettes benefit from blind-baking but I simply poked them with a fork to deflate. Almost as pretty..;-)

Whilst the tartelette cases cooled down, I selected a few nice big raspberries to thaw on a paper towel. The others went onto the stove and got cooked with sugar and a splash of white wine to release their juices. One teaspoon of cornstarch, dissolved in some white wine for thickening. And one tablespoon of cointreau to accentuate the fruity taste.

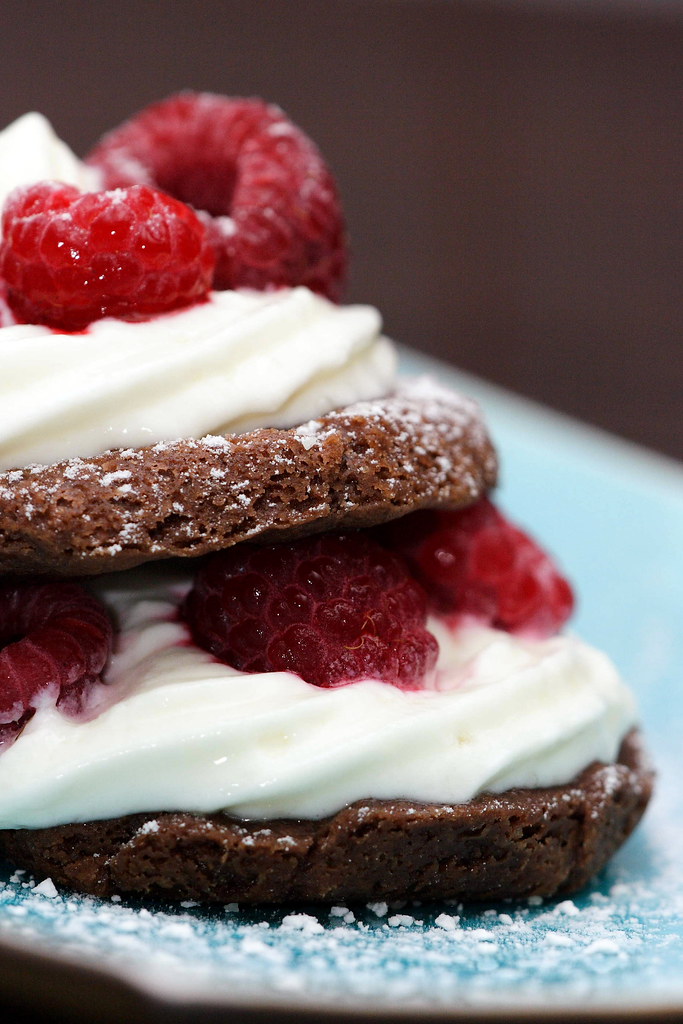
The raspberries filling went into the tartelette cases first, then the quark filling on top. It's not quite stiff enough to allow for proper piping so you might want to add some gelatin. I ended up with the Leaning Tower of Pisa but who cares anyway.
This filling actually benefits from sitting in the fridge for a day to allow the flavours to mellow. When filled the tartelettes will hold up nicely for a couple of hours but we were too greedy to wait very long..;-)

Maybe you want to give these little tartelettes a try during the next weekend? I imagine the quark filling will pair well with any kind of berry or poached fruit combined with plain, chocolate, or a nutty shortbread base.

PS: Due to a lucky coincidence in topic, I just realized that I'm able to participate with my tartelettes in this month's "Waiter, there's something in my... Berried Treasure!" hosted by Cooksister. Well, quark in my case..;-) If you happen to make something berry-related, there's still time to take part in this event!

Chocolate Shortbread Tartelettes with Quark and Raspberry Filling

The ingredients

100g quark
100g fat-reduced cream cheese
1 tbsp fat-reduced cream
1 tbsp cointreau
1 tbsp vanilla sugar
More sugar according to taste

Mix everything together and sweeten to taste. It will be thick but not stiff.

(You see I tried to make a slightly healthy-version that luckily tasted just as delicious as its fatty cousin. However, if you're not trying to shed a few grams, don't hold yourself back!)

200g frozen raspberries
splash of white wine
sugar to taste
1 tsp cornstarch
1 tbsp cointreau

The yield

This filling is enough for four muffin-pan-sized tartelettes.

The source

My own invention

Friday, 15 February 2008

A Heart for my Valentine... or two


Celebrating Valentine's Day is not considered a German tradition. In recent years, it seems to have caught on a bit but you probably won't see many of the last-minute, rose-buying, desperate-feeling boyfriends storming into a flower shop. Whilst I understand that many men think it ridiculous to buy completely overpriced stuff just because it's the 14th of February, I still think it's never too late to have a bit more romance in your life!

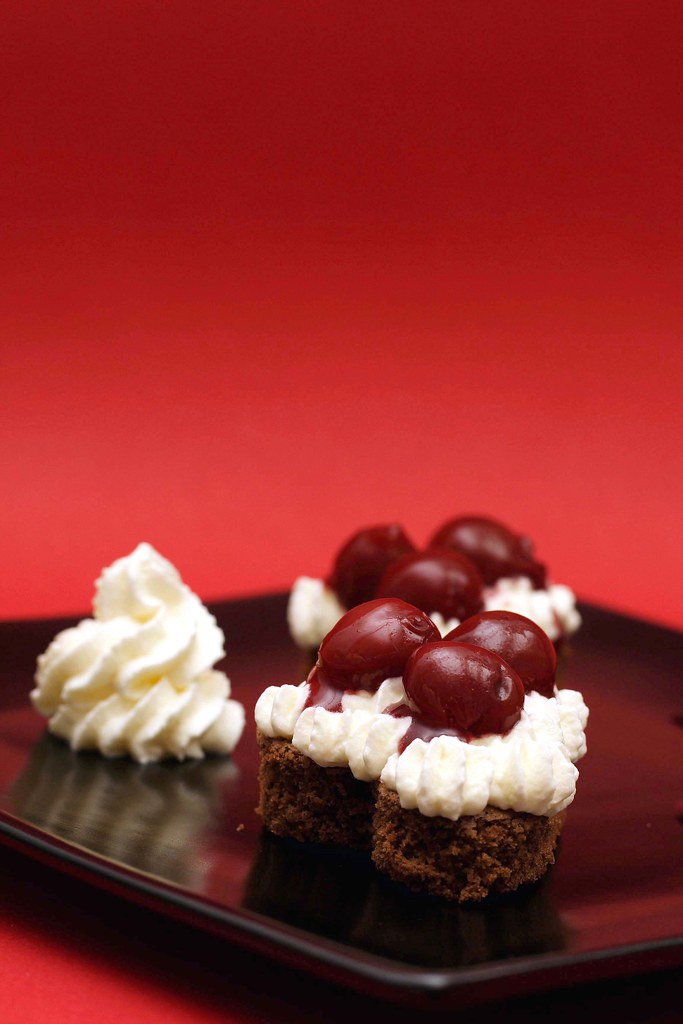
When I saw Zorra's announcement of A Heart for Your Valentine , I knew that I had to participate. With my boyfriend coming from the Black Forest Area, I also knew instantly what to make for him. The only problem, I didn't have any kirsch which is more or less the crucial ingredient for a proper Black Forest Cake. However, love is all about ignoring little imperfections, right..;-)

With only a cookie cutter in heart-shape, this black forest cake comes in very small portions but it's entirely up to you how many you'll eat...

Zorra is posting the round-up continuously in two parts, so check-out all the wonderful heart-shaped creations!


Black Forest Cake

The ingredients

6 eggs, separated
pinch of salt
175g caster sugar
90g butter
140g dark chocolate, in pieces
150g flour
1 tsp baking powder (optional)
vanilla (optional)

For assembly:
canned cherries (I like to use the juice, too, slightly thickened with cornstarch, and a hint of cinnamon)
whipped cream, sweetened to taste with vanilla sugar

optional:
kirsch for dousing the cake
chocolate shavings

1
Preheat oven to 175 degrees Celsius (no fan-bake).

2
Melt the butter. Once the butter isn't bubbling anymore, add chocolate. Stir until chocolate is melted and evenly combined. Let cool until lukewarm but still liquid.

3
Using a heatproof bowl resting on a hot water bath, beat egg yolks and sugar until pale, creamy and voluminous. This will take a couple of minutes.

4
Using another bowl and clean beaters, beat egg whites with salt until soft peaks form.

5
Sift the flower and baking powder (if using) onto the foamy egg yolks. Pour the chocolate-butter mixture on top. Do not mix at this stage.

6
Add one third of the meringue and stir in to lighten the batter. Lightly fold in the remaining meringue.

7
Pour into a baking pan (26 cm in diametre or a baking sheet) that's buttered only at the bottom. To be safe, use baking paper, too. Bake immediately. A round cake takes roughly 35 minutes, a sheet cake a bit shorter. The cake is done when the top feels springy. Don't overbake or the cake will dry out.

8
Once cooled, cut out little hearts and assemble or fill one large cake with cherries and cream.

The source
GU: "Die grosse Schule des Backens"

The hint
Some recipes specify that you can also add kirsch to the cream. If you want to really taste the kirsch that way, you'll have to add a lot and I recommend stabilizing the cream with gelatin. Many, many years ago, I added too much kirsch, the cream wouldn't become stiff, I kept beating and ended up with kirsch-flavoured butter...

Wednesday, 7 November 2007

Happy Birthday!

Have you ever forgotten your own birthday? Whilst this has happened to me with other people's special days - luckily not too often - so far I was at least able to remember mine. However, it almost happened to this dear blog. Just by chance, I asked myself yesterday when its first anniversary would be. I quickly checked here and - oh my gosh - only one more day to go!

After one year, it's almost hard to believe that there was a life without food blogging. Not that I create something blog-worthy everyday - but all this thinking about food, making food, and photographing food turned out to be much more than a mere hobby. For some people, it might not look like a creative outburst having to wait for dinner whilst I'm busy taking pictures from all angles. However, it gives me an unexpected sense of inner satisfaction when one of my creations not only tastes good but also photographs well. And the best part? Lots of nice people, completely unknown to me, stop by, have a look around and sometimes even drop me a line. This thrill I get when I read new comments, still hasn't worn off. Whenever I'm feeling moody, all I have to do is looking at my stats and smiling at the idea that someone from the Maldives or Ghana or some other very remote place payed my little blog a visit... Nora, I'll always feel indebted to you for introducing me to this new world!

But back to the birthday - there has to be a cake, right? Being only one day ahead of time, I couldn't possibly make a layer cake, try my hands on macarons or do any other fancy stuff. However, I still wanted to do something I'd never made before. One idea popped up in my head that had been lurking somewhere for quite some time: financiers. They're quick to make but still have something mysterious about them. At least for me because in German cookbooks you would never see a cake that doesn't contain any egg yolks, almost no flour (let alone baking powder) but lots of butter, sugar, and almond flour instead. I was a little bit suspicious how such a cake should rise and brown nicely. However, I decided to go with a recipe I had found at Feeding my Enthusiasms - it's originally from David Lebovitz so I figured you can't go wrong with that.

And all my worries proved absolutely unnecessary. After very little work, these tiny cakes began to fill the kitchen with their almond perfume - and they looked so cute with their golden brown tops peeking out of the paper garments. They even made my boyfriend utter an appreciating "hmmmm"...

Monday, 30 July 2007

Dan Lepard's Apple and Oats Bread

In order to expand my bread baking knowledge I have been raiding the three libraries in my vicinity and thus was able to track down a couple of books I had always wanted to read: first of all, Dan Lepard's "The Handmade Loaf" which I read from front to cover with great delight. Finally, I found a book that features many different recipes for rye bread - quite unusual for an English-speaking author. I gladly read about his "less is more" kneading techniques and his way not to flour the work surface but to oil it. It works much better that way for me!

However, before trying some of his recipes, I first had to revive my still frozen sourdough culture. Luckily, the little boys did survive their long sleep in the freezer. However, although feeding them daily in the beginning, I was never quite sure about their potency. Therefore (and because I didn't want to pour excess sourdough down the drain) I upped the amount of sourdough liberally. Not sure if that's what you should do - that's why I've included the original amounts so everyone can decide which way to go.

This Rolled Oat and Apple Bread is incredibly moist although you can hardly guess which ingredients are responsible for its long shelf-life. In case you have trouble finishing a loaf in time - this is your recipe. The slices also make excellent toast. My favourite toppings are either jam and honey or a soft cheese...hmmm...
This bread is also my entry for The Bread Baking Day #2 - Bread with Fruit. This new food blogging event was invented by Zorra and this time hosted by Columbus Foodie.

The second bread baking book I was looking forward to is Rose Levy Beranbaum's "The Bread Bible". In the beginning, I felt a bit put off - this much acclaimed food writer is tackling the subject in an almost scientific way which seemed to destroy the whole mystery about bread baking. Stop, stop, stop, I then thought, isn't that exactly what you were looking for? Ah, right... Once I got accustomed to her very thorough way of explaining things I learned a lot about certain details that had always left me puzzled. For example, I now know that fan-baking is entirely wrong for bread because you speedily lose all the self-injected steam and create an environment too dry for your bread. Since I switched to the classic bake setting, my breads finally have a good crust on the bottom (which had always been too soft) and I finally got to enjoy this mysterious crackling sound of the crust as the bread cools down. I believe that's called "the crust sings" and that absolutely describes my feeling when hearing it. Thank you, Rose, now I believe that there's nothing better than a healthy dose of perfectionism!

The third book in my library-collection is Maggie Glezer's "Artisan Baking Across America". I'm not finished yet and haven't tried any recipes but stay tuned!

PS: Being a "little bit" behind with my blogging, I thought I had better include another of Dan Lepard's breads. This chewy rye-based bread is his Five Grain Bread (although it was only a Four Grain Bread in my case). It really reminded me of the hearty breads from home and was eaten in no time...


Rolled Oat and Apple Bread

The ingredients

50g rolled oats
100g boiling water
200g peeled and grated apple (equals one big apple)
75g water at 20 degrees Celsius
250g white sourdough (original recipe: 100g of Dan Lepard's white leaven)
1/4 tsp dry instant yeast (original recipe: 3/4 tsp fresh yeast, crumbled)
300g + 3 heaped tbsp bread flour (original recipe: 250g bread flour)
1 tsp salt (orginial recipe: 3/4 tsp fine sea salt)
rolled oats for sprinkling
(Dan Lepard also suggests an egg wash which I simply forgot but the bread browns beautifully in any case)

1
Pour the boiling water over the rolled oats and let soak for five minutes while preparing the other ingredients.

2
Add the grated apple, the leaven, the extra water, the yeast, and mix everything together with a wooden spoon. Stir in the dry ingredients. (Dan Lepard mixes the dough quick-bread style but I prefer to do it all in one bowl - less dish washing...)
Mix until you have a soft sticky dough. Cover and leave for ten minutes.

3
Rub 1 tbsp of oil onto your work surface and knead the dough for ten seconds. (Between kneading Dan Lepard always returns the dough into the cleaned and lightly oiled mixing bowl - I just put the bowl over the dough on the work surface to prevent the dough from drying-out).

4
Knead the dough once more for ten seconds and shape it into a smooth, round ball.

5
Either return dough to bowl and cover or again put the bowl on top of the dough as a cover. Leave for one hour at 21-25 degrees Celsius.

6
Lightly flour your work surface and shape the dough into a loaf. Final rise: Either leave the loaf seam-side down on a piece of baking paper or put the loaf seam-side up into a proofing basket. Leave for 1.5 hours or until almost doubled in height.
Meanwhile, preheat the oven to 210 degrees Celsius (conventional). I also like to put in an extra baking sheet to splash on some water at the beginning of the baking process. This helps to create steam for a nice rise and good crust.

7
At the end of the final rise, I like to brush my loaf with lots of water, sprinkle some flour on top, rub it in, and brush with more water. This is similar to a glaze and results in a shiny surface after baking. It also helps to glue on toppings like rolled oats.

8
Bake the loaf in the middle of the oven. Splash a cup of water on the lower baking sheet during the first five minutes. After 30 minutes in total, lower the temperature to 190 degrees Celsius and bake for a further 15-20 minutes. The loaf should be golden-brown, feel light in weight and sound hollow when tapped on the bottom.

The source
Adapted from "Dan Lepard: The Handmade Loaf"

The hint
This bread tastes best on the second day. On the first day, the crumb is almost sticky with moistness and you can feel pieces of apple. On the second day, the flavours will have combined beautifully. This loaf has an incredible shelf-life and will stay fresh for a week (I store my bread in a fabric bag made out of a tea towel). However, it's also delicious when toasted.

Tuesday, 24 July 2007

An Interview... and a Banana Cake


When reading the interview meme over a Tartelette I was instantanously intrigued to get such an interesting glimpse into another person's life - and ultimately I began to wonder what Helen might ask me if I just asked her for an interview... Would it be awkward, would it be nice? Whilst reading through the comments other people had left, I decided to be spontaneous (which I am usually not) and just ask her. And a couple of days later, an email arrived with five questions I've been pondering about since then.

But hang on a minute - and I haven't forgotten about the banana cake recipe I've promised in the last post. This banana cake is very moist due to the coffee and that makes you almost forget about its low-fat character. Almost - I said. Another question I'm wondering about these days: When knowing you eat something is rather healthy (well, as far as cake goes), will you still think it moreish or are you unintentionally inclined not to like it that much? While liking the pronounced banana flavour, I couldn't quite make up my mind on how to rate this cake. My boyfriend wasn't a reliable test person in that respect because he simply complained about the fact that the cake didn't contain any chocolate. In case you're not looking for something healthy, feel free to add tons of chocolate chips!

Now without further ado, an interview by Helen of Tartelette:

1/ Name a few things you miss the most about Germany, food related and not.

Well, I better won't start listing all my friends and family... Apart from that, I very much miss German bakeries with non-pillowy bread, crusty bread rolls, and their non-refined but tasty sweet treats. I really don't need a layered mousse cake all the time... However, this deprivation was the trigger to make my own bread which turned out to be utterly fascinating. I still haven't discovered all the mysteries about sourdough etc. but I'm working on it!


Another thing I'm constantly whinging about is the absence of European-style quark or curd. It's a crucial ingredient of many a cake in Germany as you can see here; and mixed with fruit, a little sugar, and maybe some cinnamon or even cream it's the perfect afternoon snack.

I also had to accept that you can hardly get decent potatoes in Sydney - they're usually very pale, floury, and almost tasteless. And now remember that in traditional German cuisine the potato is omnipresent...


Okay, enough complaining. Apart from certain foods, there's not a lot of things that I really miss. Getting settled in Australia was easier than you might think - after all, most of the Australians have their roots in some European country so I didn't feel very "foreign". In any case, I'm still glad that my boyfriend who lured me down under, didn't plan to do his PhD in Siberia or any other uncomfortable place.


2/ As an expat I encounter many stereotypes about my home country. What do you think are the biggest misconceptions people have about Germany?

Currently experiencing winter in a country without central heating and/or properly insulated houses, I am cold all the time... Aussie friends are usually a bit bewildered about that: "Hey, you're from Germany where you have snow all the time - shouldn't you be used to it?" Well, I admire the Aussies who defeat the cold weather by sheer will power. I have never seen a people so determined to wear shorts and thongs even on a grey and rainy day with only 5 degrees. What makes it even funnier is the fact that there are also people determined on finally wearing a winter coat with a scarf when summer has barely finished. Sometimes you might get sick of wearing shorts and thongs...

Apart from that, Germans are supposed to be always on time - and I'm trying to do my best in showing that we can be just as relaxed as everyyone else on earth..;-)

3/ What is the hardest thing to adjust to when moving from Europe to Australia? The easiest?

This may sound a bit weird but the hardest thing was being constantly confronted with a certain question: "How are you?" This question exists in Germany, too, but is hardly ever used. Usually, only good friends would ask you this and then expect to get a full answer. So you'll start ranting about all the crap that has recently happened in your life. I quickly realized that the girl at the checkout did not really want to know about the state of my relationship, failed job applications or that I gained two kilos in just one week. However, I always felt a bit startled whenever the guy at the meat counter asked how I was doing today. In order to prevent any awkward silence or helpless mumbling on my part, I started to learn a few unsuspicious, short phrases to be thrown in whenever the need would arise. Eventually, I learned to relax. But to be honest, it took me about a year.

The easiest thing was to get accustomed to calling everyone by the first name. In Germany, this is pretty much unheard of. It's an important part of etiquette to address people in senior positions (or simply people older than you) only with their surname. And the day your boss offers you to call him by his first name, is regarded as something really special. However, I really like this custom!

4/ We call ourselves foodies but we all have closet with non foodie items that we use or eat once in a while, be it cake mix, instant mixes, etc...Which ones are yours if any?

I've already admitted here that I'm quite addicted to custard out of a little paper sachet. For me, it's all about instant gratification... Another favourite cheat of mine is a box with spaghetti, dehydrated tomato sugo, including little sachets with herbs and grated parmesan. This stuff can be stored almost indefinitely and is therefore always available - and let me tell you, it's quite tasty, too. Furthermore, it's not even unhealthy compared with other fast food items. However, I've never seen this little box anywhere in Australia - now I have to take care that my cupboard is always well stocked with all four emergency items.

5/ Name 2 ingredients, dishes or items that you have never had but always dreamed to try.

I'm a great admirer of French pastry - especially as I've never been able to make a tart crust that came close to those I've had in France. They're crunchy, nicely browned which gives them a slightly nutty taste, and they won't crumble too much when you bite into it. One day, I'll master it... However, I had at least a taste of it - which is still not the case with Tarte Tatin, another signature dish of France. Currently, I'm only owning a spring form tin but as soon as I have something that won't give way to all the buttery caramel goodness on the bottom, that'll be the first cake to bake!

I'm just realizing that there's a lot of French stuff that I haven't had yet. It's a bit embarrassing but I may be the only food-blogger who has never ever had creme brulee. Whilst everyone is blogging about the newest concoction infused with earl grey tea, lavender or who-knows-what, I'm still missing the original experience. I don't know if it never was on any restaurant menu (that said, I usually have sweet stuff at home) or if I just didn't choose it. One reason might be that I usually try to choose a flavour combination that I can't anticipate at all - and I am able to imagine custard. However, I'm still lacking the whole brulee experience. Look at this wonderful shiny, caramelized surface - let's get cracking!

And who would like to get interviewed next?

DIRECTIONS FOR THE INTERVIEW MEME
1. Leave a comment saying, “Interview me.”
2. I will respond by emailing you five questions. Beware, I’m not shy of asking personal questions! Please make sure I have your email address.
3. You will update your blog with the answers to the questions. Answer as little or as much as you'd like. And don't forget to add the directions at the bottom of your post
4. You will include this explanation and offer to interview someone else in the same post.
5. When others comment asking to be interviewed, you will ask them five questions.


Healthy Banana Cake

The ingredients

2 big bananas, mashed
125 ml strong coffee, cold
75 ml oil
3 eggs
100g caster sugar
100g brown sugar
100g all-purpose flour
200g LSA-Mix (see hint)
1 sachet baking powder

Note: I forgot to mention that I also added some cinnamon, mixed spice, vanilla sugar, and a pinch of salt.

1
Mix eggs with sugar and all the liquid ingredients.

2
Fold in flour, LSA-Mix, and baking powder.

3
Spoon the batter into prepared muffin or mini-loaf tin and bake at 150 degrees (fan-forced) until a skewer inserted comes out clean (I don't remember the exact baking time but it was around 20-25 minutes).

The source
My own invention

The hint
LSA-Mix consists of linseed, soy, and almonds that are ground - you'll find it in the health aisle of your supermarket. If not, substitute with ground nuts of your choice.

Saturday, 30 June 2007

"Waiter, there's something in my...dumplings!"


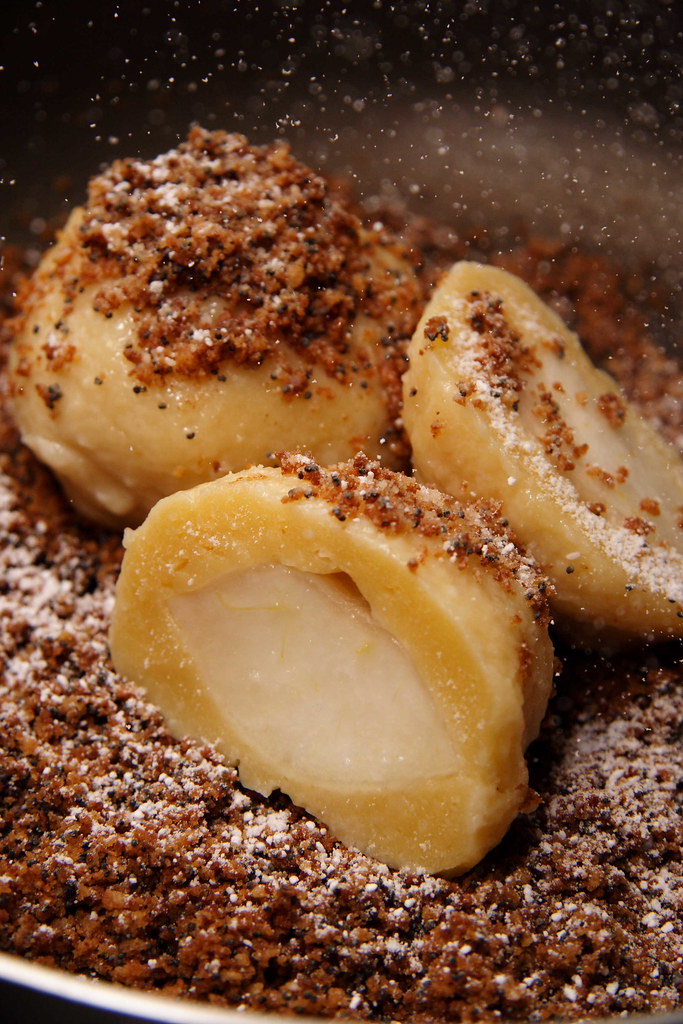
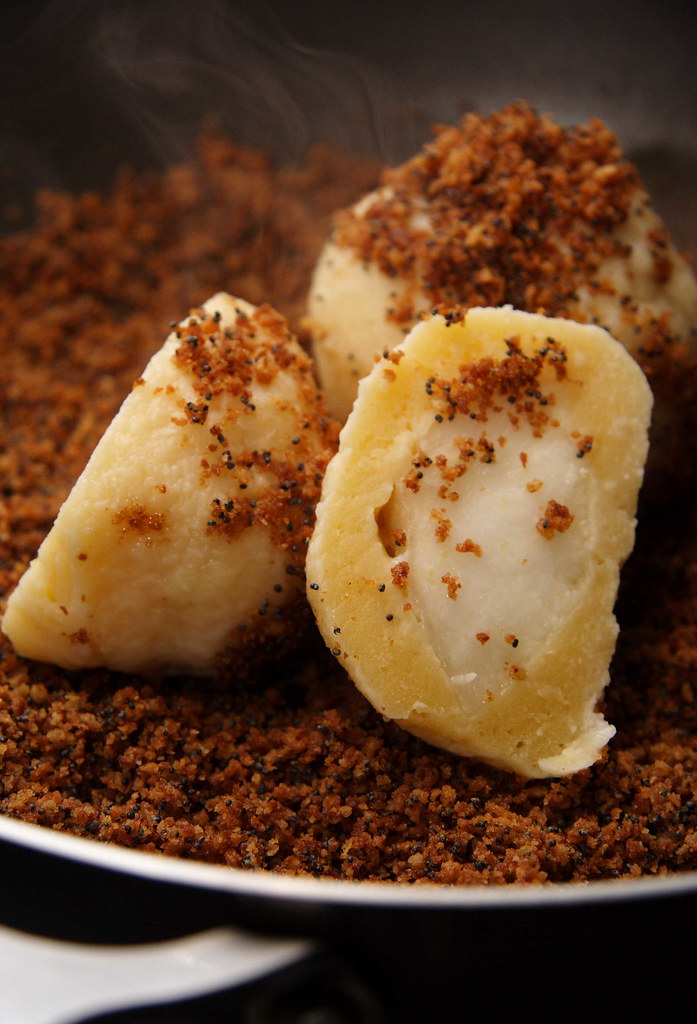
Well, pear, to be precise. When I read about Johanna's challenge for the June edition of the "Waiter, there's something in my..."-event, I was very happy. I had always wanted to make fruit-filled dumplings (you didn't expect me to make savoury ones, right?) but for some reason never got around to do it. And regarding the chilly temperature this past month here in Sydney, my dumplings couldn't be wintery enough.

The only problem: Plums or apricots are just not in season right now and I didn't want to shell out almost six dollars for a tiny punnet of strawberries (it's still a mystery to me that those always seem to be in season in some part of Australia). However, the pear season is in full swing right now so that was settled eventually. In the beginning I had dreamed of some wonderfully complicated filling like pot roasted pears but in order to get dinner ready at a reasonable time, I simply used big chunks of a very ripe packham pear. With a salad as a starter, these pear dumplings are a substantial meal - and when you only eat two dumplings each, it's no overindulgence. However, I don't want to stop anyone...

Special thanks to my boyfriend who first sneered at the idea of a sweet main meal but then helped me taking really good photos: It was his idea to picture the steam and to let it "snow". Needless to say, he ended up liking these dumplings a lot... The cooking time was just right to get sweet and soft pear centres without overcooking them. The fried breadcrumbs added texture and a nice contrast to the soft but still firm dumpling dough. Can't help it, I want more...


Pear Dumplings


The ingredients

40g butter
250g ricotta
2 egg yolks
1 pinch of salt
250g flour
6-8 tbsp milk

1 large, ripe packham pear, peeled, cored, and cut into six chunks

about 3 litres of salted water

50g butter
100g breadcrumbs
2 tbsp poppy seeds
pinch of cinnamon
pinch of mixed spice
icing sugar for dusting

1
Cream the butter, add egg yolks, ricotta, flour, and salt, mixing well.

2
If your ricotta is rather stiff like mine, you'll end up with a crumbly mixture. Add milk by the tablespoon until the dough comes together in a smooth ball. It will still be rather stiff. If your ricotta is soft, omit the milk.

3
Shape the dough into a thick roll and pop it into the fridge for 30 minutes. In the meantime, prepare the pear.

4
Boil the salted water. Cut the chilled dough roll into 6-8 slices (depending on how big your dumplings are). Flatten each pieces until it's big enough to be wrapped around the pear chunks. Make sure to pinch the seams well (which is a bit easier using naturally round fruit).

5
Carefully put the dumplings into the water and let it come to a boil. Then let the dumplings simmer for about ten minutes. They are ready when floating. Note: Make sure to stir once or twice to prevent them from sticking to the bottom. Otherwise they won't float when ready...

6
In the meantime, melt the butter in a pan. Add bread cumbs, poppy seeds, and spices. Fry until crisp, stirring frequently.

7
Turn the cooked dumplings in the breadcrumbs and sprinkle with lots of icing sugar.

The source
Adapted from Hedwig Maria Stuber: Ich helf Dir kochen

The hint
Makes 6 large dumplings or 8 smaller ones when using smaller fruit. After an entre, serve 2-3 large dumplings per person as main course. As dessert, this is enough for four people.

If you have leftovers, freeze the dumplings and the breadcrumbs seperately. To thaw the dumplings, put into cold water and let come to a boil or use a microwave.

Wednesday, 27 June 2007

Craving Vanilla Custard


Sadly enough, there haven't been many posts in this month. Due to a couple of very busy days, I didn't even have time to read my favourite blogs. But even worse, I've even managed to miss the deadline for this month's Sugar High Friday... If I'm very lucky, Jennifer - The Domestic Goddess who not only invented this popular blogging event but also hosts it this time - will have mercy on me - but if not, I can't blame her...

Anyway, I still want to tell a story about one of my all-time cravings. But beware, it's not something very interesting. Most likely, most people will have made something like that ages ago: homemade vanilla custard.
However, when I was little, I thought vanilla custard came out of a box. I did know that milk does come from cows and not from the supermarket (after all, I grew up in a little village and visited said cows almost every evening). But whenever I was craving vanilla custard, my mum would just open a paper package with a flour-like mixture, stir it into milk, and after a little boiling I was a happy camper. Up to today, I still don't know anyone personally (at least in Germany) who would make it from scratch. Although it might be possible that I accidentally made something that qualifies as custard when working on a more involved dessert recipe, I haven't done it consciously - until last weekend.

Jennifer's task to create something that you crave regularly but never actually made yourself was the proper occasion to finally try my hands on my very first vanilla custard. That said, this recipe isn't particularly difficult and it was whipped up in no time. However, I felt a bit timid. Would it be able to stand up against the beloved package mix? Could I - at the ripe old age of 30 - leave my childish custard addiction behind and fall in love with the real thing?

I tasted at every stage, carefully monitoring the changes in texture, colour, and taste. And truth be told, once the egg yolks were incorporated, this custard tasted exactly like the one I was already used to (but I take care to buy the good stuff with real vanilla). Not only taste, even colour and creaminess were exactly the same. A bit startled, I folded in the egg whites. And that's where things started changing. My eggs had been too big. Whilst this foamy feather-light custard was still pretty good, it had nothing to do with my treasured memory. And it was by far too soupy to set and be inverted later (I tried and it resulted in a very unphotogenic puddle on the plate). End of the story: I guess I will still resort to my package mix - unless it's a very special occasion...


Homemade Vanilla Custard

The ingredients
750ml whole milk
100g cornstarch (if you want to invert it - the original recipe stated only 60g)
75-100g caster sugar
1 tsp vanilla bean paste
2 small eggs, separated (If you only have large eggs, use two yolks and one egg white)

Serves 6

1
Whisk cornstarch, sugar, and vanilla bean paste into roughly 150ml of the milk.
2
Bring the remainder of the milk to a boil. Once boiling, remove from heat and stir in the cornstarch mix, using a wire whisk. Move back to heat and let it come to a boil again. Let boil for at least a minute or until noticeably thickened.

3
Stir the egg yolks into the thickened milk. (I waited a couple of minutes to let it cool down a little bit - didn't want to end up with scrambled eggs). The mixture will thicken a bit more.

4
Beat the egg whites until stiff and fold into the custard.

5
Pour custard into moulds and let cool. Refrigerate until serving.

The source
Adapted from Hedwig Maria Stuber: Ich helf Dir kochen

The hint
Serve with your favourite fruity sauce. I used frozen raspberries heated up in some Cointreau with a little sugar added.

Monday, 18 June 2007

Pia's Plum Tart


The plum season is gone since quite a while but I still haven't blogged about the latest result on my quest for the perfect plum cake. There has been the traditional one and the not-so-traditional one - both delicious in their own right but both not quite able to satisfy the expectations of my boyfriend. Usually, he's quite happy with the outcome of my kitchen adventures so I was really curious to know more about the superior plum cake of his mother with the mysterious "brown dough" - and I got her recipe.

It turned out that this dough was pretty similar to the pretty famous Austrian Linzer Torte which is said to be the world's oldest known cake recipe. I had never made it before so I was very intrigued and rushed to the store to get ground hazelnuts. I know, the recipe says almonds but that's where the trouble starts. To get the full taste - and the desired brown colour - the almonds need to be ground with their skin on. Unfortunately, the store-bought almond meal is completely white and I don't have a food processor to make my own. That said, the best option is using a manually operated grinder. There you'll get tiny flaky bits (instead of a uniform floury meal) which will improve the texture of all sorts of baked goods, especially flourless cakes.
Anyway, none of those options was open to me so I decided to cheat a bit and used a mixture of 50g of ground hazelnuts and 50g of ground almonds. That way, the dough was decidedly brownish.

However, this story doesn't come with a happy end - simply because I was too impatient. Once the tart started to look done around the edges, I decided that it was fully cooked through even after only half an hour in the oven. When slicing the tart, I realized that I had outsmarted myself: What had looked all right around the edges was completely undercooked in the middle. Luckily, even undercooked, the cake was still tasty albeit not at all crunchy. Now I'll have to wait for the next plum season to get the ultimate plum cake experience... If any one happens to have some plums in the freezer and wants to try this tart, please let me know about the outcome...


Pia's Plum Cake

The ingredients

150g butter
100g sugar
2 egg yolks
pinch of salt
some lemon zest (or vanilla extract, if you prefer)
150g all-purpose flour
100g ground almonds

1
Cream butter with sugar until sugar dissolves. Add egg yolks, salt, and flavouring, mixing carefully after each addition.

2
Add the flour and the ground almonds, while mixing on low speed. Once the dough comes together, shape it into a disc, wrap in plastic foil, and chill in the fridge for an hour (because the dough is quite soft).

3
Press the dough into a buttered 26 centimetres tart form (the dough will still be too soft to roll it out) and cover tightly with plums. If using frozen plums, don't let them defrost or they will get soggy.

4
Bake at 180 degrees Celsius for about an hour (and try to be patient - it doesn't matter that the edges of the cakes could get a bit dry and crumbly). Take the cake out of the oven and immediately sprinkle with cinnamon sugar.


The source
Pia's recipe

The hint
You can easily double the recipe for a whole tray of plum cake.

Tuesday, 5 June 2007

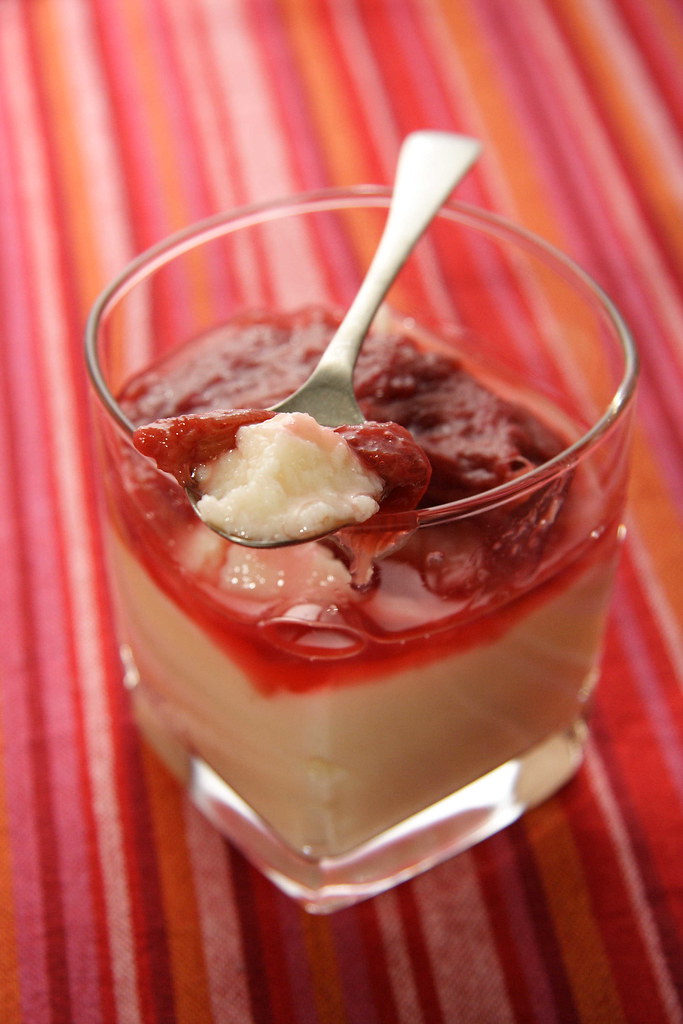
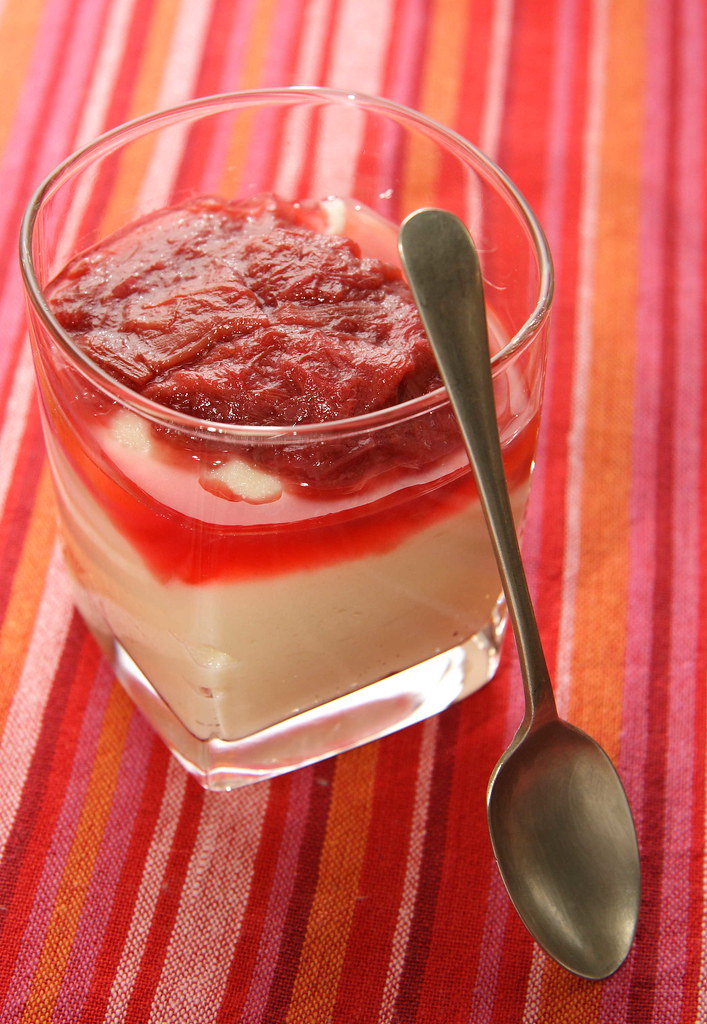
Semolina Pudding with Rhubarb Compote

Another day with another adventure in the grocery store: Doing my daily shopping for one once during the morning, I noticed lots of shop assistants around, filling up the shelves and generally being very busy. I contemplated the possibility to ask for something I've been searching for quite a while - semolina. It looks like I've never grown out of this childhood treat that always comes in handy when I want some quickly cooked lunch that should also satisfy my sweet tooth while not being completely unhealthy. I go through a lot of that stuff.

However, stocking up on it proved to be a bit of a problem. In the supermarket next to our first flat in Sydney, I had figured out after a while that semolina was to be found in the bakers’ aisle, next to nuts and vanilla essence. My other source was small grocery shop run by people from the Balkan. Squeezing myself through the extremely narrow aisles was fun already not to mention all the incredible stuff you could find there: Preserves, canned vegetables, spices and dried fruits unknown to me. Where was I? Right, this shop had the most wonderful semolina that resulted in a very smooth and almost silky semolina pudding. What shall I say – I still miss it.

Now living closer to the central business district, I could choose between two supermarkets but hadn’t found any semolina – despite having asked for it several times. This morning, after hesitating for a little while, I decided to give it another go and approached one of the shop assistants.

"Excuse me, could you please tell me where to find semolina?” I said in my nicest I-don’t-want-to-cause-any-hassle-voice.
His answer was short: "What's that?"
"Ahem, something like cracked wheat?!" Being at a loss for words, it was the quickest reply I could think of, knowing that it wasn’t quite correct. Have you ever had to explain what semolina actually is??
The shop assistant decided to take the reasonable way and took me to a colleague hoping that he would know more about it.
“Do you know where to find semolina?” – still with my nicest I-don’t-want-to-cause-any-hassle-voice.
“What’s that?” Haven’t I heard that one before? After providing my non-appropriate explanation again, the shop assistant led me to the cereal aisle. Standing in front of the boxed breakfast with no semolina whatsoever, I realised that he had just understood the word “wheat”.
And home I went without my beloved semolina.

Okay, just to be fair to the guild of shop assistants, I should mention that shortly after this memorable encounter, I finally got some semolina. In another shop, another shop assistant proved to be exceptionally helpful: She pointed one semolina brand in the health food section and another one next to the chocolate chips – sold out unfortunately.


Semolina Pudding with Rhubarb Compote

I have to admit that I never use a recipe when making this. Using the rule of thumb, I pour some semolina into the milk. If you add the semolina to the cold milk, you’ll never end up with lumps. Stir constantly until it comes to a boil, adding more milk if necessary (it will get stiffer while cooling down). Sweeten to your liking, add a pinch of salt, some vanilla sugar, and dust with cinnamon if desired.

Serve with your favourite fruit compote. I like to caramelize some sugar before adding the fruit. Stir to coat with caramel and depending on the juiciness of your fruits add a little water. Cook until you reach the desired consistency.

This is the ratio for semolina pudding one of my trusted old-style German cookbooks presents (serves 4):

1 litre of milk (low-fat works fine but whole milk tastes better)
100g semolina

To make the pudding bit richer, add up to 40g of butter, two egg yolks, and two egg whites beaten until stiff.

Thursday, 3 May 2007

Discovering Lemon Curd

Doing grocery shopping is still kind of an adventure for me - at least here in Australia. Even after one and a half years in this country, I still find some edible things that aren't familiar to me. Or I finally figure out what a familiar thing is called around here. For example, it took me a while to realize that "apple sauce" is no sauce at all but the name for pureed apple compote - something I almost thought wouldn't exist in Australia. Not that it's hard to make it myself but to have a jar of apple sauce in the pantry is not too bad at all.

However, there is a down side to all those discoveries. A long time ago standing in the midst of a normal supermarket, I had come to realize that there is some sort of immanent order in Australian supermarkets that is completely different from German ones. It still happens that I'm walking the aisles back and forth, looking for a certain ingredient (of course looking at the spots where it would be in German supermarkets) - and not finding it at all. After I had eaten the jar of apple sauce a friend gave to me when he left Australia, I haven't been able to buy another one. It's not at the spot for preserved fruits, it's not at the spot for spreads, it's not at the spot for cans - it seems that I definitely will have to make my own apple sauce in the future. And did I mention that it's completely useless to ask any shop assistant? If you're lucky, they will narrow your search down to "look in aisle 2 or 3 but it could also be in aisle 8". If you're lucky, that is.

Anyway, there are also some happier discoveries like lemon curd. I was just looking for some jam and right next to it, I found nice little jars with either pale yellow or flashy yellow content. The label "lemon curd" wasn't familiar to me at all and "lemon butter" was even more confusing. Feeling adventurous, I bought a jar. I wasn't really sure what to do with it but its vicinity to jam and peanut butter pointed at some sort of spread. Well, what shall I say - I tried and loved it! Soon after I had gone through this first jar, I decided to make my own having read frequently that homemade lemon curd is very much superior to the store-bought variety. After checking out various recipes of fellow food bloggers, I quickly settled on this recipe from A Cat in the Kitchen. The changes I made were using only lemons (didn't have any limes) and omitting the zest (the lemons weren't organically grown and I wanted my curd to be completely smooth). Dagmar hadn't promised too much, this recipe was truly foolproof. The resulting curd firmed up nicely without any curdling whatsoever. Its tartness is noticeable but not overwhelming and can stand up against any kind of bread. And when I'm biting into my toast with homemade lemon curd, I can almost pardon the lack of logic in Australian supermarkets.

Thursday, 19 April 2007

Plum Cake Heresy

When it comes to food, most people have a certain conception of how things have to be. It's like any other kind of dogma you could easily start a fight about: Do you pour some olive oil in the water while cooking pasta or don't you? What's the right way to cut an onion? Should there be a law for or against rinsing meat? Some of your culinary beliefs might never get questioned at all, others will get shattered after the first contact with a truly inaugurated foodie.

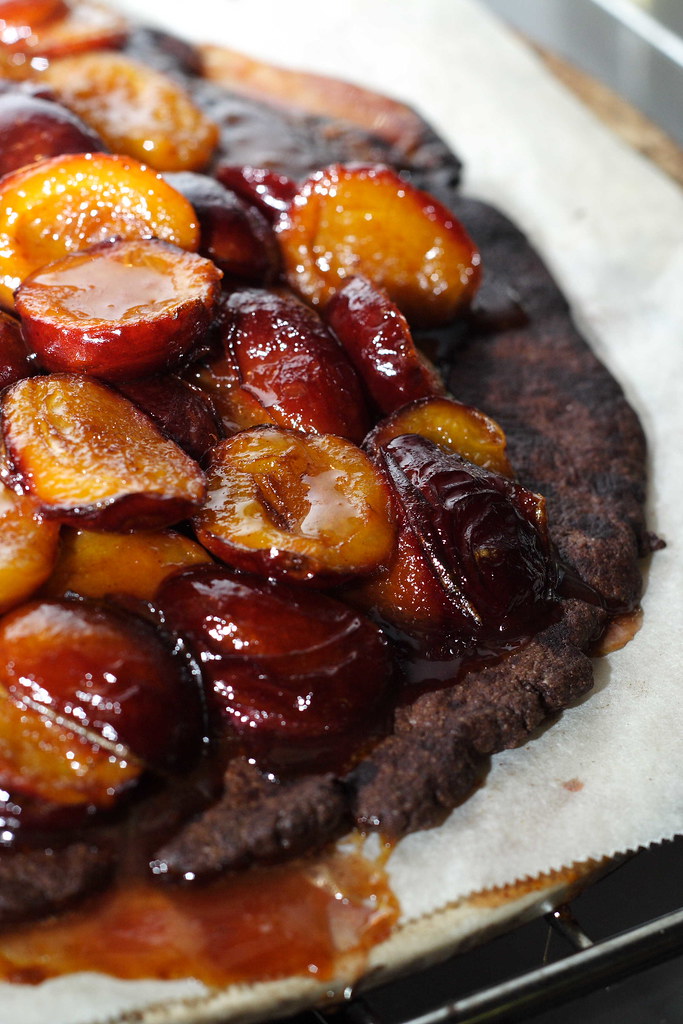
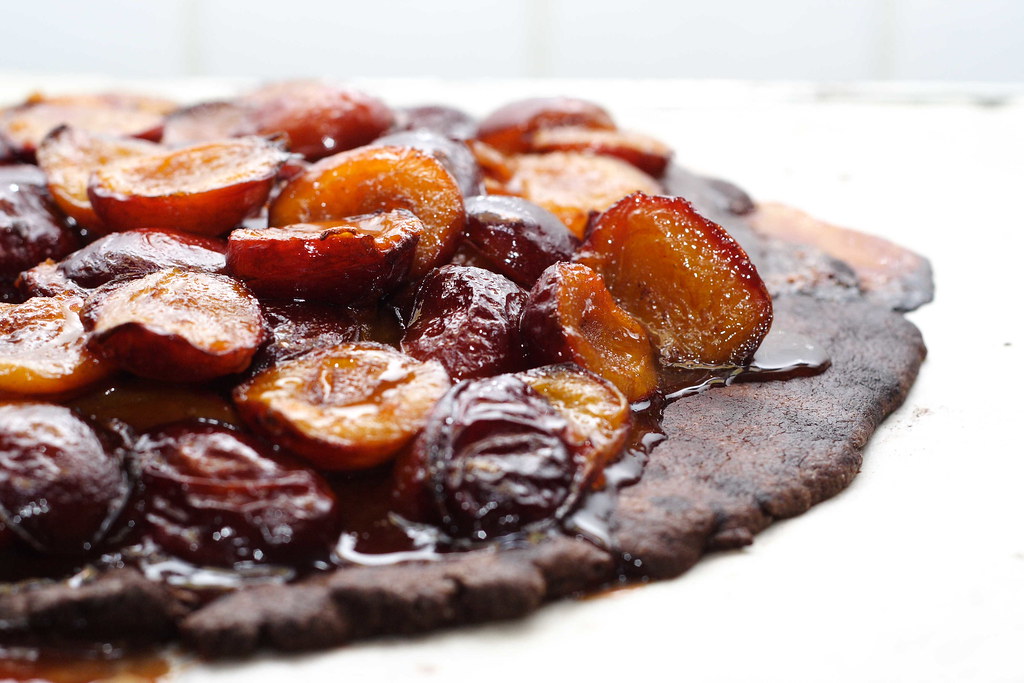
However, I would have never imagined that my idea of the perfect plum cake could ever change. All people ate it that way, right? There simply is no other way, right? To my utter disbelief, my boyfriend wasn't quite convinced of the superior nature of my plum cake. In fact in his opinion, the one he always ate at his parents' place was exactly how a plum cake should be. Now my curiosity was sparked. Although being pressed hard, the only thing he stated was: It's a brown dough. Patiently asking my way through all sorts of possibilities - was it soft, was it crispy - we settled on some kind of shortcrust pastry. Alas, he couldn't tell me where the brown colour came from. So I decided to do some online recipe research and after a while came up with a recipe for Chocolate Plum Galette found on Food & Wine. I wasn't sure if using cocoa really would produce the right kind of "brown" but I had to try and he likes all things chocolate anyway.

I slightly increased the amount of cocoa for a really rich chocolate taste but lacking fresh rosemary as well as an organic orange I omitted both. Truth be told, this rosemary seemed to stray away from my idea of a plum cake just a bit too much... Maybe one day I'll try this rather unusual combination but this time I paired the plums with the trusted duo of rum and cinnamon. Apart from the fact that the carefully shaped rim of this free form tart collapsed while pre-baking, everything went well.

I freely admit that the beautiful combination of plums and chocolate caused me to reconsider my once firmly grounded beliefs. But of course, it was not in the least as my boyfriend had remembered his mom's plum tarts.

PS: Meanwhile, I've inquired about the mysterious plum cake and got the recipe. I'm looking forward to giving it a whirl very soon.


Monday, 5 February 2007

Frozen Jogurt with Passionfruit


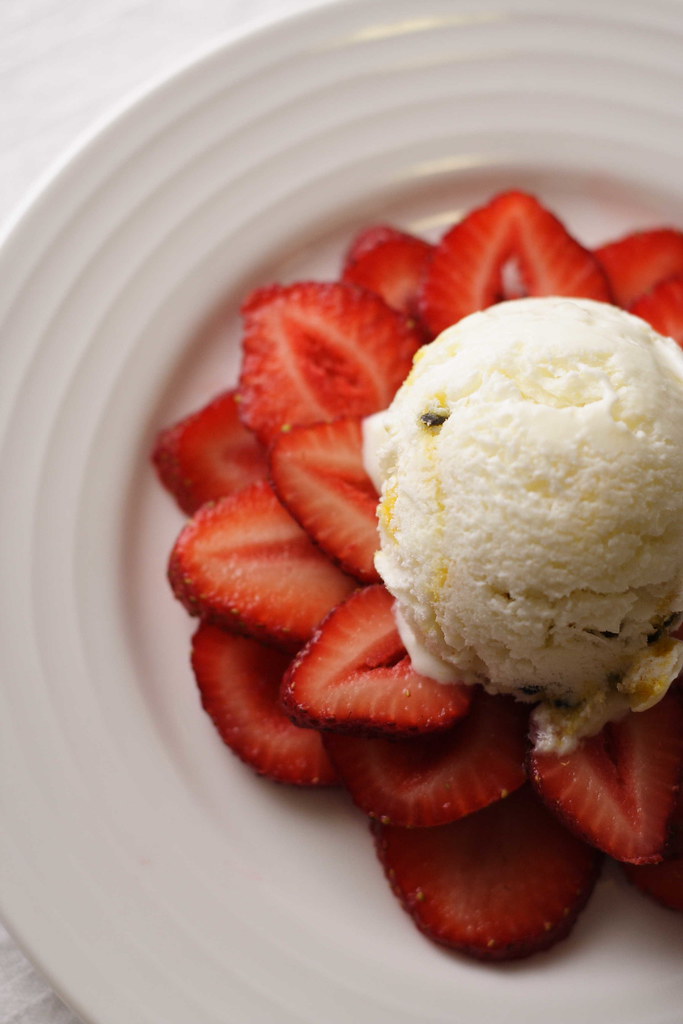
Embarking on an adventure while knowing that you don't have neither the experience nor the proper equipment is probably a foolish thing to do. However, when I saw the elderflower and honey glace on Lara's Cook&Eat quite some time ago, I decided that it was time to finally make frozen yogurt with passionfruit. Ok, the connection might not be evident but I simply didn't have (and didn't now where to buy) elderflower syrup and extravagant honey. However, when I saw the passionfruit sale at my local grocery shop (10 passionfruits for 3 Aussie-Dollars), I didn't have to think twice. The fact that I don't own an ice-cream maker couldn't stop me either. I am well aware that you shouldn't make ice-cream without a properly churning machine unless you use lots of cream, egg yolks, sugar, and alcohol. My parfait - vanilla, chocolate&rum, cinnamon, or walnut praline - is pretty good and so rich that it definitely doesn't need an ice-cream maker. No big ice crystal will ever be able to build up in this addictive mixture...

However, once in a while you want something lighter and I do love frozen yogurt. I have never eaten a homemade version but I took Lara's version as an inspiration and then decided to just follow my imagination - and the unfrozen mixture was heavenly creamy and yummy. I tried to stir during the freezing process as often as possible but at some point I decided to go to bed. So if you want to reproduce this, take my advice: start early in the day so the yogurt will be thoroughly frozen when you want to sleep... All in all, I ended up with a tasty frozen yogurt which unfortunately wasn't as creamy as I had hoped. If you don't insist on properly formed scoops, simply let it thaw about 15 minutes before eating and everything will be fine! Or - even better - go and get yourself an ice-cream maker...


Frozen Yogurt with Passionfruit

The ingredients

300g cream (20% fat)
500g yogurt (3,8% fat)
3 sachets vanilla sugar (about 3 heaped tablespoons)
3 egg whites
100g caster sugar
pinch of salt
10 passionfruits

yields about 2 litres (roughly estimated)

1
Pulp the passionfruits and set aside.

2
Beat egg whites with the caster sugar and a pinch of salt until stiff but not dry. Set aside.

3
In a separate bowl, beat cream with vanilla sugar until soft peaks form. Fold in yogurt.

4
Fold the meringue into the yogurt and cream mixture and pour into a container suitable for freezing. Stir every hour with a fork to break ice crystals.

5
When the mixture starts to get thoroughly frozen, fold in passionfruit pulp - either mix in completely or try to create separate layers of frozen yogurt and passionfruit.


The source
My own creation


The hint
Serve either with sliced strawberries or with vanilla ice-cream and topped with natural yogurt.

Wednesday, 31 January 2007

Summer Delight - Sugar Plum Cake


I remember it pretty well: those lazy afternoons in our garden, sitting on the terrace, and indulging ourselves in sugar plum cake. What, that doesn’t sound very decadent? Mind you, when I say indulging it means two huge baking sheets full of sweet yeast dough and studded with plums shared between five people. And it surly didn’t take all weekend to polish it off. Even with such an abundance of cake, someone peeking through our hedge-like shrubs could still find us fighting over the last piece – not to mention the heated discussions about who ate more than his or her fair share…

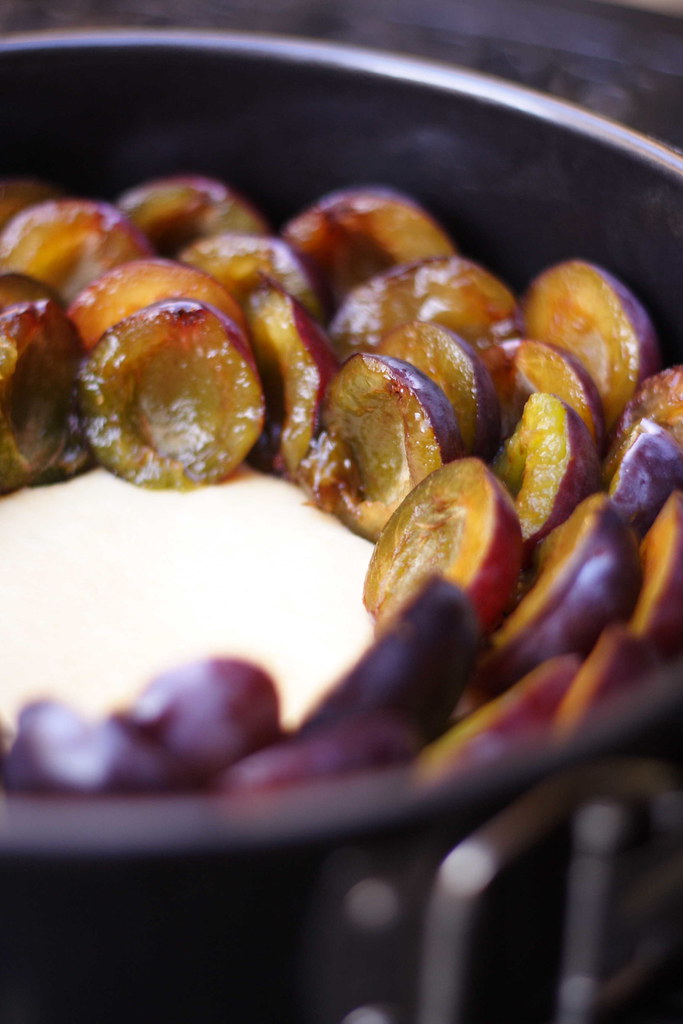
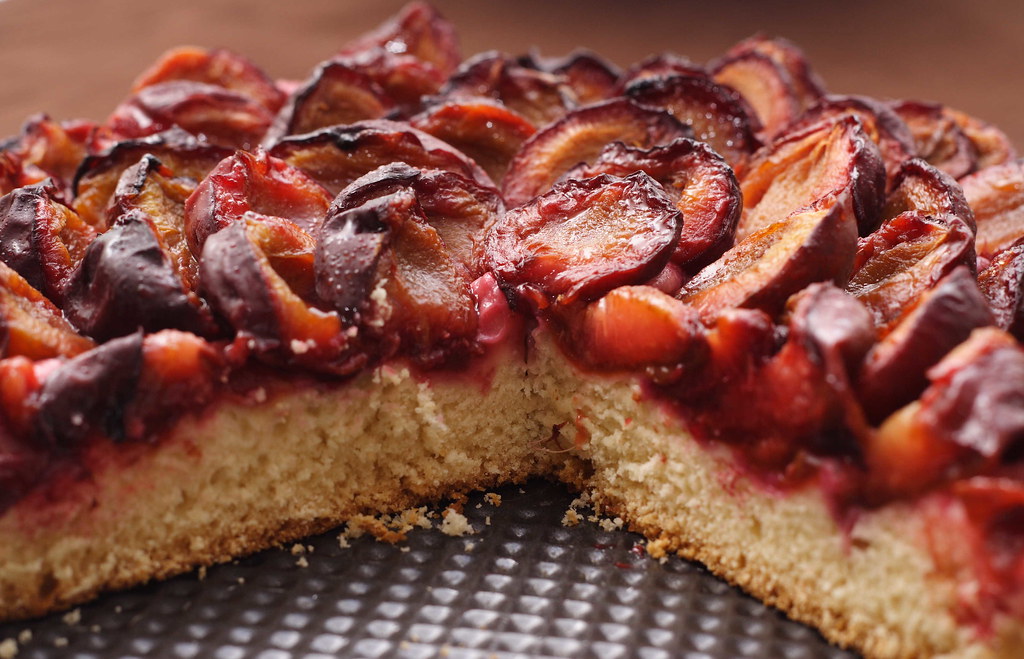
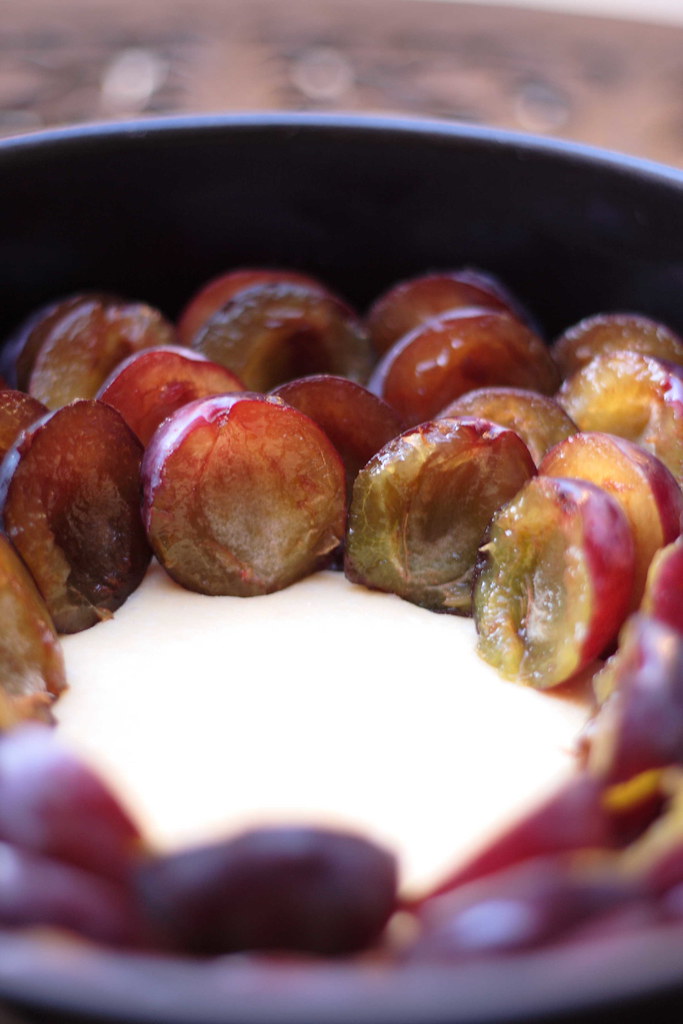
Some people might find this cake rather plain and won’t understand the fuss about it. However - tart-sweet plums on top of a tender yeast cake with a slightly soggy upper layer where all the purple juices join with the crumb – this simple combination sounds like heaven to me! Unfortunately, when moving to Australia I had to endure a full 15 months without sugar plum cake. Whilst one can find almost any exotic fruit in Sydney, I could spot not a single sugar plum. Until about ten days ago: Roaming through the bustle of Market City and doing my weekend shopping, there they were all of a sudden: purple-blue, nice and plump, with a seam and a pointed end. I happily bought a kilogram – of course, it was perfectly clear what to do with them. Had I just known that I wouldn’t be able to get some more the next weekend…I had big plans making plum compote, baking more plum cake, and freezing some for future use. Alas, the only thing I can do is to hope and wait for better luck the next weekend.


Sugar Plum Cake

The ingredients

100g butter
250ml milk
500g all-purpose flour
pinch of salt
100g sugar
1 sachet vanilla sugar
1 sachet dry yeast or 30g fresh yeast
2-3 eggs (depending on size – if using three large eggs, use less milk)

1kg sugar plums, halved, stones removed
2-3 tbsp caster sugar

The yield
One third of the dough is more than enough to cover a spring form 24 centimetres in diameter. The rest of the dough can be baked as a brioche (or topped with other fruits, streusel, cream cheese/curd/sour cream filling – whatever strikes your fancy).

1
Melt butter. Pour cold milk into the melted butter, the mixture should be lukewarm. Set aside.

2
Mix other ingredients in a large bowl, making sure not to put the yeast next to the salt. Pour in butter-milk-mixture.

3
Using your mixer with the dough hooks, beat the dough until it comes together in a soft and wobbly mass. It should not stick to the sides of the bowl anymore. This step may take between 20 and 40 minutes (I confess I used my bread maker for kneading).

4
Cover with a clean kitchen towel and set aside until doubled in volume. Put the risen dough on a lightly floured surface and knead until smooth again.

5
For the plum cake take about a third of the dough or less and flatten it inside the buttered baking tin. Be careful to roll out the dough very thinly because it will rise quite a bit during the baking process. Equal thickness of fruit and cake layer provides the best fruit-to-dough ratio in my opinion. Unfortunately, after my plum cake deprivation, I forgot about this important fact and made the cake base too thick.

6
Place plums on top of the dough in an upright manner trying to squeeze in as many as possible. Fan-bake at 150 degrees Celsius until the edges of the cake are golden brown (25-35 minutes).

7
Right after taking the cake out of the oven sprinkle roughly three tablespoons of caster sugar on top. This has to be done while still hot and will cause the plums to release their juices. Up to half of the cake base should get soggy from the juices – don’t be afraid, that’s the best part. Another reason is that the baking seems to bring out the tartness of the plums - even if sweet when tasted raw, the cooked plums will need some extra sugar.


The source

Vohenstraußer Kochbuch


The hint

Despite the obvious temptation, don’t eat this cake while still hot or lukewarm. It’s best when fully cooled. In fact, this cake tastes best on the second or even on the third day when all the flavours have thoroughly combined.

Friday, 8 December 2006

A humble cake rises up to the occasion


Once upon a time, there was a really plain looking cake. Sitting flatly in its baking sheet, it always adored those piled-up high layer-cakes coated in whipped cream or butter cream and garnished with all sorts of dainty things. The humble cake never expected to be appreciated like those masterpieces of pastry. It knew too well that most people tend to overlook it at first. However, this honest cake would never attempt to conceal any kind of culinary failure behind a cream cloud – hoping that no one would dare to cut into this lofty creation.

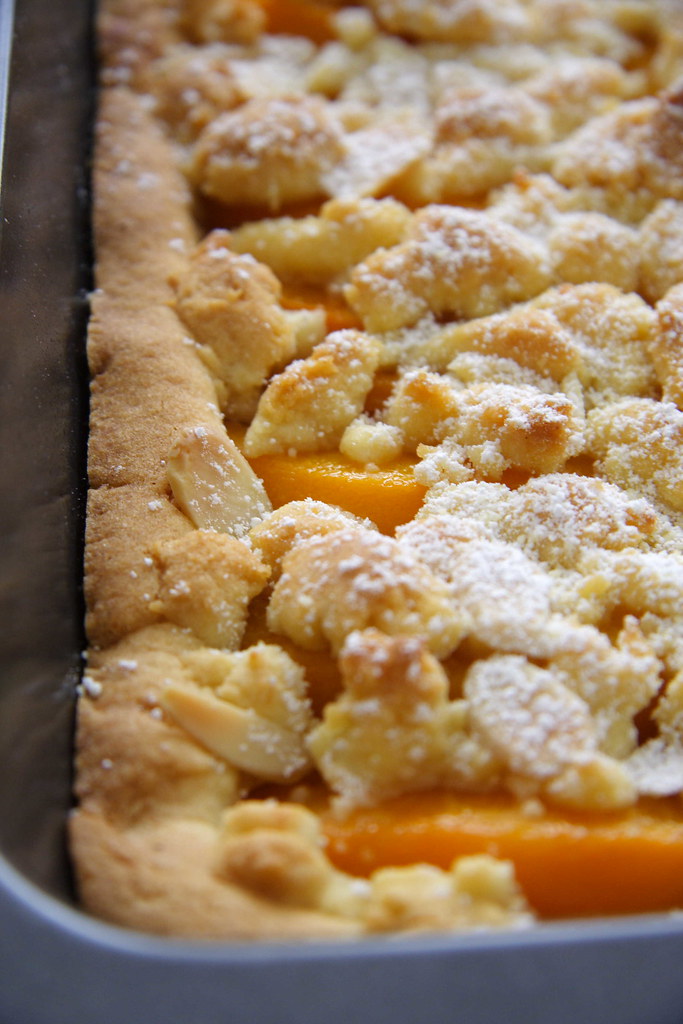
German streusel cake - that’s the incarnation of home-made goodness. It wants to impress you with quality not with its looks: On a bed of shortcrust pastry you’ll find pieces of peaches covered with sweet and crunchy streusel and a handful of flaked almonds. A light shower of powdered sugar fits this cake quite nicely. If you feel dainty, just dress it up with some vanilla-scented whipped cream. After that, this cake will look almost as elegant as its lofty relatives – but unlike them, its taste will never disappoint you.


German Streusel Cake

The ingredients

300g butter, softened
250g caster sugar
2 small eggs (or 1 whole egg and an egg yolk or egg white)
Salt
600 g all-purpose flour
3 teaspoons baking powder

1 big can of peaches
Handful of slivered almonds
Icing sugar for sprinkling


1
Cream the butter together with the sugar. Add eggs, one at a time. Beat thoroughly until pale and fluffy.

2
Mix dry ingredients. Pour half of the dry ingredients on top of the creamed butter, beat until incorporated. Mix in the rest of the dry ingredients using your hand while producing little crumbles.

3
Press a good half of the crumbling dough into a lightly buttered baking sheet. Top with peach slices.

4
Crumble dough pieces on top until almost all of the peaches are covered. I like my crumble topping very crunchy and sweet so I added a bit more sugar at this stage.

5
Scatter a handful of slivered almonds on top. Fan-bake at 150 degrees Celsius until the crumbles have a nice golden-brown colour, about 45-55 minutes. Let cool, sprinkle icing sugar on top and serve with whipped cream if desired.


The source

The German cookbook “Hedwig Maria Stuber: Ich helf Dir kochen”


The hints

Depending on the size of your baking sheet, you’ll probably end up with too much dough. It freezes very well and can be used either as shortcrust pastry or crumble topping.

For really crunchy crumbles, caster sugar is a bit too fine. Whilst the coarse sugar available in Australia might be a bit too coarse something in between should give your cake just the right amount of crunch.

This cake works equally well with apples, rhubarb or sour cherries. If your fruits are very juicy, you should cover the dough with bread crumbs first.

A quarter of the flour could also be substituted with almond flour.

Monday, 4 December 2006

That's Summer...


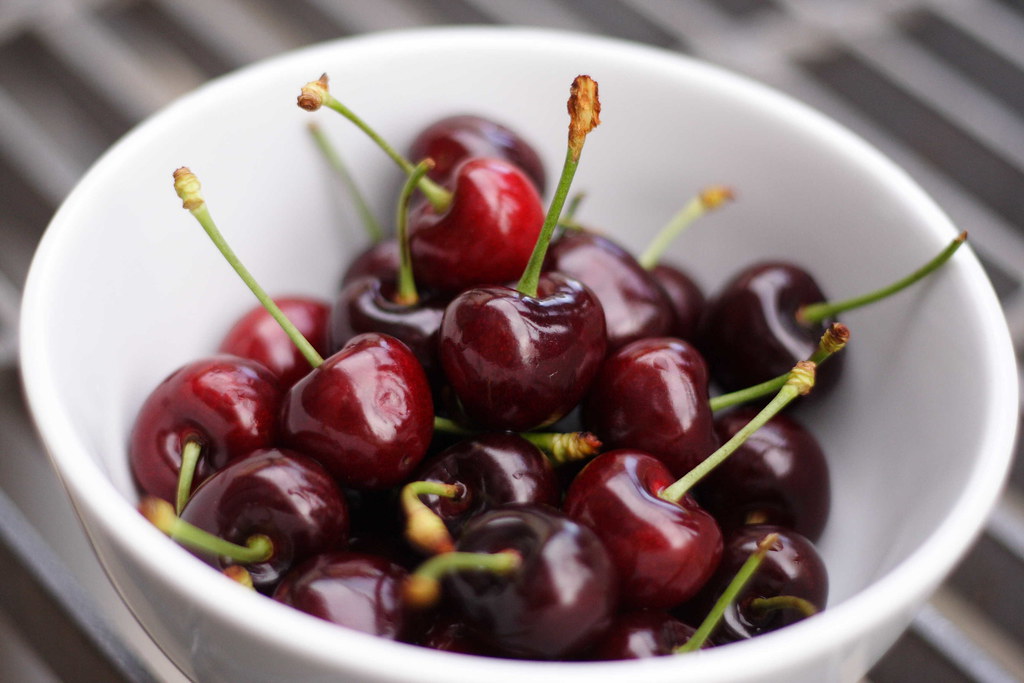
Currently, I'm a bit busy - unfortunately too busy to spend much time in the kitchen. Having quite a lot of work and a friend from Germany visiting me, we mostly decide to dine out. However, here comes a little picture that reminds me that it's summer out there. Sydney weather tends to forget that sometimes these days...

Monday, 13 November 2006

Guilt-free Cream-Dream


What to do if you feel the urge to have something sweet while actually being on a diet? What to do if you are not strong enough to resist – no matter how strong your resolutions were – when everybody around you is enjoying a sinful treat? This dilemma can only be topped by having invited guests for afternoon tea. After telling them for ages that you will eventually get serious with you dietary ambitions, you cannot eat the tiniest butter cream slice in public without feeling guilty. But apart from that, there is still the responsibility to come up with something delicious. First, you want to make your friends happy. Second, you have a reputation to lose.

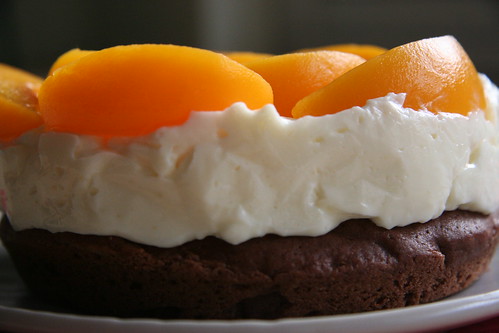
There is only one way of earning compliments for a delicious treat without loading too much on your daily calorie account: The Peach Torte. This fluffy chocolate sponge with a creamy, yoghurt-based filling and peach slices on top looks and tastes as good as a representative of the heavy weight class. But the sponge base is made without additional fat, and the filling contains roughly one kilogram of yoghurt and only about 150 ml whipping cream – it is even possible to decrease the amount of cream to your liking. And the fruit on top turns it into a healthy thing anyway.

After explaining this dilemma far too long, let's get started. It is best to make the sponge base one day ahead. But if you feel a sudden cake craving and you want to devour it as soon as possible, let the sponge rest for two hours before assembling the cake and it’ll be all right.


The pastry base

1
Heat up the oven to 175-180 degrees, without using the fan.
2
Prepare a round baking tin, 26 centimetres in diameter (a baking tray is also possible). Cut a sheet of greaseproof paper into the shape of the tin base, spread soft butter generously on the tin base, making sure not to grease the side walls of your tin. The sensitive batter will slip down a greased wall and will not rise properly. Put the greaseproof paper on the base and then turn it upside-down, so you end up with the buttered side on top. If your baking tin is really non-stick, forget the paper.
3
Mix the flour with the corn starch, the baking powder, the cocoa powder, the instant coffee and set aside.
4
Stir the eggs (no need to separate the yolks from the egg whites) for about one minute until slightly bubbly, and then add sugar and vanilla sugar. Beat until thick, pale, and creamy – for at least five minutes.
5
Sift the dry ingredients on top of the egg-and-sugar foam and make sure that the firm instant coffee grains get minced. Gently fold in the flour mixture, using a wire whisk. Do not overwork but make sure there are no lumps left.
6
Pour the batter into the prepared pan and pop it immediately into the preheated oven. Bake for about 30-35 minutes. Don't open the oven during the first 20 minutes, otherwise the sponge could collapse. Palm the centre of the pastry to test it: It's ready when the top feels only slightly soft with a little drawback. Turn off the oven and open the door leaving the pastry inside for another ten minutes. Cooling it down too abruptly could also result in the cake collapsing.


The filling

Here, you can experiment as you wish and adjust the amount of yoghurt, cream, and sugar to your liking. Only one thing is crucial: orange sugar – it gives the filling its unique flavour. Although citron-flavoured sugar is widely used, this peculiar variation is pretty uncommon. If you’re not able to find it in your supermarket, just try to make it yourself: Wash an organic grown orange with hot water, dry properly and grate the orange zest (make sure not to take anything of the bitter white skin underneath). Put the zest into a tight-closed jar, fill up with caster sugar, mix well, and let it stand for several days. The flavour of the home-made mixture is more subtle than the store-bought one. To substitute a sachet of orange sugar, use at least two tablespoons of your own version. This sugar will give any dairy-based mixture an elegant and unexpected twist. It is unusual enough not to be guessed right away but light enough for not to overwhelm other flavours. This orange-flavoured cream-mix works very well with peaches, but also with strawberries and raspberries.

1
Mix 1.2 kilograms of yoghurt with sugar and orange sugar, to your liking. When using store-bought orange sugar, one sachet will be enough. When using your own, add 1-2 tablespoons, mix well, then add more according to your taste.
2
Dissolve the gelatine according to the instructions on the package. For this amount of yoghurt, I used 7 teaspoons of powdered gelatine. When using gelatine sheets, 12 sheets should be enough.
3
First mix a few tablespoons of yoghurt with the liquid gelatine, and then fold the gelatine-mixture into the yoghurt. This will slowly cool down the warm gelatine and prevent it from getting stiff and forming small hard bits as it does when touching the cold yoghurt all of a sudden.
4
Pop the mixture into the fridge until it sets (usually after half an hour). If your yoghurt turns very stiff quickly, just stir in the pouring cream. If your mixture is set, but not very firm, whip the cream and fold in carefully.
5
If you choose not to diet, you’ll be able to increase the cream from 150 ml up to 500 ml. In this case you should make sure that your yoghurt mixture is pretty firm and whip your cream before folding in – otherwise the whole mixture will get too soft and fall apart when you’re slicing the cake.


The assembling


1
The next day – or two hours later – you can start to assemble the torte. If you used a round baking tin, cut the pastry lengthwise into half. To get a smooth surface, score just along the edge of the cake roughly one centimetre deep, then put a normal sewing thread into the chink and pull both ends across, until the cake is cut through. (If you used a baking tray, this flatter cake base can’t be cut lengthwise.)
2
Spread half of the filling on the base using the brim of the spring form to keep the filling in place. Top with cake layer and spread with the remaining filling. Arrange slices of canned peach on top and chill. Carefully remove the brim when the filling is firm.
3
If the Peach Torte is not to be eaten the same day, a transparent gelatine glaze will protect the fruit from drying out.

And now, dig in and enjoy your guilt-free creamy Peach Torte!


The ingredients


4 whole large eggs
180 g caster sugar
1 sachet or a heaped tablespoon of vanilla flavoured sugar
75 g all-purpose flour
75 g corn starch
2 teaspoons of baking powder
30 g cacao
1 teaspoon instant coffee

1.2 kg low-fat yoghurt
150 ml whipping cream
1 sachet or 2 heaped tablespoons of orange flavoured sugar
100 g of caster sugar (to your liking)
7 teaspoons powdered gelatine or 12 sheets of gelatine
A few tablespoons of hot water to dissolve the gelatine

1 big can of peach slices (or as much as you like)

Gelatine glaze (optional)


The source

This chocolate sponge recipe was torn out of a magazine by my mother, some twenty years ago. Since then, this easy and quick recipe is used for a wide range of tarts. The filling is my own creation.


The hint
For a delicious Strawberry Torte, just omit the cacao and the instant coffee in the sponge recipe and you’ll get a slightly vanilla flavoured sponge which makes – combined with the orange flavoured filling and fresh strawberries on top – a light and refreshing summer tart.