Google
 
Showing posts with label Italian Cuisine. Show all posts

Monday, 22 December 2008

Biscotti - definitely twice baked


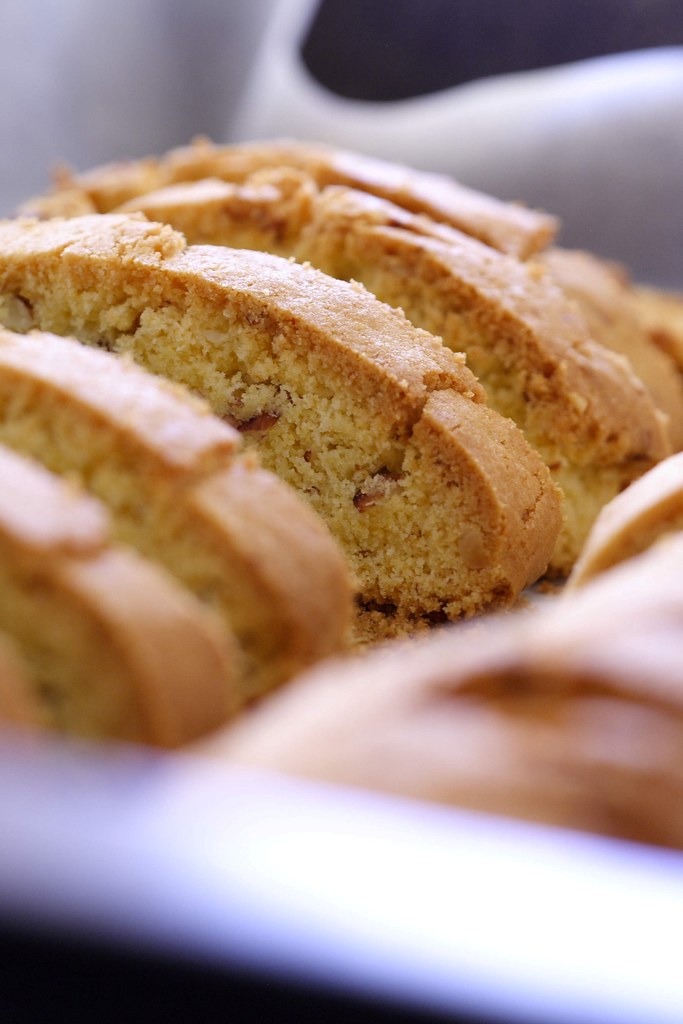
Twice baked - and I mean it! And that's got nothing to do with the regular procedure to bake them, slice them, and then return them to the oven for added crunch and a golden glow.

Having seen lots of biscotti recipes in blogland, I wanted to know if they were really that good. My only encounter so far had been the rock-hard store bought kind that almost cost me a tooth. So, one of these days, I decided to give them a go. However, these biscuits turned out to be not quite as easy to make as I had thought. Not willing to be conquered by some cookies, I decided to start again a few days later, albeit again with mixed results.

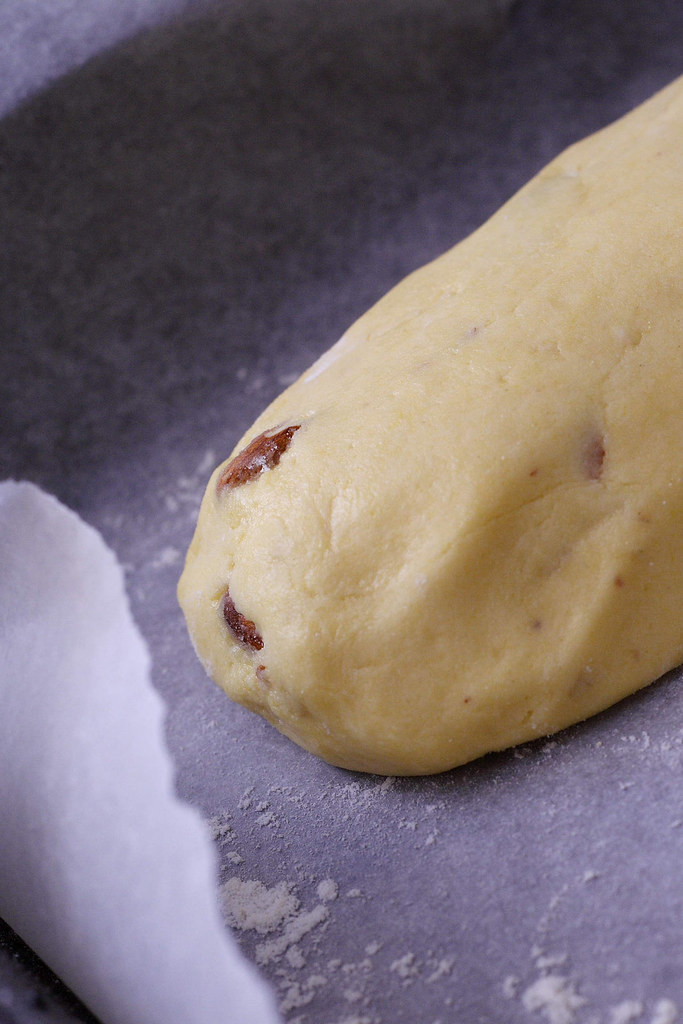
But let's start with the first batch. Emerging from its first stint in the oven, it looked just perfect - from above, that is. Once I had the logs sliced up, I noticed that I almost burned the bottom sides. Cursing under my breath - it clearly must be the oven's fault - I returned them to the heat but carefully laid them out side wise as not to brown the bottoms any further.

For the second batch, I decided to turn down the heat and use the fan-bake setting. But disaster struck once more. When I took the logs out of the oven - pale golden but with darker edges - to be sliced up for the second browning, it turned out that this batch wasn't even done all the way. I quickly returned the uncut logs and peeped anxiously through the oven door. Luckily the baking powder was still doing its job and the logs rose some more. However, a little too much as it turned out. When fully baked, this batch with its cracked surface and less than smooth texture had a rather "rustic" charm to it - at least that's what I think smart people call their baked goods that aren't picture-perfect...

Taste-wise though, I almost preferred the charred batch. The over-the-top caramelization of the crust added more depth of flavour. Therefore, a third batch is in order some time soon - once I'm done with all the Christmas baking - and then with a double-layer of baking sheets!

Almond Biscotti

I started out with a recipe from delicious days and kept to its instructions but made a couple of modifications regarding the ingredients, most notably the addition of maize flour.

The ingredients

90g unpeeled almonds, partly whole and partly chopped
100g butter, softened
100g caster sugar
50g lemon caster sugar (in a jar, mix sugar with lemon zest and let it sit for a few days)
2 eggs
5 drops of bitter almond essence
pinch of salt
200g flour
80g fine maize flour

Friday, 29 February 2008

Focaccia - at last

Focaccia isn't known as the most complicated bread recipe in the world. Maybe that's the reason why it took me a long time to try for myself. What could possibly go wrong with a straight yeast dough baked on a sheet until golden-brown and crispy? Well, a lot - as I had to find out a couple of months ago. Despite following the recipe of a well-trusted online source to the letter including an overnight rest in the fridge, my focaccia was rather bland with a weird texture and a weird look to it, too.

Not wanting to admit defeat, I decided to forget about this project unti I read the announcement for Bread Baking Day #7 over at Chili&Ciabatta: With the chosen topic of flatbreads, I suddenly felt the urge to redeem myself. And with "The Italian Baker" by Carol Field freshly borrowed from the library, it almost seemed like a hint of fate.

Luckily, this time everything went well and I can report that making focaccia isn't going to give me doubts about my bread baking abilities anymore. Carol Field's recipe yields a tender and crusty focaccia that is perfect for picnics and should you happen to have leftovers, it also makes a very good pappa al pomodoro.
However, I still don't know why it didn't work out the first time...

PS: I so want to participate in Bread Baking Day #7 - a food blogging event created by Zorra of 1x umruehren bitte - but as I'm already far too late, we'll see if Petra can still add me to her round-up...


Herbed Focaccia

The ingredients

2 1/2 active dry yeast or 18g fresh yeast
1/4 cup warm water for dissolving the yeast
2 1/4 cups plus 1-2 tbsp water, at room temperature
2 tbsp olive oil
1kg bread flour
1 tbsp or 15g salt

For the topping:
olive oil, coarse sea salt, herbs

The yield
Makes enough dough for two baking sheets (not completely covered with dough) or three big round focacce

1
Stir active dry yeast into warm water to dissolve. Let stand for 10 minutes.

2
Using a big bowl and a wooden spoon, mix all the ingredients together but hold back a little of the water to adjust dough consistency. The dough will come together as a lumpy mass.

3
Depending on your preferences, either lightly oil or flour your work surface and knead the dough 8 to 10 minutes until velvety and soft. I like to give the dough a 20 minutes break in the middle with shortens the kneading time quite a bit.

4
To test if the gluten is properly developped, I do my own kind of windowpane test. Similar to shaping a pizza, I hold up the dough ball and let it stretch over my hands mainly due to its own weight while rotating it a little bit. That way, the dough gets stretched gently until you can really look through it.
The regular way of doing a windowpane test is pulling off a piece and stretching that until it ressembles a thin sheet of dough. That way, my dough always tears, no matter how long I've kneaded it.

5
For the first rise, put the dough into a lightly oiled bowl, cover with foil, and let rise until doubled (1.5 hours).

6
Cut the dough into how many pieces of focaccia you want to make and gently stretch them to cover your prepared baking sheets. Cover the dough with kitchen towels or foil to prevent it from drying out and let rest for 30 minutes.
Meanwhile you can prepare herbed olive oil by heating oil and your favourite mix of fresh or dried herbs until warm. Do not let it come to a boil. Let the herbs steep until you're ready to top your flatbreads.

7
Dimple the dough with your fingertips. These little dips will hold the pools of olive oil, herbs, and salt during the bake. Cover again and let rise until doubled (2 hours).

Preheat the oven to 200 degrees Celsius, preferably using a baking stone.

8
Using a pastry brush, top the focaccia with (herbed) olive oil. Sprinkle with coarse sea salt. Put into the hot oven and bake for 20-25 minutes. During the first 5 minutes, splash water on the bottom to create steam.

The source
Adapted from Carol Field: The Italian Baker

The hint
If you have to bake both baking sheets at once, make sure to switch them around after half of the baking time is over. Baking several sheets at once without using the fan-bake option isn't ideal though. If one of your focacce doesn't brown well, you can use the grill for the last one or two minutes but you'll have to watch it closely. Otherwise the thinner parts will get very dark very quickly...

Thursday, 1 November 2007

Exploring Pappa Al Pomodoro

Okay, this one won't be loved for its looks. It's used to be seen as just some leftovers - thrown together into a pot and forgotten on the stove. Stale bread soaked in tomatoes. Peasants' food.

I've always wondered if there's something worth knowing about Pappa Al Pomodoro. After all, it's still around, and not only in Tuscany. So, when leafing through "Jamie's Italy", I always went back to the page with this tomato and bread stew. No matter how many other (more) beautiful dishes were pictured in this lovely book, it was time to finally find out about Pappa Al Pomodoro.

And I'm pleased to say that Jamie didn't promise too much: The oven-roasted tomatoes provided sweetness and concentrated flavour, the bread made for a smooth and silky texture, and the garlic gave it that little extra kick. Instead of the usual basil, flat-leaf parsley had to stand in and did a pretty good job.

For this recipe it's crucial to use good bread, in my case it was the "Heart of Wheat" Bread by Rose Levy Beranbaum. I left the crust on in order to retain some texture - otherwise this stew could easily turn into baby food. I had to add a little more liquid, it was still not quite as soupy as Jamie's version but never mind. Jamie stresses the importance of using good olive oil for this dish. Whilst I'm not using anything fancy or overly expensive, mine has a nice fruity smell to it that certainly contributed to the overall flavour.

It might not have the looks but this dish has a lot going for it.

Pappa Al Pomodoro

The ingredients

500g ripe tomatoes, preferably cherry tomatoes (cut into pieces if using bigger ones)
3 cloves of garlic, finely sliced
1 bunch of flat-leaf parsley, stalks and leaves chopped (or use basil instead)
2 cans of whole peeled tomatoes (400g each)
500g of stale bread, crust on, torn into pieces
salt and freshly ground pepper
olive oil

1
In a roasting tray, toss tomatoes with some olive oil, the slices of one clove of garlic and a quarter of the herb leaves. Season with salt and pepper and prick tomatoes all over. Roast in the oven at 180 degrees Celsius (or 150 degrees fan-baked) for 20 minutes.
Note: I covered the herbs and the garlic with the tomatoes to keep them moist during the bake.

2
In a big pot, saute the parsley stalks and the remaining garlic in some olive oil until soft but not coloured. Add the canned tomatoes. Fill both cans with water and add it, too. Let simmer for 15 minutes, stirring every now and then.

3
Tear the bread into bite-sized pieces and add to the pot. Mix and season to taste. Add the remaining parsley leaves (reserving a little for garnish) and let stand on very low heat for up to ten minutes.

4
Remove the roasted tomato mixture from the oven and add to the pot, scraping everything off the tray. Stir thoroughly and add some more water if necessary (depending on how soupy you like it).

5
Check the seasoning, stir in some olive oil (Jamie suggests 6-7 tablespoons but this seemed too much for me) and serve sprinkled with herbs.

The source
Adapted from Jamie Oliver: "Jamie's Italy"

Thursday, 5 July 2007

Calming down with Red Risotto


There are times when everything turns from the well-planned into the unexpectedly chaotic. Add to this friends coming over for dinner and you get me freaked-out. Luckily, my friend Nora from Life's Smorgasbord and her partner weren't expecting a dinner extravaganza - instead, Nora and I had planned to cook together. Nora even brought vital ingredients like readily marinated garlic prawns. Lucky me...

While frantically getting the kitchen into ready-to-use status, Nora contentedly sipped her red wine and chatting with me, she got me cooled down eventually. We managed to put together a very nice three course dinner: Pumpkin Soup, Red Risotto with Garlic Prawns and homemade Vanilla Custard which I had already prepared the night before.

Despite being still not very coordinated, I did not manage to botch the pumpkin soup. Nora who had chosen the risotto recipe, took charge of the main course so I didn't have to do much more than stirring... With some steamed asparagus for added vitamins this risotto proved to be an absolute winner. The amount of tomato paste was just right, not overwhelming, and provided the ideal backdrop for the juicy garlicky prawns. The only thing we changed was adding another half cup of rice and therefore adjusting the amount of chicken stock. The recipe is supposed to be for four people and I was pretty hungry after all that last-minute hurry. With good food and wine and with a little help of my friends I managed to enjoy myself and we all had a wonderful evening!

If you'd like to read Nora's account of our cooking adventure, head over to her post!

Monday, 28 May 2007

Mocha Panettone...

...with dark chocolate and pine nuts. Sounds good, doesn't it? Unfortunately, taste wise, the result was nothing short of a disappointment. There had been a little voice inside my head, asking if it really was such a good idea to use instant coffee as the main flavouring. However, the recipe said so - the accompanying picture was appealing enough - and I love these sweet yeast breads.

After the first slice it was already obvious that I didn't want to eat the whole loaf on its own. The coffee flavour was terrible, the texture was rather dry - and the chunks of dark chocolate definitely couldn't make up for that. But I didn't want to throw away the whole thing either. After all, besides the instant coffee, lots of good ingredients had been used to make this rather bland bread. So I had to think of something else to do with it...stay tuned!

Note: So far, it was the first and only recipe from the Bread Machine Kitchen Handbook that wasn't a success. Assuming that no one will want to try this particular recipe, I won't bother posting it.

Friday, 19 January 2007

My first proper Pizza

For some reason unknown to me, it is very hard to find a well-prepared pizza in Sydney. Despite the huge number of Italian immigrants I have never eaten any pizza that tasted like the ones I had in Italy. There, the crust is unbelievably thin, rather pale, and a little bit charred on the bottom. Here, the crust is crispy but of a more bread-like colour and consistency. There, the toppings are rather sparse and thinly sliced so you can taste every single ingredient. Here, at least ten different toppings seem to be a “must-have”. Everything is cut into tiny pieces and thoroughly mixed together so you can hardly identify if you got your “Corsica” or the “Mediterranean Surprise” of your neighbour.

I do have to admit that you can find some interesting combinations on Australian menus. Using pumpkin, goat’s cheese or potatoes definitely broadens a traditional pizza lover’s horizon. However, some of those adaptations are a bit over the top – “Tandoori Chicken Pizza” or “Meat Lover’s Delight” with bacon and barbeque sauce, anyone?

To top it off, pizza in Sydney or Australia in general is a rather pricey delight compared to the excellent Asian food you can get here for little money. Therefore, it was only a matter of time to make my own pizza.

After searching through my favourite food blogs, it became pretty clear that Peter Reinhart’s Napoletana pizza dough was the way to go. I used the recipe and instructions provided on ChubbyHubby which were pretty easy to follow. My little hand mixer squealed heart-rendingly while mixing the first batch of dough – not for the first time I was longing for my old but strong Krups mixer back home in Germany. The second batch was kneaded by my bread baking machine which worked just fine. After a night’s rest in the fridge, the dough was a pleasure to work with. Stretchy yet firm, it was really easy to shape it into thin rounds.

The toppings: homemade tomato sauce, shredded tasty cheese, shredded mozzarella, ham, salami, fresh tomatoes, sliced mushrooms, capers, grilled eggplants, grilled and skinned capsicum which proved to be the favourite amongst my fellow pizza eaters. They fully approved of my first attempt in making proper pizza – mostly due to the generosity of my dear friend Nora. When I invited her for the pizza night, she said she’d like to give me a pizza stone as sort of a late Christmas present. Any serious pizza lover should have one. That’s what she told me – and she was so right! Even the male guests had to admit the superiority of the stone. Being engineers they first doubted its usefulness. Pretending it was only another gadget girls "had to have". But a quick check with wikipedia revealed everything you need to know about pizza, pizza stones, and the like.

The few pizzas I baked on a regular baking sheet (after all, there were nine hungry people to feed) were not too bad but definitely not as crispy as the ones baked on the stone. However, it was a bit tricky to lift the prepared pizza on the stone and into the oven (I got a few minor burns). Polenta was very helpful to prevent sticking; and those little yellow kernels provided an extra crunch to the crust. The oven was heated to maximum which sometimes seemed to be a bit too much as you can see on the picture. But I didn't get any complaints and my guinea pigs encouraged me to continue my search for the perfect Italian pizza. With my own pizza stone it will be only a matter of time – thank you, Nora!