Google
 
Showing posts with label dessert. Show all posts

Tuesday, 5 May 2009

Scoring points


Being married for a little more than a year, I'm trying to do my best and score some good-wifey- points from time to time. Sometimes it's easy to do something nice for my better half (particularly if it happens to fit in with my own plans), sometimes I actually make myself do something I wouldn't have done otherwise. After all, one shouldn't start to slacken just yet!

What's been surprisingly difficult though, is to make his favourite desserts. Bit embarrassing, isn't it? And I'm not talking about several ill-fated attempts to recreate his mom's best cakes (before you ask, my versions were perfectly edible but unfortunately not half as good as the originals). No, his criterion for a great dessert is quite simple yet I'm still struggling to master it: Whatever you do, it must have chocolate - and loads of it!

Thus, I discovered over the course of the last months that whilst I like chocolate as much as the next person, I'm just as enamoured with vanilla, and come to think of it, I really prefer fruity desserts over anything else. Who knew that it would take just one year of marriage to finally figure that one out.

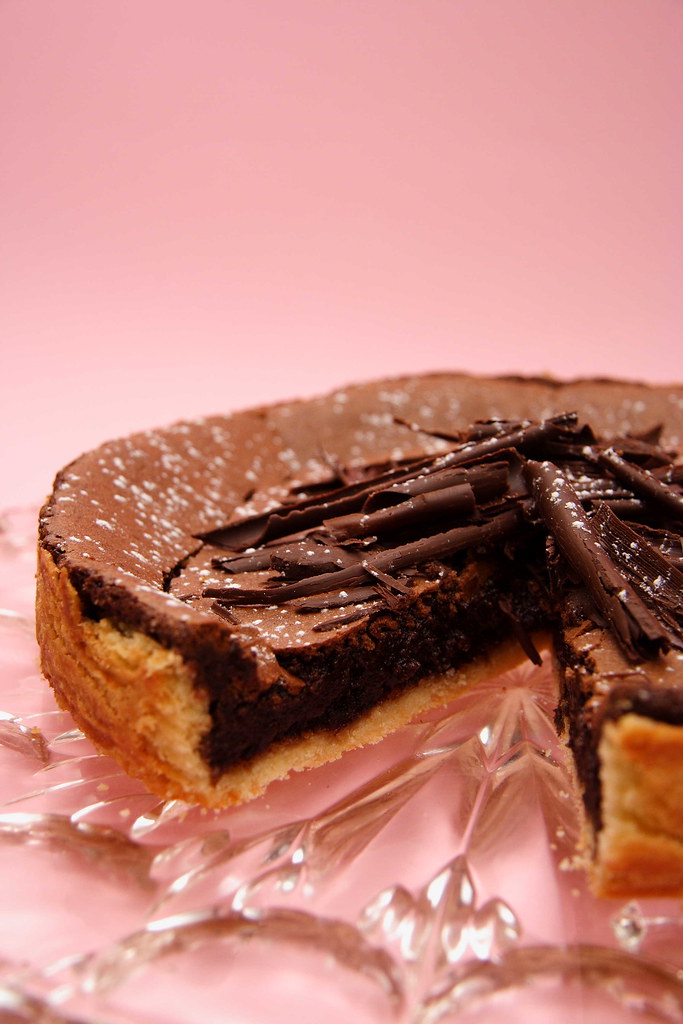
For our first wedding anniversary (the first of the two) I really wanted to get it right. I borrowed a lovely chocolate dessert cookbook from the library with mouthwatering pictures in it and let him choose a recipe - with only very little guidance in getting to the right chapter, of course. His choice was an American classic: Mississippi Mud Pie!
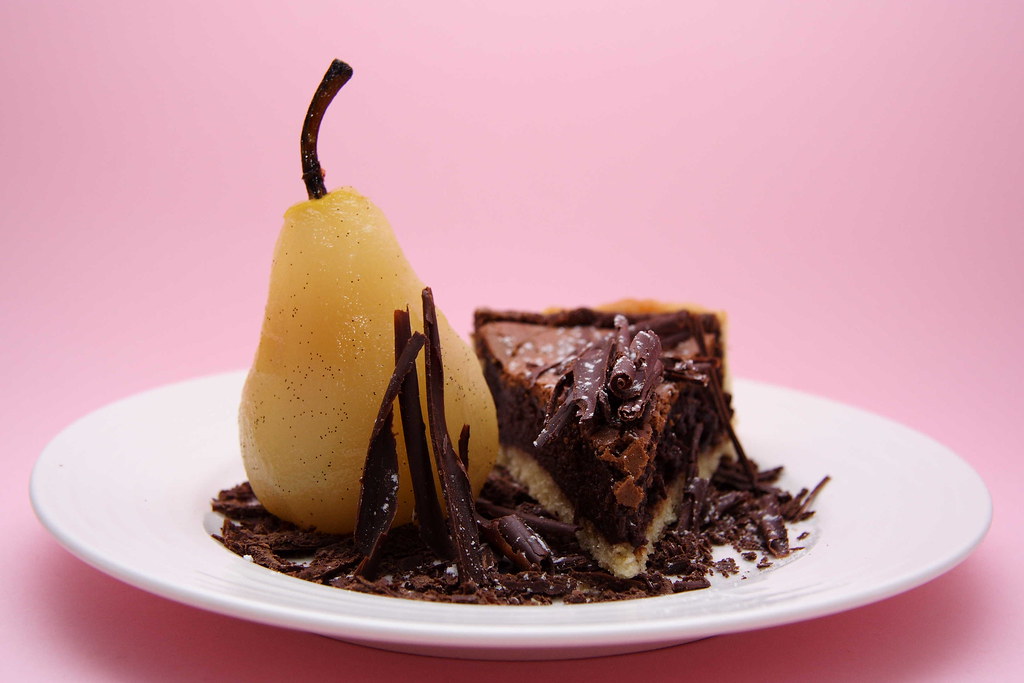
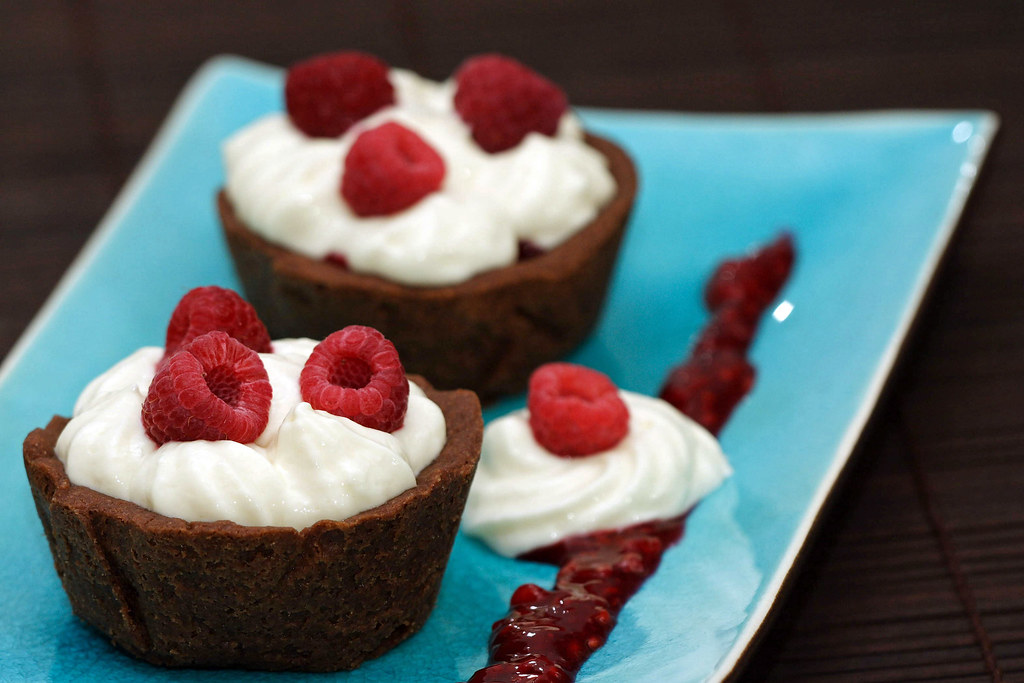
To my great surprise, this recipe isn't quite as chocolatey as it looks so don't hesitate to up the chocolate/cocoa content. And it's rather nice with vanilla-poached pears, if I might say so myself - after all, marriage is all about compromise!


Mississippi Mud Pie

The ingredients

your favourite shortcrust pastry, enough to thinly line a 20cm-spingform pan

1oog butter
50g dark chocolate, chopped
2-3 tbsp cocoa sifted
1 tsp instant espresso powder
2 small eggs
115g caster sugar
1 tbsp golden syrup
1 tbsp sour cream
1 tbsp vanilla extract (I substituted vanilla sugar for part of the sugar instead)

for serving: chocolate curls and pears poached in vanilla-bean-syrup (optional)

1
Butter the tart pan and line the bottom with parchment paper. Line it with the shortcrust pastry, making a small rim around it. Chill the crust while preparing the filling.

2
Melt the butter, stir in the chocolate until combined. Stir in cocoa and instant espresso. Set aside

3
Beat eggs, sugar, and salt until thick and creamy. Add vanilla (if using), sour cream, and golden syrup. Stir in chocolate-butter-mixture.

4
Pour the filling into the tart shell and fan-bake at 150 degrees Celsius for roughly 25 minutes (check after 20 minutes). It will be done when the filling puffs up and forms a crust. Upon cooling, the filling will sink a little and may crack. On the inside, the filling will be firm but sticky.

The source
Adapted from "Chocolate" by Patricia Lousada

The hint
This pie is quite rich so serve in small doses. We ate it over the course of 3-4 days - texture and taste didn't suffer over time. Once the tart shell starts to soften, slicing will be easier, too.

Monday, 23 June 2008

Ideas with Quark


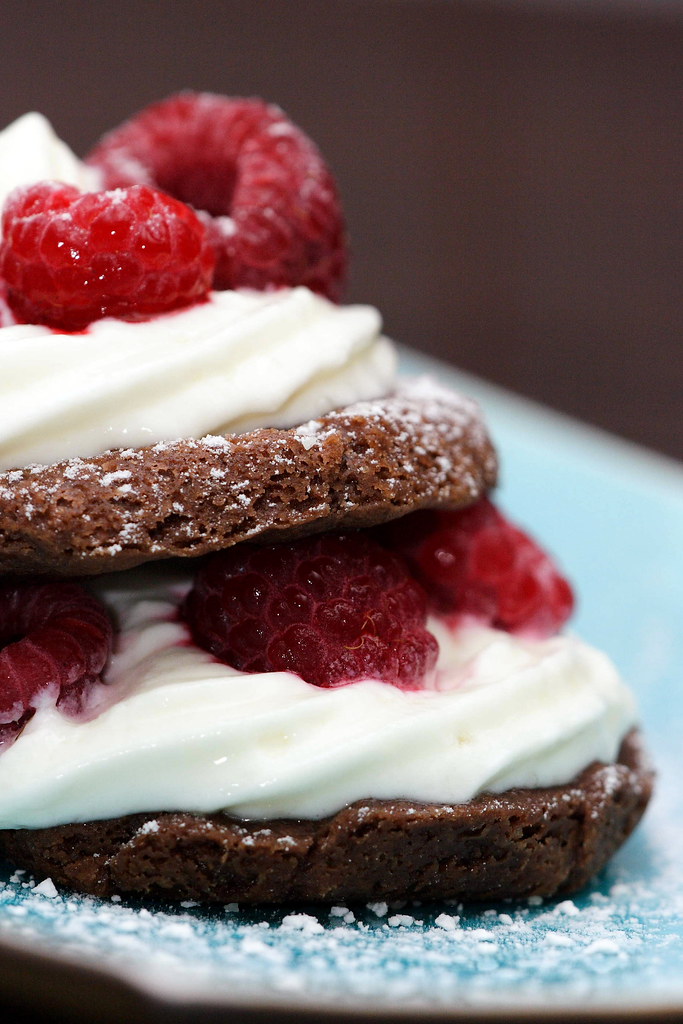
I guess it's time to see what I do with all the quark I've been making recently... The following isn't so much a recipe but rather an idea that might lead you to think up your own instant dessert. During one of the previous weekends, the urge to have a little sweet bite after dinner was positively unbearable, and I remembered having some chocolate shortbread dough and raspberries in the freezer plus newly made quark in the fridge. Dessert was only a matter of minutes.

I lined my muffin pan with small sheets of baking paper and the dough and (after a brief stint in the fridge) baked it at 175 degrees Celsius in a preheated oven (not fan-forced). Baking time varies according to size. However, once the pastry looses its shine, it's partially cooked so I then gave it another 5 minutes. Of course, these little tartelettes benefit from blind-baking but I simply poked them with a fork to deflate. Almost as pretty..;-)

Whilst the tartelette cases cooled down, I selected a few nice big raspberries to thaw on a paper towel. The others went onto the stove and got cooked with sugar and a splash of white wine to release their juices. One teaspoon of cornstarch, dissolved in some white wine for thickening. And one tablespoon of cointreau to accentuate the fruity taste.

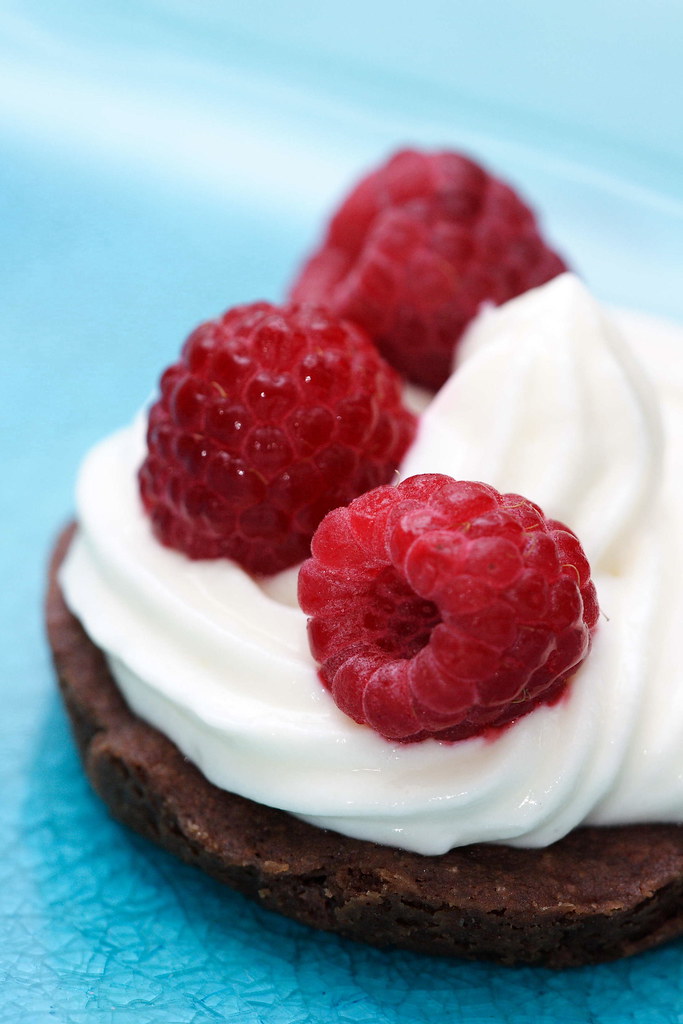
The raspberries filling went into the tartelette cases first, then the quark filling on top. It's not quite stiff enough to allow for proper piping so you might want to add some gelatin. I ended up with the Leaning Tower of Pisa but who cares anyway.
This filling actually benefits from sitting in the fridge for a day to allow the flavours to mellow. When filled the tartelettes will hold up nicely for a couple of hours but we were too greedy to wait very long..;-)

Maybe you want to give these little tartelettes a try during the next weekend? I imagine the quark filling will pair well with any kind of berry or poached fruit combined with plain, chocolate, or a nutty shortbread base.

PS: Due to a lucky coincidence in topic, I just realized that I'm able to participate with my tartelettes in this month's "Waiter, there's something in my... Berried Treasure!" hosted by Cooksister. Well, quark in my case..;-) If you happen to make something berry-related, there's still time to take part in this event!
Chocolate Shortbread Tartelettes with Quark and Raspberry Filling

The ingredients

100g quark
100g fat-reduced cream cheese
1 tbsp fat-reduced cream
1 tbsp cointreau
1 tbsp vanilla sugar
More sugar according to taste

Mix everything together and sweeten to taste. It will be thick but not stiff.

(You see I tried to make a slightly healthy-version that luckily tasted just as delicious as its fatty cousin. However, if you're not trying to shed a few grams, don't hold yourself back!)

200g frozen raspberries
splash of white wine
sugar to taste
1 tsp cornstarch
1 tbsp cointreau

The yield

This filling is enough for four muffin-pan-sized tartelettes.

The source

My own invention

Friday, 15 February 2008

A Heart for my Valentine... or two


Celebrating Valentine's Day is not considered a German tradition. In recent years, it seems to have caught on a bit but you probably won't see many of the last-minute, rose-buying, desperate-feeling boyfriends storming into a flower shop. Whilst I understand that many men think it ridiculous to buy completely overpriced stuff just because it's the 14th of February, I still think it's never too late to have a bit more romance in your life!

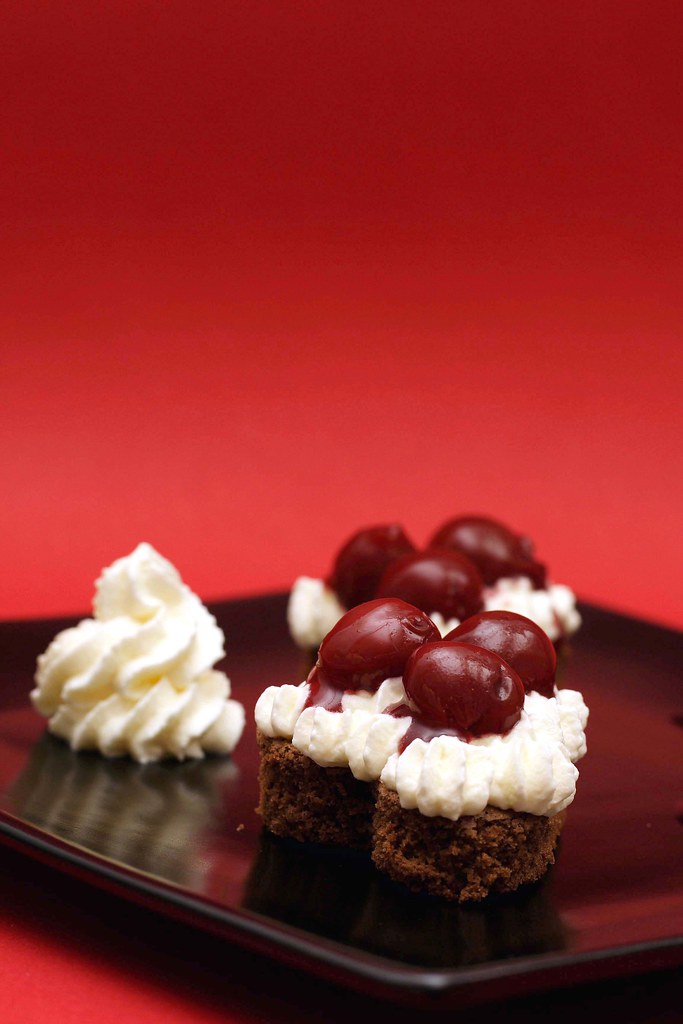
When I saw Zorra's announcement of A Heart for Your Valentine , I knew that I had to participate. With my boyfriend coming from the Black Forest Area, I also knew instantly what to make for him. The only problem, I didn't have any kirsch which is more or less the crucial ingredient for a proper Black Forest Cake. However, love is all about ignoring little imperfections, right..;-)

With only a cookie cutter in heart-shape, this black forest cake comes in very small portions but it's entirely up to you how many you'll eat...

Zorra is posting the round-up continuously in two parts, so check-out all the wonderful heart-shaped creations!


Black Forest Cake

The ingredients

6 eggs, separated
pinch of salt
175g caster sugar
90g butter
140g dark chocolate, in pieces
150g flour
1 tsp baking powder (optional)
vanilla (optional)

For assembly:
canned cherries (I like to use the juice, too, slightly thickened with cornstarch, and a hint of cinnamon)
whipped cream, sweetened to taste with vanilla sugar

optional:
kirsch for dousing the cake
chocolate shavings

1
Preheat oven to 175 degrees Celsius (no fan-bake).

2
Melt the butter. Once the butter isn't bubbling anymore, add chocolate. Stir until chocolate is melted and evenly combined. Let cool until lukewarm but still liquid.

3
Using a heatproof bowl resting on a hot water bath, beat egg yolks and sugar until pale, creamy and voluminous. This will take a couple of minutes.

4
Using another bowl and clean beaters, beat egg whites with salt until soft peaks form.

5
Sift the flower and baking powder (if using) onto the foamy egg yolks. Pour the chocolate-butter mixture on top. Do not mix at this stage.

6
Add one third of the meringue and stir in to lighten the batter. Lightly fold in the remaining meringue.

7
Pour into a baking pan (26 cm in diametre or a baking sheet) that's buttered only at the bottom. To be safe, use baking paper, too. Bake immediately. A round cake takes roughly 35 minutes, a sheet cake a bit shorter. The cake is done when the top feels springy. Don't overbake or the cake will dry out.

8
Once cooled, cut out little hearts and assemble or fill one large cake with cherries and cream.

The source
GU: "Die grosse Schule des Backens"

The hint
Some recipes specify that you can also add kirsch to the cream. If you want to really taste the kirsch that way, you'll have to add a lot and I recommend stabilizing the cream with gelatin. Many, many years ago, I added too much kirsch, the cream wouldn't become stiff, I kept beating and ended up with kirsch-flavoured butter...

Tuesday, 11 December 2007

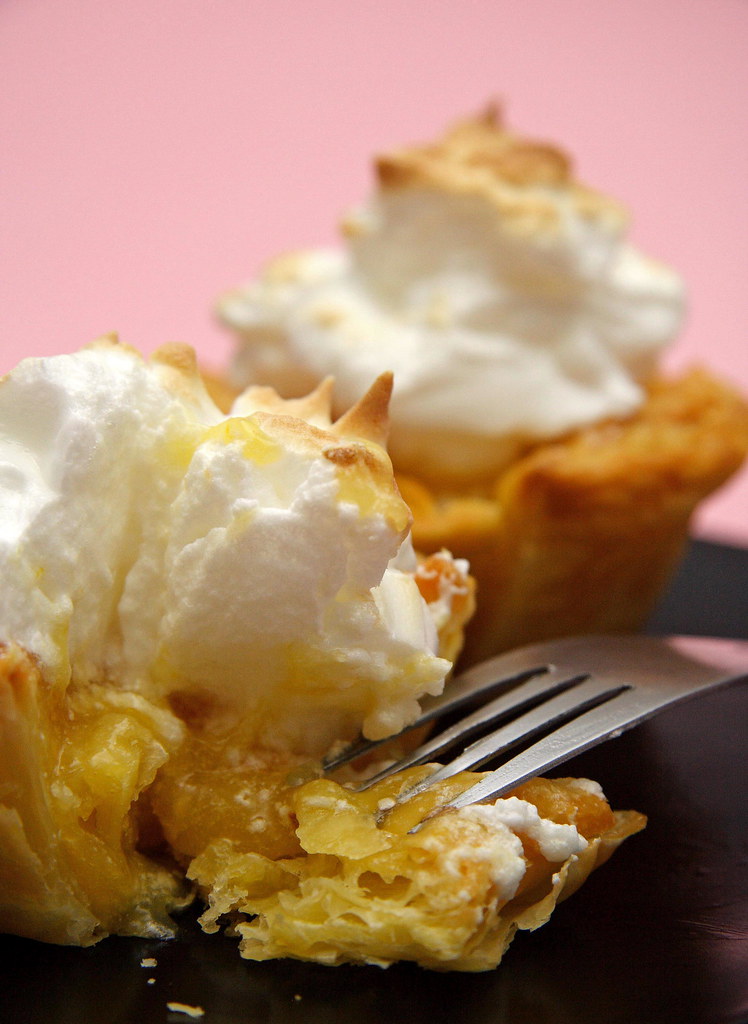
Lemon Meringue Tartles - A Sugar Fix, quicker than you'd think

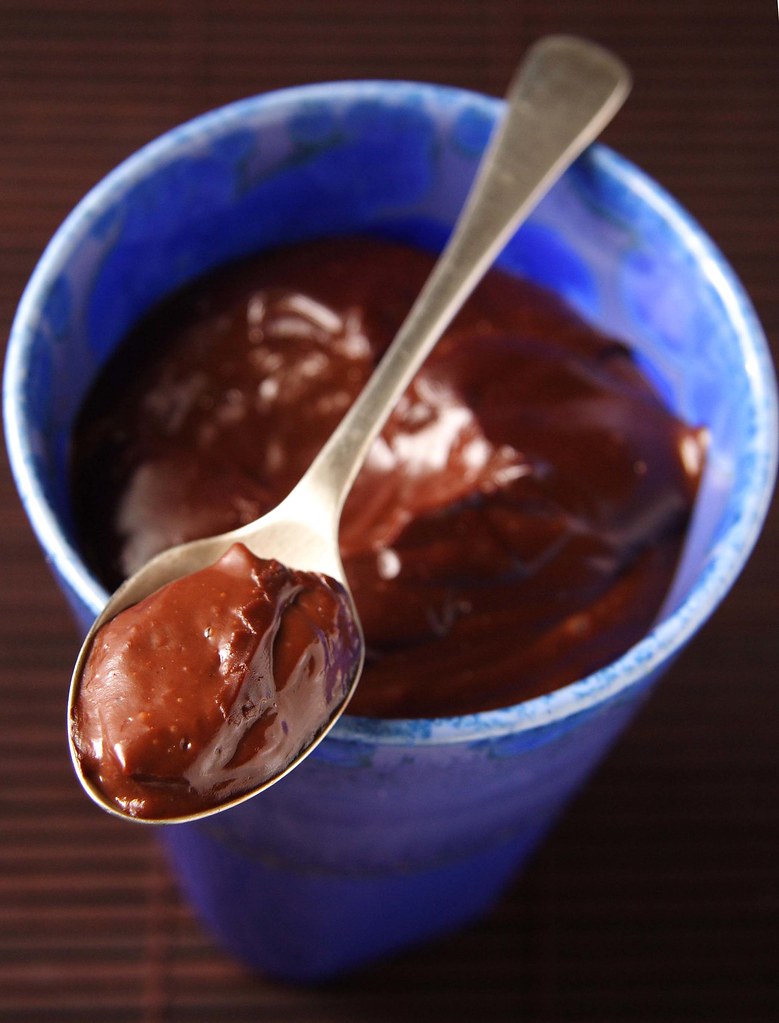
SHF#38: Fool-proof Chocolate Pudding

It might not come as a great surprise when I say that I haven't been posting much lately - or cooking for that matter (the "quick, I'm hungry" kind of cooking doesn't count here). However, I didn't want to miss out on this month's Sugar High Friday hosted by Zorra of 1x umruehren. Alas, due to work commitments, there was no way I could possibly make the sticky date pudding that I had already started dreaming of... It's one of the real Aussie desserts and to be found on many a restaurant menu in Sydney. I've had it only once so far and since then, always wanted to recreate it myself. This is what it would look like but it will have to wait until next year.

However, what does one do when coming home from a long day at work and craving for some comfort and food or comfort food so to speak? You skip dinner, of course, it's past 11pm after all, and rather go straight for dessert instead. In my opinion, there's not much a warm, smooth pudding couldn't fix - even if it actually is a custard, technically speaking.
This really fool-proof recipe fits perfectly into Zorra's theme "The proof is in the pudding" or "The proof of the pudding is in the eating", as the original version of the saying goes.

As I've mentioned before, I quite like the ready-to-use custard mixes you can get in Germany and always make sure to take some with me when visiting my family. However, in order to qualify for SHF#38, this one would have to be made from scratch. It's not quite as fast as opening a sachet but it's dead easy nonetheless. And in case I haven't said it yet, it's truly delicious!

Warm Chocolate Pudding (or Custard)

The ingredients

1/2 l whole milk
40g cornstarch
50g sugar
40g cocoa, dutch-processed
pinch of salt
1/2 tsp vanilla bean paste
1 egg yolk (optional)
1 tbsp dark rum (optional)

The yield
2 big servings or 3 smaller ones

1
Pour 6 tablespoons of the milk (I like to use more) into a mixing bowl. Bring the remainder of the milk to a boil.

2
Add cornstarch, sugar, salt, vanilla bean paste, and cocoa to the reserved milk. Mix thoroughly with a balloon whisk until smooth.

3
Once the milk has reached boiling point, take it off the heat and pour in the cocoa mixture. Keep stirring while doing this.

4
Let the pudding come to a boil once more and let it cook for a minute, stirring all the time. The pudding will thicken quickly.

5
While still hot, whisk in add egg yolk and rum. You need to keep whisking until you are ready to pour the pudding into serving dishes or a skin will form on top.

The source
Adapted from Hedwig Maria Stuber: Ich helf Dir kochen

The hint
This recipe states a lot of cocoa. Unless you're fond of a bittersweet, dark chocolate taste, either decrease the amount of cocoa to 20-30g or add more sugar (can be done at the last step). I've added more sugar but afterwards thought that the original amount is enough.

If you like a lighter texture, fold in a stiffly beaten egg white.

Thursday, 15 November 2007

A little Tart and another Anniversary

What do you do when you realize that you have never ever celebrated the anniversaries of your own relationship? After all, this is about being with the One And Only, right? There should be something to celebrate, right? Well, I am growing older, ahem, and I tend to forget a little bit here and there. Haven't I said that before..;-) Luckily, my boyfriend is no different in that respect. Not that he keeps forgetting things (big difference between us as he likes to point out) but when it comes to anniversaries he's just your average bloke who doesn't care much about these things. However, when approaching our - gasp - fourth anniversary, I decided that things finally had to take a turn for the better.

So off we went to Sydney's Observatory Hill that overlooks the harbour including Harbour Bridge, lots of boats, lots of lights, and other things necessary for some romantic atmosphere. After eating our way through crispy chicken pieces, Greek salad, foccacia, brie cheese, and hummous, there was almost no room left for dessert. However, who could say no to a creamy coffee chocolate ganache in an almond hazelnut crust? We certainly didn't!

To make the pastry cases I only had to defrost some leftover shortcrust pastry. For the filling, I had been keen for a while to try these tempting little tarts. However, after fully baking my tart shells, I didn't dare baking them again with the filling inside. I figured that halving the dairy components and not using any eggs might give me a creamy consistency that's still sufficiently stiff. With just a little cream and milk, I only used a quarter of the original amount of coffee. This way, the coffee flavour was nice but already very subtle on the second day. Next time, I might go back to only halving the amount of coffee.

These Vietnamese coffee chocolate tarts made for a fabulous ending of our anniversary picnic and will always remind me not to ever forget it again...

PS: I didn't want to prove this particular point any more but I have to add something I ... forgot ...: This tart is my entry for WTSIM#11 "Waiter, there's something in my...topless tart!" hosted by Cooksister!

Wednesday, 7 November 2007

Happy Birthday!

Have you ever forgotten your own birthday? Whilst this has happened to me with other people's special days - luckily not too often - so far I was at least able to remember mine. However, it almost happened to this dear blog. Just by chance, I asked myself yesterday when its first anniversary would be. I quickly checked here and - oh my gosh - only one more day to go!

After one year, it's almost hard to believe that there was a life without food blogging. Not that I create something blog-worthy everyday - but all this thinking about food, making food, and photographing food turned out to be much more than a mere hobby. For some people, it might not look like a creative outburst having to wait for dinner whilst I'm busy taking pictures from all angles. However, it gives me an unexpected sense of inner satisfaction when one of my creations not only tastes good but also photographs well. And the best part? Lots of nice people, completely unknown to me, stop by, have a look around and sometimes even drop me a line. This thrill I get when I read new comments, still hasn't worn off. Whenever I'm feeling moody, all I have to do is looking at my stats and smiling at the idea that someone from the Maldives or Ghana or some other very remote place payed my little blog a visit... Nora, I'll always feel indebted to you for introducing me to this new world!

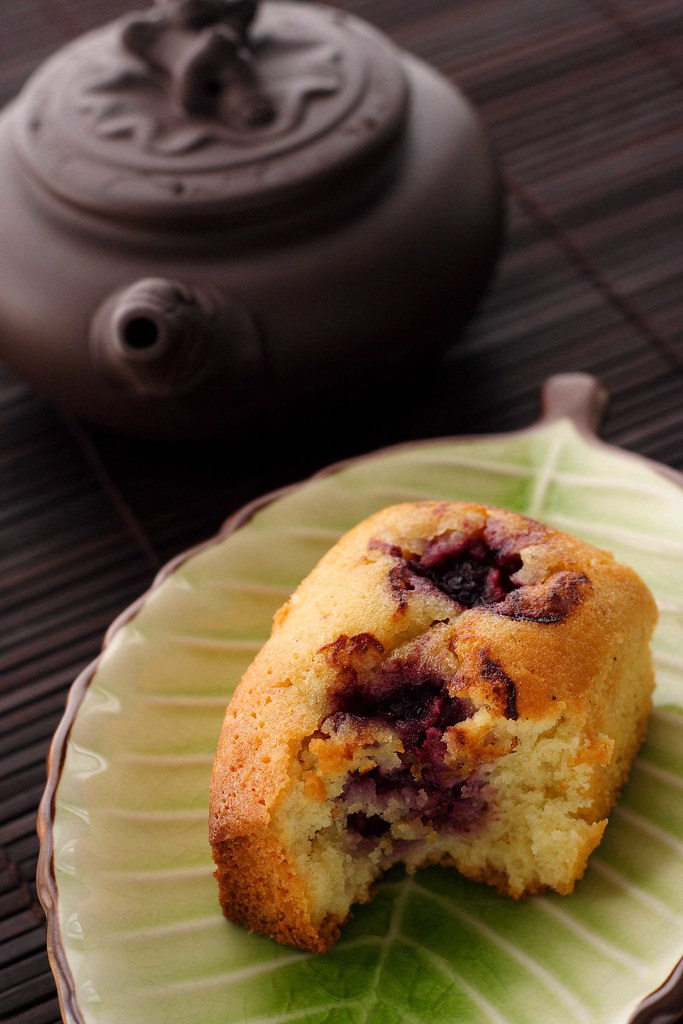
But back to the birthday - there has to be a cake, right? Being only one day ahead of time, I couldn't possibly make a layer cake, try my hands on macarons or do any other fancy stuff. However, I still wanted to do something I'd never made before. One idea popped up in my head that had been lurking somewhere for quite some time: financiers. They're quick to make but still have something mysterious about them. At least for me because in German cookbooks you would never see a cake that doesn't contain any egg yolks, almost no flour (let alone baking powder) but lots of butter, sugar, and almond flour instead. I was a little bit suspicious how such a cake should rise and brown nicely. However, I decided to go with a recipe I had found at Feeding my Enthusiasms - it's originally from David Lebovitz so I figured you can't go wrong with that.

And all my worries proved absolutely unnecessary. After very little work, these tiny cakes began to fill the kitchen with their almond perfume - and they looked so cute with their golden brown tops peeking out of the paper garments. They even made my boyfriend utter an appreciating "hmmmm"...

Tuesday, 28 August 2007

SHF#34 - Going Local

A long time ago, when I first thought about moving to the other side of the world, my boyfriend would always start to chuckle: "I´d love to see you explaining to some Aussie bloke who never ever left Australia, from which particular, tiny area in Bavaria you´re from!" Well, if there´s one thing I´m getting missionary about then it´s the cultural diversity of my home country. Mind you, I´m not making any judgements - I just love to get to know all these little, graspable things that are part of this very abstract concept of identity. And let me tell you, there´s a lot to be proselytized - not even the people from our neighbouring state (on the Western side of southern Germany) knew enough about us.

Ladies and Gentlemen, let me introduce you to one of the seven districts of Bavaria which is located next to the Czech border: the Upper Palatinate (aka Oberpfalz)!

Ok, I know it´s pretty small. It´s not even an economically important area - once blooming industries like porcelain and lead crystal manufacturing are now wilting; and the long time in the shadow of the Iron Curtain wasn´t a good thing to begin with. There even is a rather mean saying that all the area has in abundance is stones on the fields.

However, with their limited supplies (milk products, potatoes, and apples were a staple) the people from the Upper Palatinate not only managed to get by but also produced some really tasty, hearty country fair.

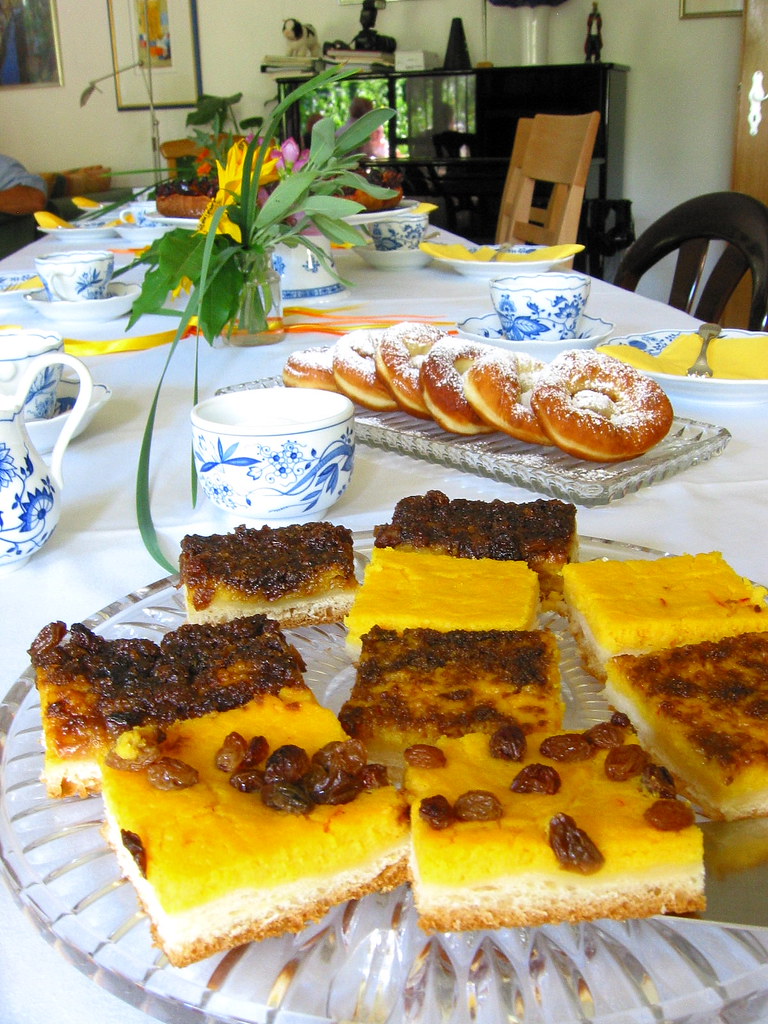
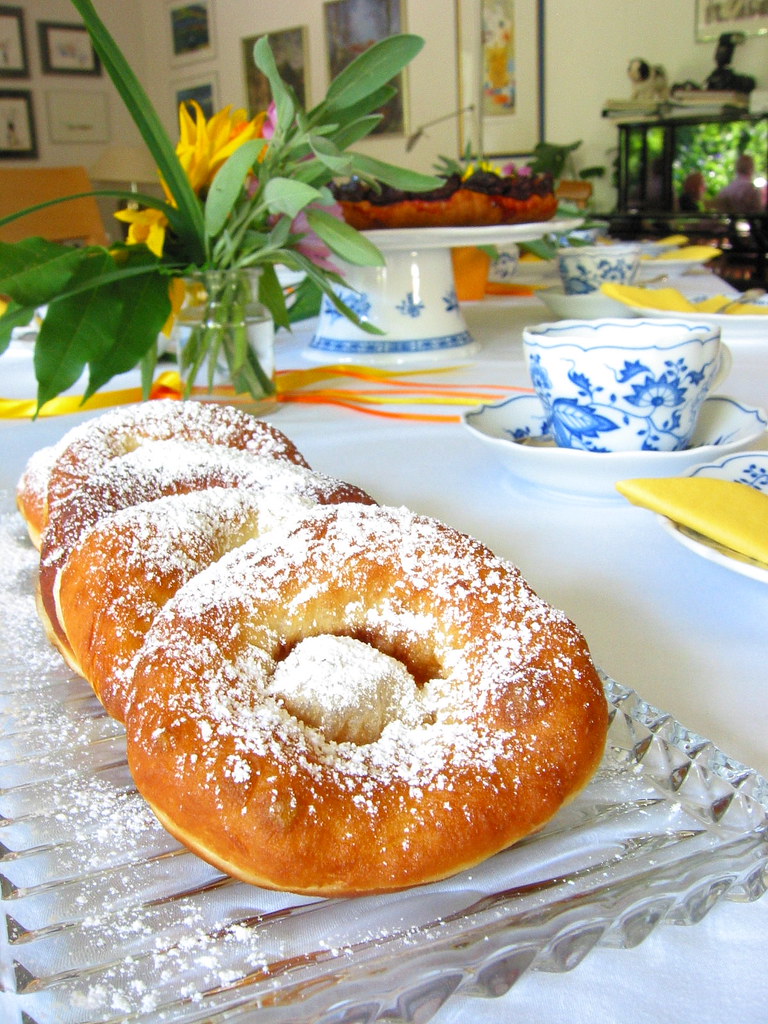
Whenever there is a feast in this area it won´t be complete without some of the local doughnuts (which don´t have a hole in the middle but a very thinly stretched piece of dough). One of the bigger feasts was the annual church anniversary where the whole village would come together and party for an extended weekend. This occasion would call for another traditional cake, the so called "Church Anniversary Cake" or "Parish Fair Cake" - I can´t even find a proper translation for that one... The pronounciation in my home dialect may seem a bit weird: it´s "Kirbakejchln" (doughnuts) and "Kirbakoucha" (cake).


The doughnuts are very crispy in the middle, buttery-soft in the thicker parts, and not sickly sweet. As a kid, the first thing to do when visiting my grand mother, was looking into her pantry for some of these doughnuts...


Whilst doughnuts are well-known allover the world in some way or other, I bet that this cake with its peculiar yellow colour won´t be know to many people outside my area. The colour of the semolina pudding layer comes from the generous use of saffron. This traditional spice is still rather expensive and that´s probably the reason why people had this cake only once per year. Saffron also makes for a particular taste that I didn´t cherish as a kid (but I do now). You can have this cake to your liking either plain, topped with raisins, with a mixture of brown sugar, ginger bread crumbs, and syrup or with simply everything. Enjoy!


Although I´m pretty late, this is my entry for this month´s Sugar High Friday invented by the Domestic Goddess herself and this time hosted by Johanna from The Passionate Cook. Her theme of local specialties was just perfect for last weekend when I made these things for the 60th birthday party of my father which happened to be on the same day as our local parish party!

PS: Hidden behind the flowers is a traditional plum cake - I told you, I don´t do anything but eating...

PPS: Please excuse the subpar pictures, without the camera I´m used to, I´m pretty hopeless...


Parish Fair Doughnuts


You can use your preferred recipe for sweet yeast dough like this one. The only adjustment for soft doughnuts is to make a very soft dough by adding more liquid including alcohol. For 500g of flour add a shot of rum or kirsch and at least double the amount of milk (depending on your preferences).

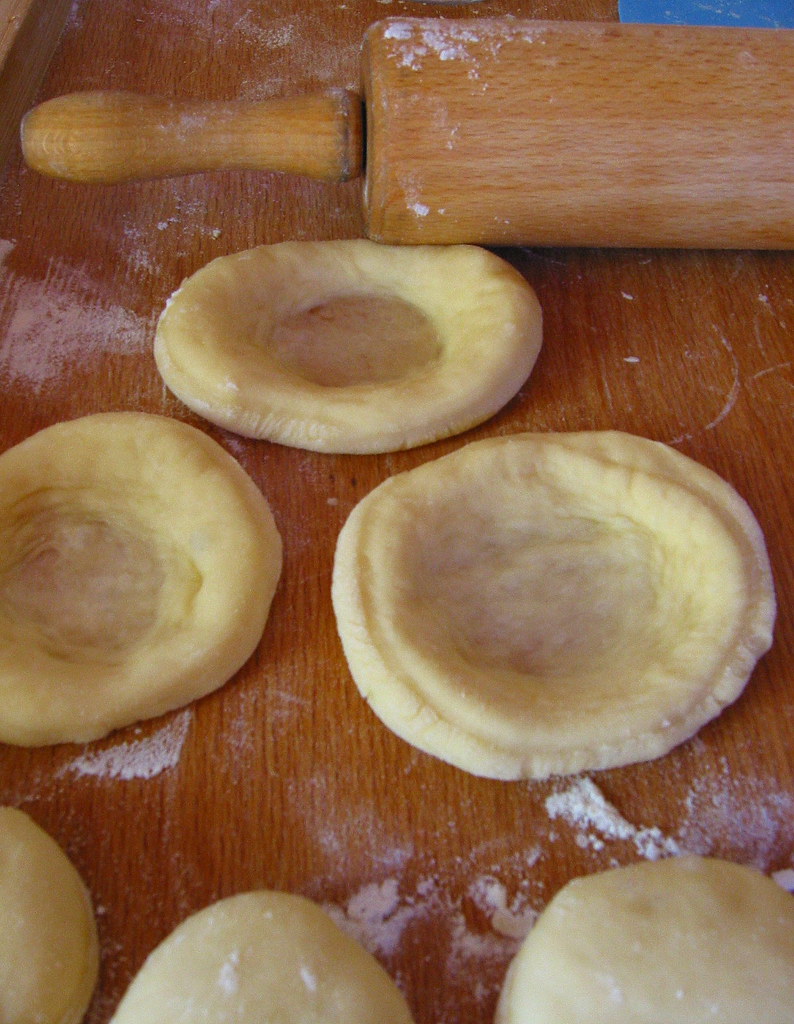
After the first rise, roll out the dough to almost one centimetre in thickness on a lightly floured worksurface. Using a small drinking glass, cut out rounds. Cover with a towel and let rise until doubled. Now comes the tricky part that I haven´t quite mastered yet: You have to turn and stretch the round piece of dough between your thumbs and index fingers until the middle is like a window pane and the rim is of an even thickness (well, more or less). Deep-fry each round on one side until golden brown, then turn around. It is important that there is no hot oil in the cavity after the turn (otherwise the middle won´t stay yellow). Let cool down on sheets of kitchen towel and serve with lots of icing sugar. The next day, refresh in the hot oven for a couple of minutes.


Church Anniversary Cake

Again, use your favourite sweet yeast dough as a base but make sure that this one isn´t too soft.

The ingredients

1.5 l milk
225g soft semolina
sugar to your liking
0.5g saffron (or a little bit more)
250g butter
5 eggs, separated

2 big pieces of ginger bread
400g light brown sugar
1-3 tbsp sugar beet molasses
250g raisins
rum (optional)

This makes enough to cover two big baking sheets as seen above.

1
Cook a thick semolina pudding, stir in butter, saffron, and sugar to your liking.

2
Add egg yolks. Beat egg whites until they hold soft peaks and gently fold in.

3
Roll out the dough onto your baking sheets and let rise for 15-20 minutes, cover with yellow semolina mixture.

4
Depending on your preferences, either bake plain or with raisins plumped in rum or with a sticky mixture of brown sugar/crumbled ginger bread/molasses or put everything on top.

5
Fan-bake at 150 degrees Celsius until the edges of the dough are golden brown.


The source
Adapted from a local cookbook: "Weidener Kuechengeheimnisse"


The hint
Tightly wrapped, the cake keeps very well for several days. The doughnuts can be frozen.

Saturday, 4 August 2007

Anh's Cottony Cheesecake - Surprise at First Sight

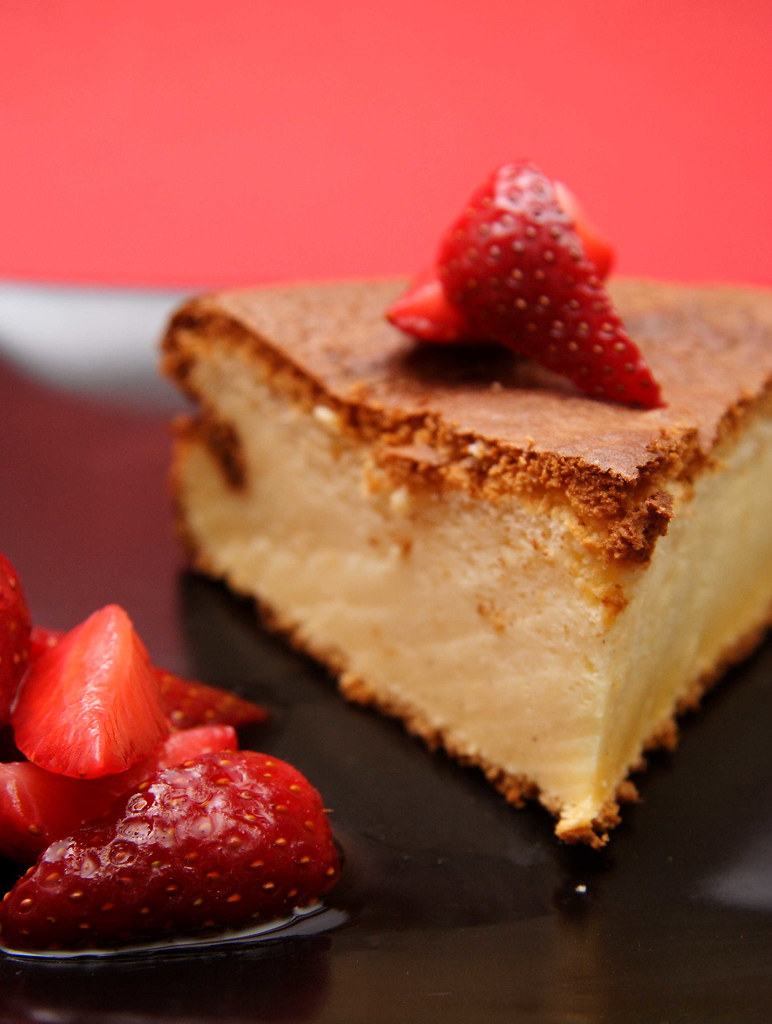
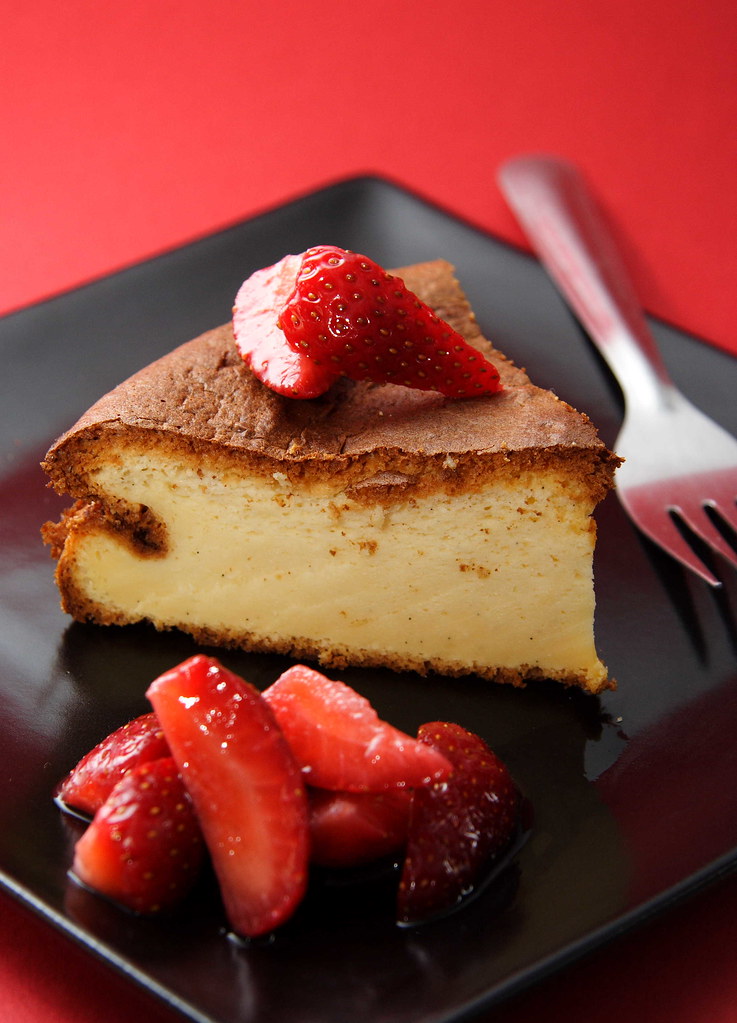
Finally, finally... Honestly, I feel really bad for making you guys wait such a long time... Should have at least added the link to the original recipe - stupid me... As the title suggests, I saw this cheese cake over at Food Lover's Journey - the lovely blog of Anh from Melbourne. Besides loving all kinds of cheese cakes, I was truly intrigued by her love affair with this particular cheese cake. Wondering if I was to fall in love at first sight, too, I set to work. The only change I made was substituting dark rum for the lemon juice and vanilla bean paste for the black sesame powder (it was late at night and I didn't feel like hunting down this ingredient although I'm pretty sure that it's preferable to the rather well-known vanilla flavour).

For some reason, my computer decided to continually hibernate itself so I had a hard time making sure that I got all the ingredients in the right amounts (nearly forgot the corn flour...). This chaos could have been the reason for not thinking about the right kind of cream cheese to choose. Usually, I have the slightly fat-reduced one for breakfast and that's what I used for the cake, too. However, this resulted in a batter with pouring consistency - I definitely had no need to add any more milk as Anh had suggested in her recipe. And I'm pretty sure that I beat the egg whites until far too fluffy. All in all, the whole thing reminded me of souffle batter - not a bad thing in itself but I started to feel a bit worried - the recipe said it should be like your average cake batter...

Anyway, I poured it into my 20-centimeters spring form pan; the left-overs went into my little heart-shaped moulds. And then the waiting began. One hour and ten minutes is an awful long time when you're desperately wanting to eat this cake... I stared through the oven door and watched the batter rising beautifully, just like a souffle. However, I was pretty sure that this lofty appearance wouldn't last very long and during the last third of the baking time the cake flattened out quite a bit. It was then when I noticed that I had simply forgotten the water bath the recipe had called for...

Despite the fact that I had messed up a lot, the cake soon started to smell wonderful. When I took it out of the oven, I could barely contain my impatience and quickly cut one of the little cakes in half. Due to my greediness, I don't have any pictures... The texture was quite different from the large cake. The small ones had retained their airy structure and with their dark brown edges, they reminded me of Canneles. Mind you, i've never eaten any but they looked exactly like this or like that had there been any chocolate in it. Now I definitely have to try the real thing!

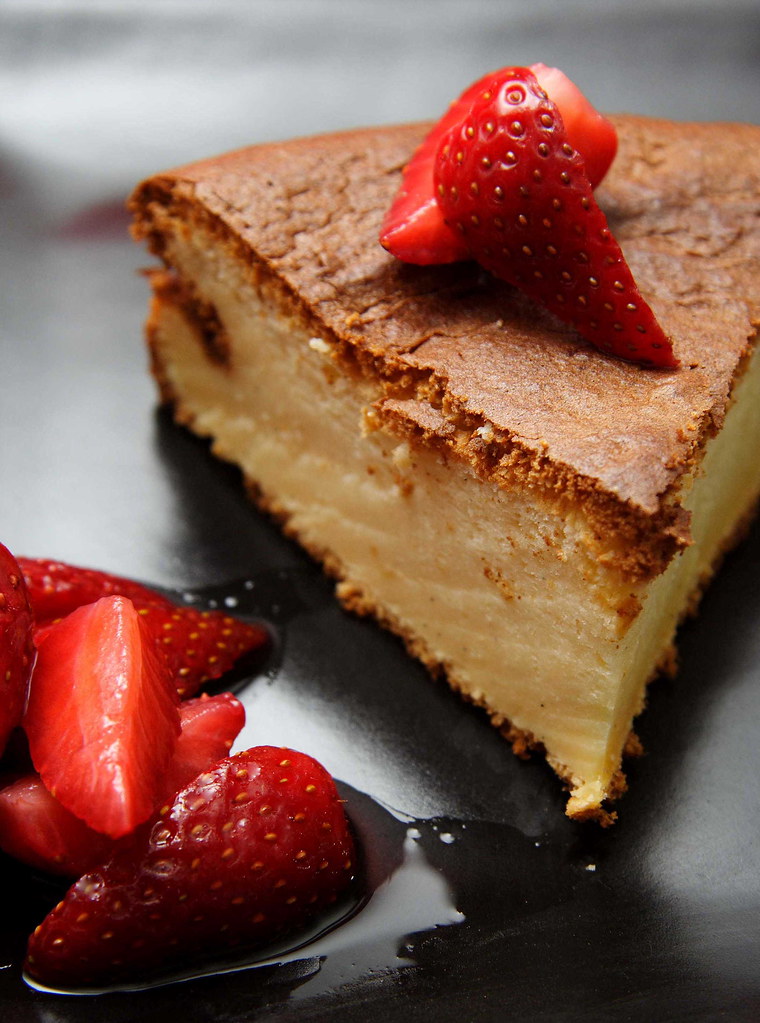
The next day, during a dinner party, I cut up the large cake and got my second surprise. Although the cake didn't have the decidedly cottony texture of Anh's original, it reminded me of another French specialty: Far Breton. I had eaten this custardy prune-studded cake only once in my life while on school exchange in Brittany. However, I loved it so much that I still remember the taste of it. And this cake was a darn good replica!

All in all, this cake was surprise at first sight - and what a good one! Now I just have to find the time to try the original recipes. Besides following Anh's recipe to the letter...


The hint
First, I served this cake with warm berry sauce and slightly whipped cream. However, strawberries marinated in a little sugar and Cointreau were an even better accompaniment.

Wednesday, 27 June 2007

Craving Vanilla Custard


Sadly enough, there haven't been many posts in this month. Due to a couple of very busy days, I didn't even have time to read my favourite blogs. But even worse, I've even managed to miss the deadline for this month's Sugar High Friday... If I'm very lucky, Jennifer - The Domestic Goddess who not only invented this popular blogging event but also hosts it this time - will have mercy on me - but if not, I can't blame her...

Anyway, I still want to tell a story about one of my all-time cravings. But beware, it's not something very interesting. Most likely, most people will have made something like that ages ago: homemade vanilla custard.
However, when I was little, I thought vanilla custard came out of a box. I did know that milk does come from cows and not from the supermarket (after all, I grew up in a little village and visited said cows almost every evening). But whenever I was craving vanilla custard, my mum would just open a paper package with a flour-like mixture, stir it into milk, and after a little boiling I was a happy camper. Up to today, I still don't know anyone personally (at least in Germany) who would make it from scratch. Although it might be possible that I accidentally made something that qualifies as custard when working on a more involved dessert recipe, I haven't done it consciously - until last weekend.

Jennifer's task to create something that you crave regularly but never actually made yourself was the proper occasion to finally try my hands on my very first vanilla custard. That said, this recipe isn't particularly difficult and it was whipped up in no time. However, I felt a bit timid. Would it be able to stand up against the beloved package mix? Could I - at the ripe old age of 30 - leave my childish custard addiction behind and fall in love with the real thing?

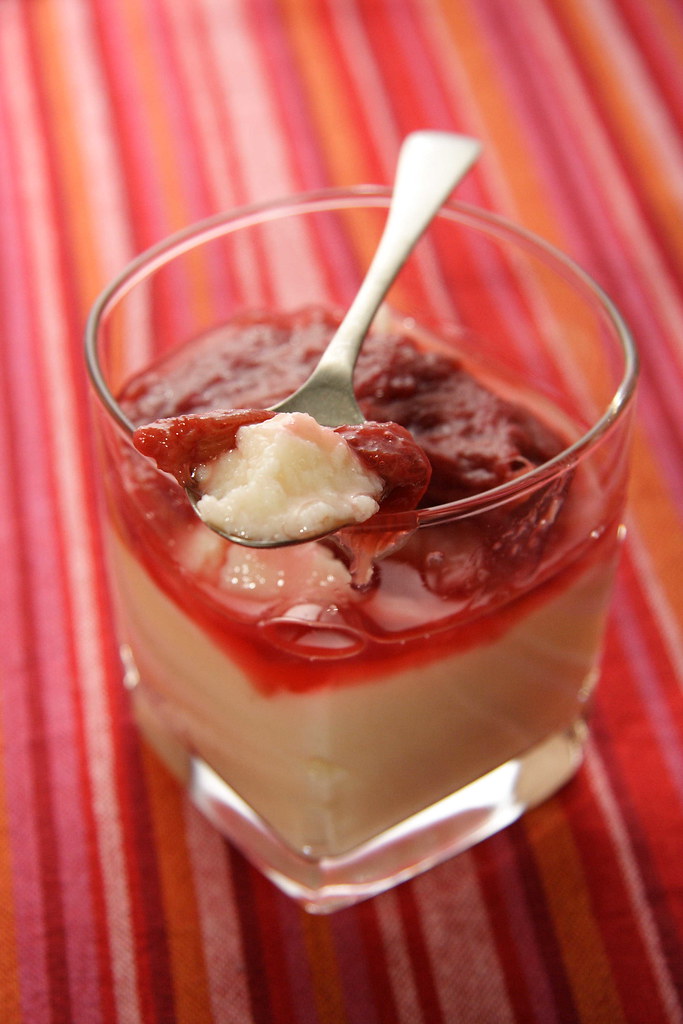
I tasted at every stage, carefully monitoring the changes in texture, colour, and taste. And truth be told, once the egg yolks were incorporated, this custard tasted exactly like the one I was already used to (but I take care to buy the good stuff with real vanilla). Not only taste, even colour and creaminess were exactly the same. A bit startled, I folded in the egg whites. And that's where things started changing. My eggs had been too big. Whilst this foamy feather-light custard was still pretty good, it had nothing to do with my treasured memory. And it was by far too soupy to set and be inverted later (I tried and it resulted in a very unphotogenic puddle on the plate). End of the story: I guess I will still resort to my package mix - unless it's a very special occasion...


Homemade Vanilla Custard

The ingredients
750ml whole milk
100g cornstarch (if you want to invert it - the original recipe stated only 60g)
75-100g caster sugar
1 tsp vanilla bean paste
2 small eggs, separated (If you only have large eggs, use two yolks and one egg white)

Serves 6

1
Whisk cornstarch, sugar, and vanilla bean paste into roughly 150ml of the milk.
2
Bring the remainder of the milk to a boil. Once boiling, remove from heat and stir in the cornstarch mix, using a wire whisk. Move back to heat and let it come to a boil again. Let boil for at least a minute or until noticeably thickened.

3
Stir the egg yolks into the thickened milk. (I waited a couple of minutes to let it cool down a little bit - didn't want to end up with scrambled eggs). The mixture will thicken a bit more.

4
Beat the egg whites until stiff and fold into the custard.

5
Pour custard into moulds and let cool. Refrigerate until serving.

The source
Adapted from Hedwig Maria Stuber: Ich helf Dir kochen

The hint
Serve with your favourite fruity sauce. I used frozen raspberries heated up in some Cointreau with a little sugar added.

Tuesday, 5 June 2007

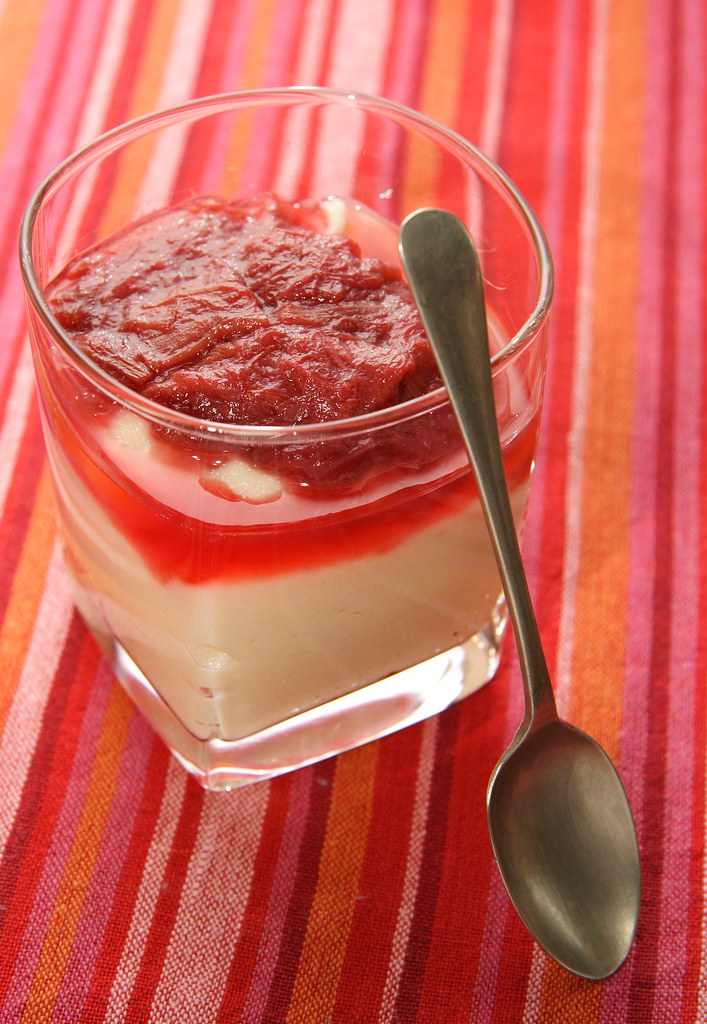
Semolina Pudding with Rhubarb Compote

Another day with another adventure in the grocery store: Doing my daily shopping for one once during the morning, I noticed lots of shop assistants around, filling up the shelves and generally being very busy. I contemplated the possibility to ask for something I've been searching for quite a while - semolina. It looks like I've never grown out of this childhood treat that always comes in handy when I want some quickly cooked lunch that should also satisfy my sweet tooth while not being completely unhealthy. I go through a lot of that stuff.

However, stocking up on it proved to be a bit of a problem. In the supermarket next to our first flat in Sydney, I had figured out after a while that semolina was to be found in the bakers’ aisle, next to nuts and vanilla essence. My other source was small grocery shop run by people from the Balkan. Squeezing myself through the extremely narrow aisles was fun already not to mention all the incredible stuff you could find there: Preserves, canned vegetables, spices and dried fruits unknown to me. Where was I? Right, this shop had the most wonderful semolina that resulted in a very smooth and almost silky semolina pudding. What shall I say – I still miss it.

Now living closer to the central business district, I could choose between two supermarkets but hadn’t found any semolina – despite having asked for it several times. This morning, after hesitating for a little while, I decided to give it another go and approached one of the shop assistants.

"Excuse me, could you please tell me where to find semolina?” I said in my nicest I-don’t-want-to-cause-any-hassle-voice.
His answer was short: "What's that?"
"Ahem, something like cracked wheat?!" Being at a loss for words, it was the quickest reply I could think of, knowing that it wasn’t quite correct. Have you ever had to explain what semolina actually is??
The shop assistant decided to take the reasonable way and took me to a colleague hoping that he would know more about it.
“Do you know where to find semolina?” – still with my nicest I-don’t-want-to-cause-any-hassle-voice.
“What’s that?” Haven’t I heard that one before? After providing my non-appropriate explanation again, the shop assistant led me to the cereal aisle. Standing in front of the boxed breakfast with no semolina whatsoever, I realised that he had just understood the word “wheat”.
And home I went without my beloved semolina.

Okay, just to be fair to the guild of shop assistants, I should mention that shortly after this memorable encounter, I finally got some semolina. In another shop, another shop assistant proved to be exceptionally helpful: She pointed one semolina brand in the health food section and another one next to the chocolate chips – sold out unfortunately.


Semolina Pudding with Rhubarb Compote

I have to admit that I never use a recipe when making this. Using the rule of thumb, I pour some semolina into the milk. If you add the semolina to the cold milk, you’ll never end up with lumps. Stir constantly until it comes to a boil, adding more milk if necessary (it will get stiffer while cooling down). Sweeten to your liking, add a pinch of salt, some vanilla sugar, and dust with cinnamon if desired.

Serve with your favourite fruit compote. I like to caramelize some sugar before adding the fruit. Stir to coat with caramel and depending on the juiciness of your fruits add a little water. Cook until you reach the desired consistency.

This is the ratio for semolina pudding one of my trusted old-style German cookbooks presents (serves 4):

1 litre of milk (low-fat works fine but whole milk tastes better)
100g semolina

To make the pudding bit richer, add up to 40g of butter, two egg yolks, and two egg whites beaten until stiff.

Thursday, 31 May 2007

Rescue Mission: Choc Bread Pudding

When I was planning what to make for a dinner party a couple of days ago, the failed mocha panettone turned out to be a blessing in disguise. The party was sort of an impromptu occasion due to a friend's leaving Australia the next day. While wanting to make something special, I couldn't spend all day in the kitchen on a week night. So I needed quick and easy recipes that still provided an aah&ooh factor. Looking at the big brown loaf of panettone on the dining table, I remembered having seen a recipe for chocolate bread pudding at Anna's Morsels&Musings - this way I would be able to get rid of the bread in the most delicious way!

Luckily, all my dinner guests agreed that this reasoning had been right: The chocolate bread pudding was very chocolatey and moist, but not soggy. The lightly whipped cream and the warm berry sauce gave the dessert a little lightness (not calorie wise, though). The only changes I made to the recipe were substituting dark rum for the Pedro Ximenez Sherry (though I'd love to try that one!) and adding some more milk, another egg, and some cocoa as I was suspecting that I used more bread than Anna. Not to forget the half-hearted try to get rid of some calories by using a mix of milk, evaporated milk, and cream instead of cream only - well, I admittedly had to empty some open jars...
The next day, suprisingly, the leftovers served cold alongside vanilla yogurt and some berry sauce tasted even better.

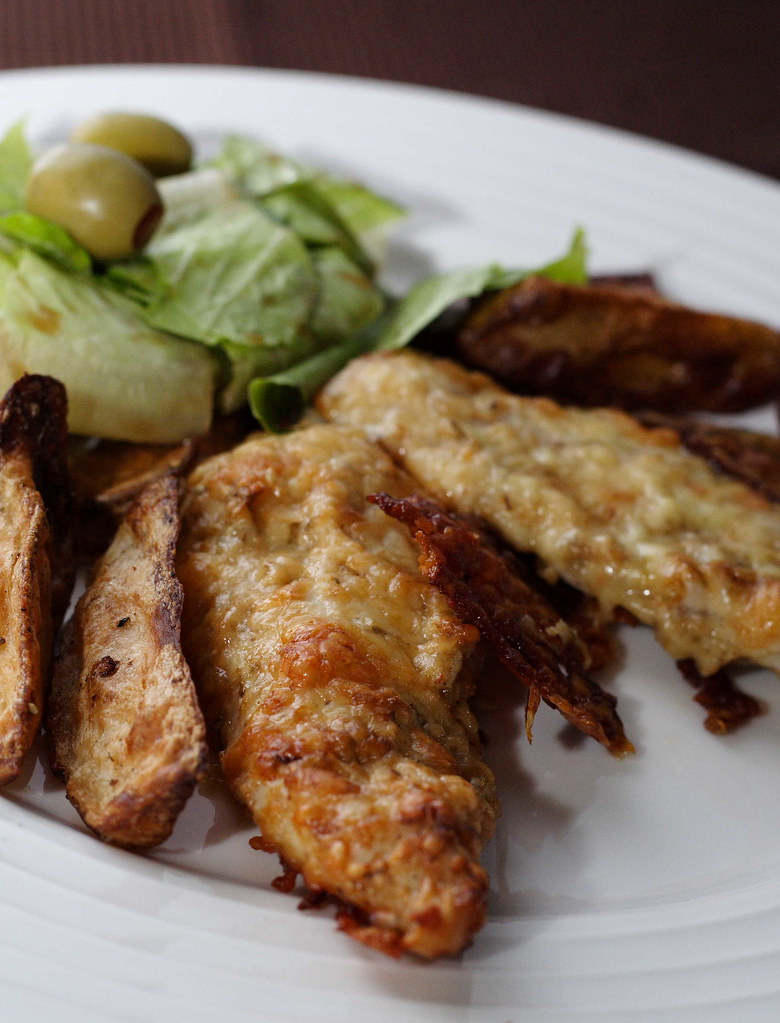
If you're looking for a fuss-free main course, this parmesan-crusted chicken will fit the bill perfectly. All it requires is a quick brush with a mustard mixture (I was pretty generous with the mustard but it was still not overly noticable - next time, I'd use even more), coating it in grated parmesan and up it goes for a good 15 minutes into the preheated oven. The chicken was very juicy and flavourful with some nice crisp from the cheese. Serve it with baked potatoes and you'll be able to enjoy the evening while the oven does most of the job.

Thursday, 19 April 2007

Plum Cake Heresy

When it comes to food, most people have a certain conception of how things have to be. It's like any other kind of dogma you could easily start a fight about: Do you pour some olive oil in the water while cooking pasta or don't you? What's the right way to cut an onion? Should there be a law for or against rinsing meat? Some of your culinary beliefs might never get questioned at all, others will get shattered after the first contact with a truly inaugurated foodie.

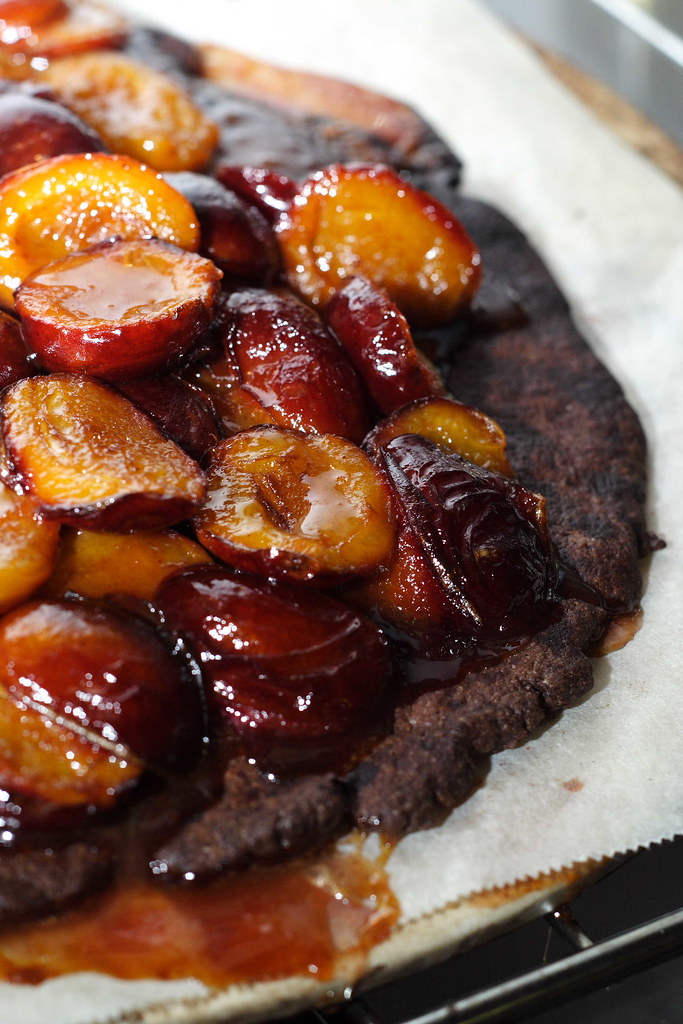
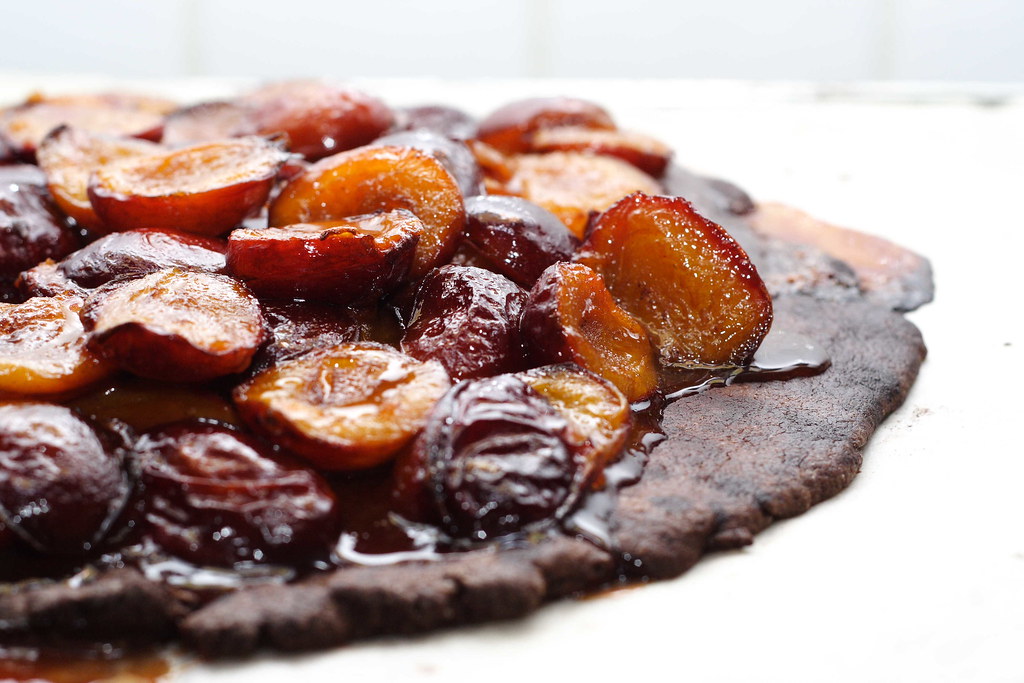
However, I would have never imagined that my idea of the perfect plum cake could ever change. All people ate it that way, right? There simply is no other way, right? To my utter disbelief, my boyfriend wasn't quite convinced of the superior nature of my plum cake. In fact in his opinion, the one he always ate at his parents' place was exactly how a plum cake should be. Now my curiosity was sparked. Although being pressed hard, the only thing he stated was: It's a brown dough. Patiently asking my way through all sorts of possibilities - was it soft, was it crispy - we settled on some kind of shortcrust pastry. Alas, he couldn't tell me where the brown colour came from. So I decided to do some online recipe research and after a while came up with a recipe for Chocolate Plum Galette found on Food & Wine. I wasn't sure if using cocoa really would produce the right kind of "brown" but I had to try and he likes all things chocolate anyway.

I slightly increased the amount of cocoa for a really rich chocolate taste but lacking fresh rosemary as well as an organic orange I omitted both. Truth be told, this rosemary seemed to stray away from my idea of a plum cake just a bit too much... Maybe one day I'll try this rather unusual combination but this time I paired the plums with the trusted duo of rum and cinnamon. Apart from the fact that the carefully shaped rim of this free form tart collapsed while pre-baking, everything went well.

I freely admit that the beautiful combination of plums and chocolate caused me to reconsider my once firmly grounded beliefs. But of course, it was not in the least as my boyfriend had remembered his mom's plum tarts.

PS: Meanwhile, I've inquired about the mysterious plum cake and got the recipe. I'm looking forward to giving it a whirl very soon.


Sunday, 1 April 2007

SLW Challenge: Who Inspires You?


Who inspires you? That's a question I seldom think about consciously. No matter that there are ever so many people to set an example or to turn to for advice in difficult situations. When Lara - the administrator of my food photography group on flickr - asked this very question as the monthly food photography challenge, it took me almost all of March to decide about it. In terms of food photography, I don't know anyone personally who is into that. Mostly all I can do is staring at other people's mouthwatering pictures and pondering what'dahell they did to make it look so good. Add to this a bit of reading around the internet and Lara's helpful hints on her food photography blog StillLifeWith and that's basically all I know about it.

Hence, it may not be unexpected that I frequently reach my limits. I had finally figured out whose pictures I admire the most but then, the trouble started. I absolutely adore the macro shots of Nicky from Delicious Days like this one - but I don't have a macro lens. Second, I absolutely adore the well-arranged shots of Bea from La Tartine Gourmande like that one - but I'm lacking all those nice little plates/bowls/cutlery/place mats you would need to recreate such a shot. Let me tell you my heart is aching whenever I come near any homewear store... Another one of my favourites is Melissa from Traveler's Lunchbox. Usually, she, too, does most of her shots with elaborate settings like that one. However, her picture of a flourless chocolate cake didn't use too many different things (except one very beautiful cake fork as you can see here) so I tried to reproduce it. And oh boy, did I fail... While managing to reproduce the cake (except that I didn't have ground almonds so I had to chop them myself which resulted in a less smooth batter and a less smoothly cut slice) - I wasn't able to reproduce the picture with the original soft lighting. Very disappointing! I also tried once to reproduce a very nice bread picture of MattBites but I couldn't figure out the proper lighting on that one either. It hadn't looked particularly difficult but it was particularly difficult. In the end, after many a trial and error, I managed to take a picture that I really liked but it didn't have much to do with the original. You see, I'm still wondering how on earth they do it...

Thursday, 15 February 2007

SHF#28: Sweet Seduction


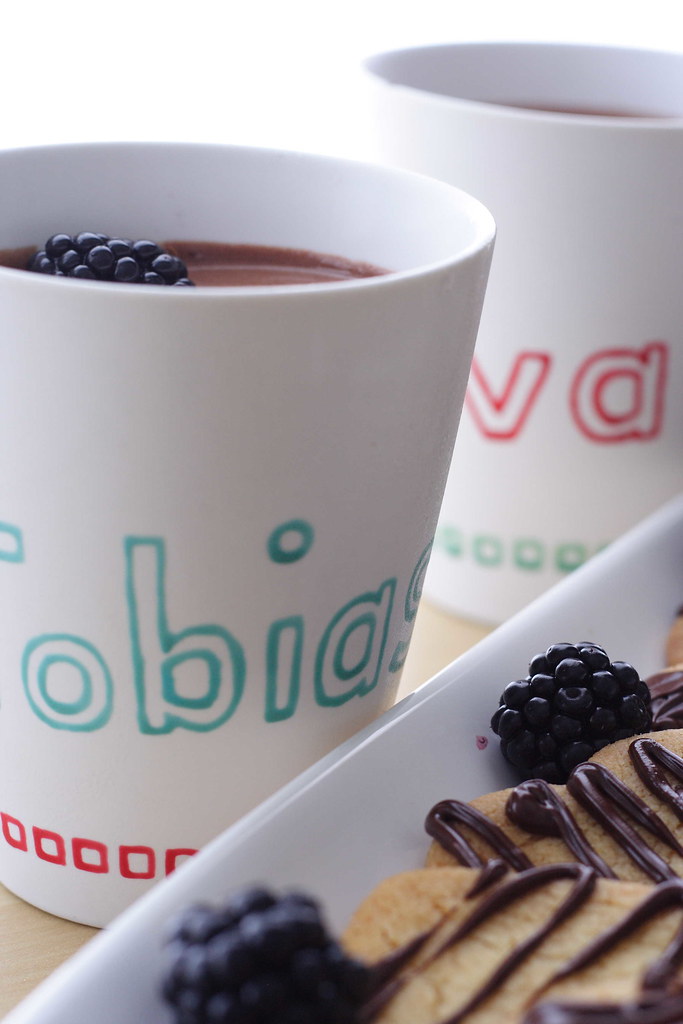
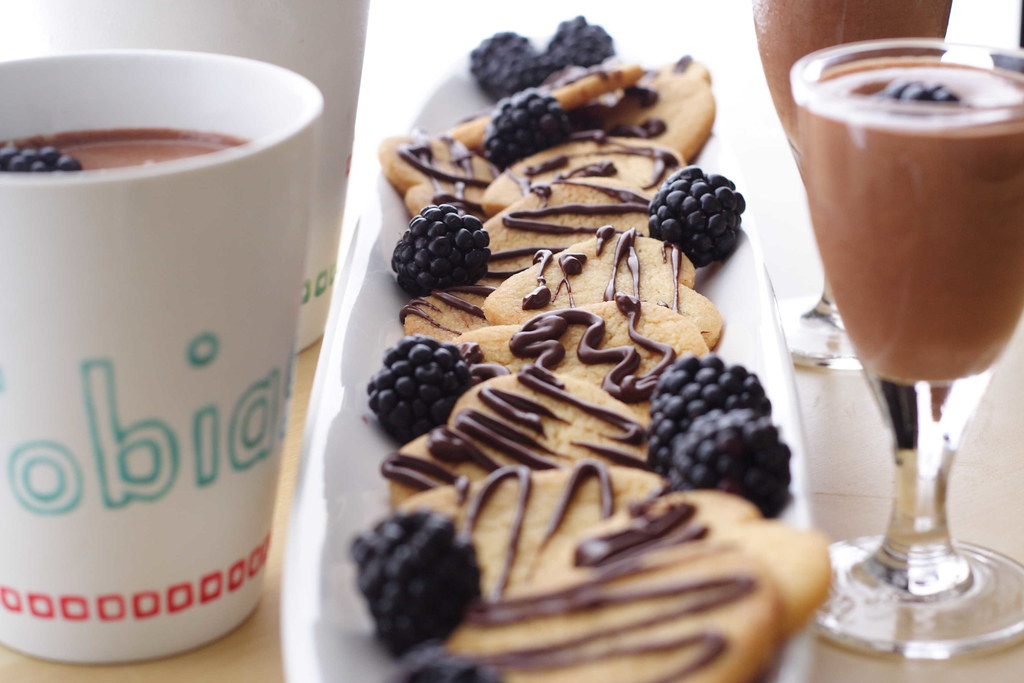
They may not look like it – but those mugs are well travelled. They’ve found their first home in a shared house back in Germany, got separated and after one and a half year were finally reunited in Australia. Hey, and they’re not even chipped, right?

Those mugs may not look elegant – in fact, they’re handmade by myself. They were part of the first Christmas present for my boyfriend after discovering that he did not own a single piece of crockery let alone cookware. Of course, while living in a shared house this wasn’t really necessary. But to me, at least having my own coffee cup would have been utterly necessary to feel at home. Knowing that in three months time he would leave Germany in order to move to Australia, I thought I had better paint my name on… So off he went taking the cup with my name with him and leaving me (and the other cup) behind. Ok, that does sound too pathetic. We knew already that I would come and join him later. However, we didn’t know that it would really take that long. Since then, the two mugs are quietly sharing the shelf with each other (and a couple of other mugs, too). We’re not quite sure yet where we will live in the next couple of years but I’ll make sure that those mugs come along.


While thinking hard about what to make for Sugar High Friday No. 28 "Sweet Seduction" - hosted by Jasmine of Cardamom Addict - my good old mugs gave me the well-needed inspiration to make something that could be spooned out of them. My boyfriend strongly voted for something chocolatey - and there you go!


Valentine’s Day Chocolate Pudding (or Mousse or whatever you’d like to call it)

The ingredients

300ml milk
1 teaspoon instant espresso (I forgot it in the end)
50g dark chocolate, broken into pieces
50g caster sugar
1 small egg
1 teaspoon of vanilla extract or vanilla sugar
Pinch of salt
1 heaped tablespoon of cornstarch (for dipping consistency, otherwise use 2 tablespoons)
1 heaped tablespoon of cocoa
1 tablespoon Rum (I forgot this one, too…)

100ml cream, whipped (20% fat works well in here)
1 teaspoon of cocoa
1 sachet vanilla sugar
1 teaspoon caster sugar

To serve: Blackberries and chocolate-drizzled sugar cookies for dipping

Yield: rather 3 than 2 servings (or 4 if you're not too greedy)

1
Using a wire whisk, mix milk, cacao, cornstarch, and salt (the instant espresso should go in here as well). While stirring continually, let it come to a boil (all the lumps should vanish by now). When the mixture is noticeably thickened, set aside.

2
In a metal bowl, mix caster sugar and egg. Prop the bowl on top of the pot with the milk mixture (providing they have suitable sizes) and beat until pale and fluffy. Take the bowl off the pot and continue beating for 1-2 minutes.

3
Put the chocolate pieces into the milk mixture and stir until melted and thoroughly combined (at this stage, the rum should be stirred in, too) and let cool down.

4
Meanwhile, beat cream with cocoa, sugar and vanilla sugar until stiff.

5
Fold egg and sugar mixture and cream into the chocolate-milk mixture. Spoon into mugs and pop into the fridge until ready to serve.


The source

My own blend of several recipes found on Food&Wine


The hint

I have to admit that I was not patient enough to let everything cool down properly. This and the fact that I had only used one tablespoon of cornstarch led to a somewhat viscous texture. If you prefer it a bit more solid, I’ll recommend to follow the instructions and to wait patiently… However, the resulting pudding-mousse was not only rich and chocolatey but also very silky!


In case you want to know what we had as main course:

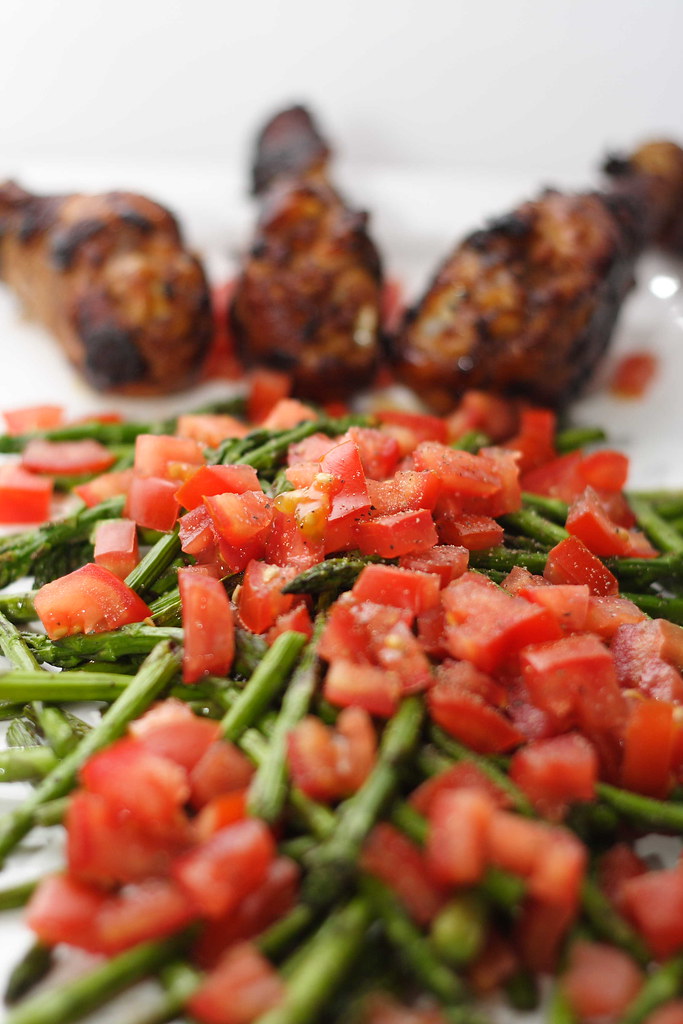
Roasted chicken drumsticks (marinated in honey, soy sauce, paprika, and chili flakes) with a salad of fried asparagus, diced tomato and croutons. I’m pretty sure it’s not a recommended match to have the Sparkling Shiraz of Bimbadgen Estate (Hunter Valley, Australia) with both courses – but Valentine’s Day was a perfect occasion to finally open this lovely bottle!

Monday, 5 February 2007

Frozen Jogurt with Passionfruit


Embarking on an adventure while knowing that you don't have neither the experience nor the proper equipment is probably a foolish thing to do. However, when I saw the elderflower and honey glace on Lara's Cook&Eat quite some time ago, I decided that it was time to finally make frozen yogurt with passionfruit. Ok, the connection might not be evident but I simply didn't have (and didn't now where to buy) elderflower syrup and extravagant honey. However, when I saw the passionfruit sale at my local grocery shop (10 passionfruits for 3 Aussie-Dollars), I didn't have to think twice. The fact that I don't own an ice-cream maker couldn't stop me either. I am well aware that you shouldn't make ice-cream without a properly churning machine unless you use lots of cream, egg yolks, sugar, and alcohol. My parfait - vanilla, chocolate&rum, cinnamon, or walnut praline - is pretty good and so rich that it definitely doesn't need an ice-cream maker. No big ice crystal will ever be able to build up in this addictive mixture...

However, once in a while you want something lighter and I do love frozen yogurt. I have never eaten a homemade version but I took Lara's version as an inspiration and then decided to just follow my imagination - and the unfrozen mixture was heavenly creamy and yummy. I tried to stir during the freezing process as often as possible but at some point I decided to go to bed. So if you want to reproduce this, take my advice: start early in the day so the yogurt will be thoroughly frozen when you want to sleep... All in all, I ended up with a tasty frozen yogurt which unfortunately wasn't as creamy as I had hoped. If you don't insist on properly formed scoops, simply let it thaw about 15 minutes before eating and everything will be fine! Or - even better - go and get yourself an ice-cream maker...


Frozen Yogurt with Passionfruit

The ingredients

300g cream (20% fat)
500g yogurt (3,8% fat)
3 sachets vanilla sugar (about 3 heaped tablespoons)
3 egg whites
100g caster sugar
pinch of salt
10 passionfruits

yields about 2 litres (roughly estimated)

1
Pulp the passionfruits and set aside.

2
Beat egg whites with the caster sugar and a pinch of salt until stiff but not dry. Set aside.

3
In a separate bowl, beat cream with vanilla sugar until soft peaks form. Fold in yogurt.

4
Fold the meringue into the yogurt and cream mixture and pour into a container suitable for freezing. Stir every hour with a fork to break ice crystals.

5
When the mixture starts to get thoroughly frozen, fold in passionfruit pulp - either mix in completely or try to create separate layers of frozen yogurt and passionfruit.


The source
My own creation


The hint
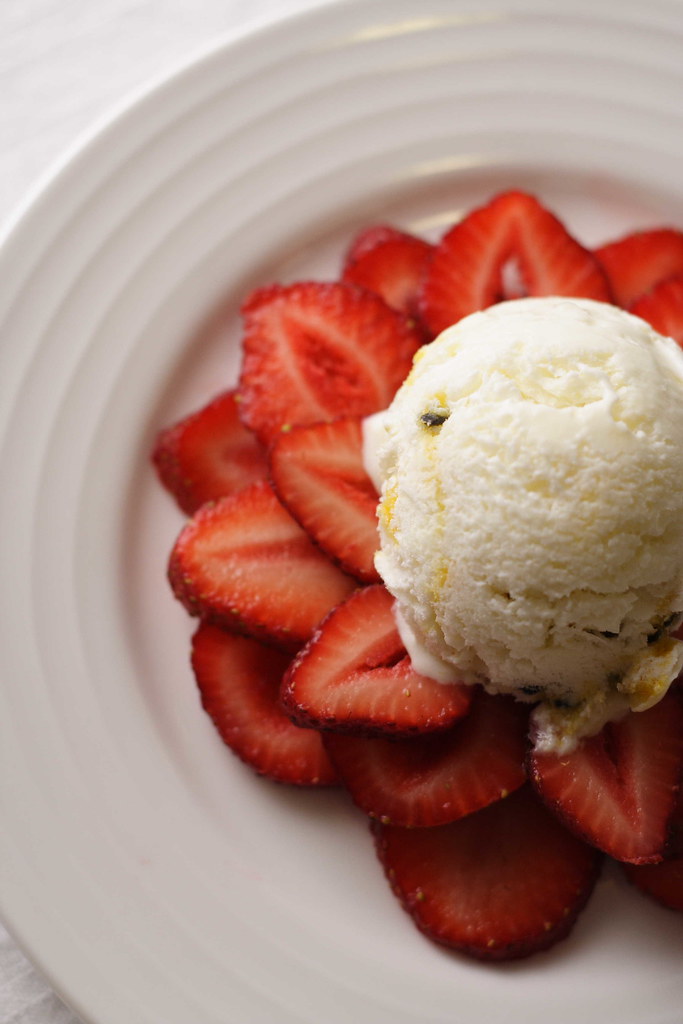
Serve either with sliced strawberries or with vanilla ice-cream and topped with natural yogurt.

Monday, 22 January 2007

SHF#27: Chocolate by Brand

I’ve eagerly awaited this month’s Sugar High Friday hosted by David Lebovitz, patissier and chocolatier in Paris: His theme is Chocolate by Brand. Great – who doesn’t like chocolate? But on the other hand, it really made me think: What on earth should I make? There are thousands of chocolate-laden recipes out there. And what type of chocolate should I use since it was of such paramount importance?

I have to say that so far, I have never used any sophisticated chocolate brand. It was during my first contact with the blog world that I learned about Scharffen Berger, Valhrona, and all those other fancy brands. Of course, none of my local supermarkets had any of those in stock. So what’s there to choose from? Nestle (I like their classic dark one but I wanted to try something different), Cadbury (which I can’t stand at all), and Lindt (I like their pralines a lot but I’m not a big fan of their bars).

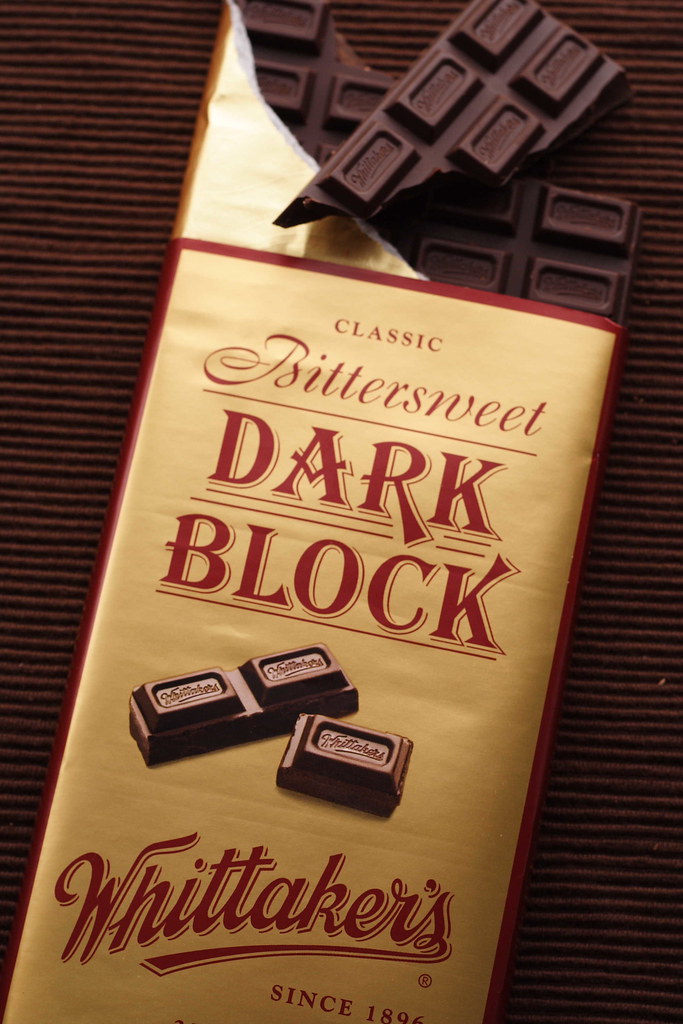
Apart from those, I found a brand from New Zealand that was completely unknown to me. Unfortunately, there is no reason why you should know Whittakers – at least that was my first thought after tasting a piece. I didn’t want to spoil the whole experience so I decided not to use it. (What am I going to do with that 250g-bar sitting in my fridge?) Luckily, on my way home I had also picked up a few bars of my favourite German chocolate brand, Ritter Sport.

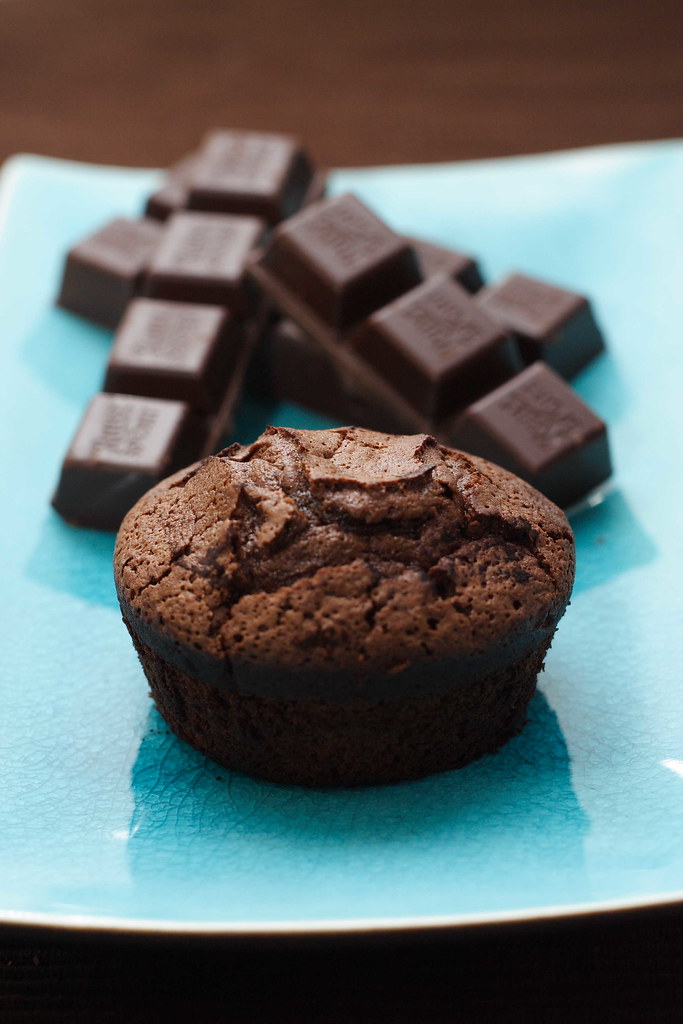
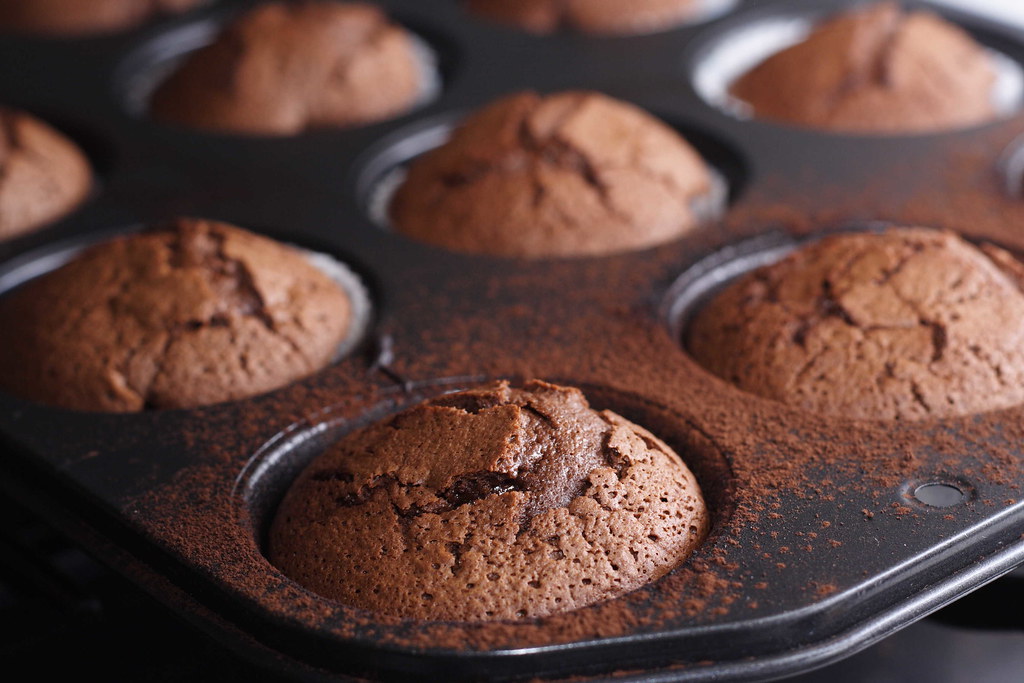
While thinking back and forth, I had also managed to settle on a certain recipe: flourless chocolate cake. I had never before made such a cake – so it was about time. And I reckoned that with such a pure recipe – only chocolate, sugar, butter, and a tiny bit of flour – the character of the chocolate would really shine. Originally, I wanted to try Clotilde’s version on Chocolate&Zucchini. However, due to my on-going not-so-strict diet, I decided to make the waistline-friendly version of Petra of Chili&Ciabatta. I strictly sticked to the recipe but baked the cake in muffin tins. Without any experience, I shouldn’t have done it… In such tiny baking pans over baking can happen pretty quickly. One minute too long in the oven and the gooey centre is getting solid. To my great relief, the cakes were not completely dry – so all was not lost. They were nice and chocolaty but due to my mistake didn't quite live up to their reputation. Next time, I’m going to try Clotilde’s version and maybe I’ll be able to track down those fancy chocolate brands!


Wednesday, 29 November 2006

Creating my own chocolate tart – an experiment


Every now and then, I provide cakes for informal birthday parties in my boyfriend’s office. On the one hand, it gives me a reason for baking which is always a good thing. On the other hand, the guys are always pretty pleased with the results and give me some more money than necessary for the ingredients. I would not call it an income but it’s nice to get shown some appreciation in a measurable way.

To cater for a crowd of hungry engineers, I usually make a small round cake and a baking tray. The small one always has to be a chocolate cake – all guys are just the same when it comes to sweet things. A chocolate sponge filled and frosted with chocolate ganache and raspberry jam proved to be a real crowd pleaser. However, having already made the whole lot once this week, I decided to try something different. Additionally, the order came on short notice and I didn’t feel like going to the supermarket twice a day. Therefore, a quick look into the fridge: I always have a little supply of chocolate so the key ingredient was not a problem. However, there was almost no cream left and only a little cream cheese. Instead, a big tub of low-fat sour cream sat on the shelf. I’m not extremely fond of American cheese cake but don’t they throw sour cream into it? How would this pair with chocolate? Too sour or just a nice counterpart to cut down the sweetness? Partly out of curiosity and partly out of mere necessity, I decided to give it a shot.

Fortunately, I had some leftover shortcrust pastry in the freezer which just has to thaw. In the meantime, I start with the filling by melting 150g of chocolate. I add cream, cream cheese, and sour cream – and the stuff tastes far too acidic. What to do? After all, I don’t want to disappoint the guys. Frantically, I stir in four tablespoons of cocoa – still not chocolatey enough. Okay, more chocolate has to be melted. It’s getting better but still not sweet enough. Some icing sugar is stirred in, followed by some rum essence to lift it up a bit. And step by step, I start to feel like having created something really good! To balance the taste a little bit, I add a small egg yolk and notice that I really like it by now. However, I'm still a bit insecure. Would it get firm enough for slicing? Would it match the pastry base? Would the engineers like it?

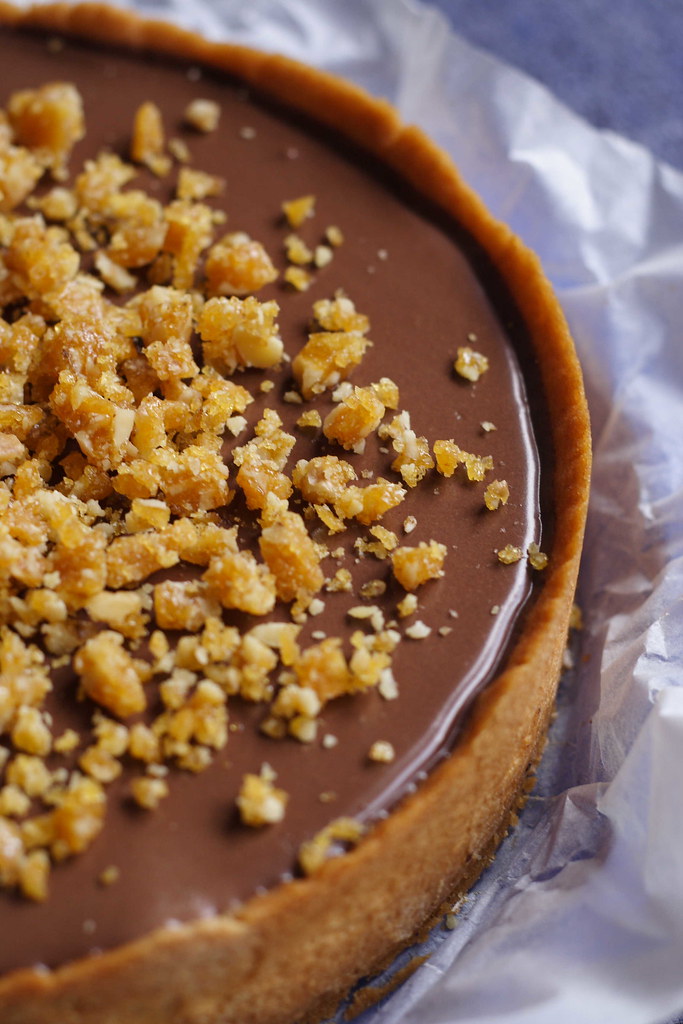
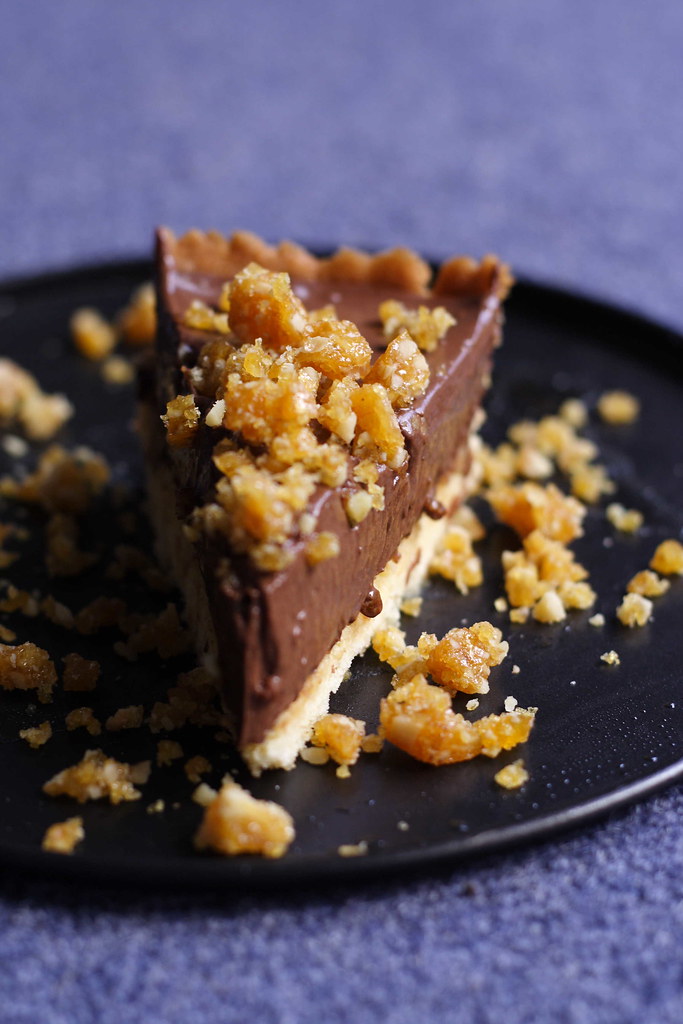
I pour the filling into the tart shell. The smooth and shiny surface of my experimental tart looks already good to me but I want to dress it up with some walnut caramel. Those dark golden bits have a stunning look and add a much welcomed crunch.

The next day, the engineers clean their plates even faster than usual.


The ingredients

Pastry base

A fully baked tart shell, 20 centimeters in diameter.
(I used a recipe from the bible for German down to earth food - Hedwig Maria Stuber: Ich helf Dir kochen)

Chocolate filling

250 g dark chocolate
300g sour cream, light
1 ½ tablespoons cream cheese
4 tablespoons thickened cream
4 tablespoons cocoa
4 tablespoons icing sugar
½ bottle of rum essence
1 egg yolk

Topping

A handful of walnut halves, chopped
4 tablespoons sugar

1
Break chocolate into pieces; melt over a bowl with hot water. Thoroughly stir cream cheese into the warm chocolate using a wire whisk.

2
Add cream and sour cream; add cocoa and icing sugar, stirring vigorously.

3
Add half of the bottle of rum essence, maybe ten drops. You could use real rum but I reckon the mixture would get too runny. Stir in egg yolk.

4
When the mixture has cooled completely, pour into tart shell and pop into the fridge until firm (or overnight).

5
For the walnut caramel, melt sugar over medium heat until golden brown. Remove from heat and stir in walnut pieces. Spread the sticky mixture on parchment paper using a knife. When cool to the touch and firm, chop into crumbles. Decorate the firm chocolate filling with walnut caramel. Chill the tart until serving.


The source

My very own creation

Friday, 24 November 2006

Fiery Chocolate Truffles – SHF 25


It must be about nine or ten months ago that I got to know the world of food blogs. When a friend told me about some of her favourite blogs, I started reading – and haven’t been able to stop ever since. Gorgeous pictures, wonderful recipes, a touching style of writing – and miraculously, everybody seemed to know each other. There was some sort of secret community between all those food lovers out there and they even gathered in certain events with weird names like IMBB or SHF. It took me a little while to figure out what “Is my blog burning?” or “Sugar High Friday” really meant. And after some more time I also figured out that you actually don’t need a formal invitation to join in. Although SHF is founded by Jennifer, The Domestic Goddess herself, there is no deity of the silver spoon you have to beg for permission – all you have to do is to cook or bake according to the chosen topic and blog about it. What a relief, I’m allowed to play with all the other kids in the sandpit!

After eventually getting serious with my blogging ambitions this November, I eagerly awaited the first opportunity to take part in SHF – sweet tooth that I am. Having already thought about making homemade pralines again, it came as a nice surprise that Johanna from The Passionate Cook had chosen the topic “chocolate truffles”. Thus, my official entry into the food blogger community will be a baptism in molten chocolate!

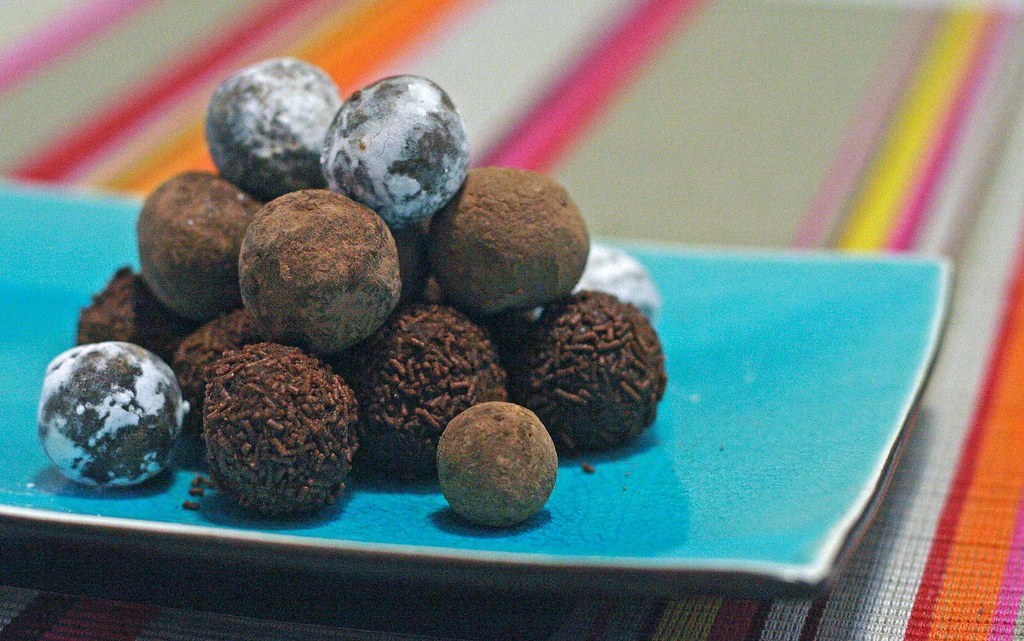
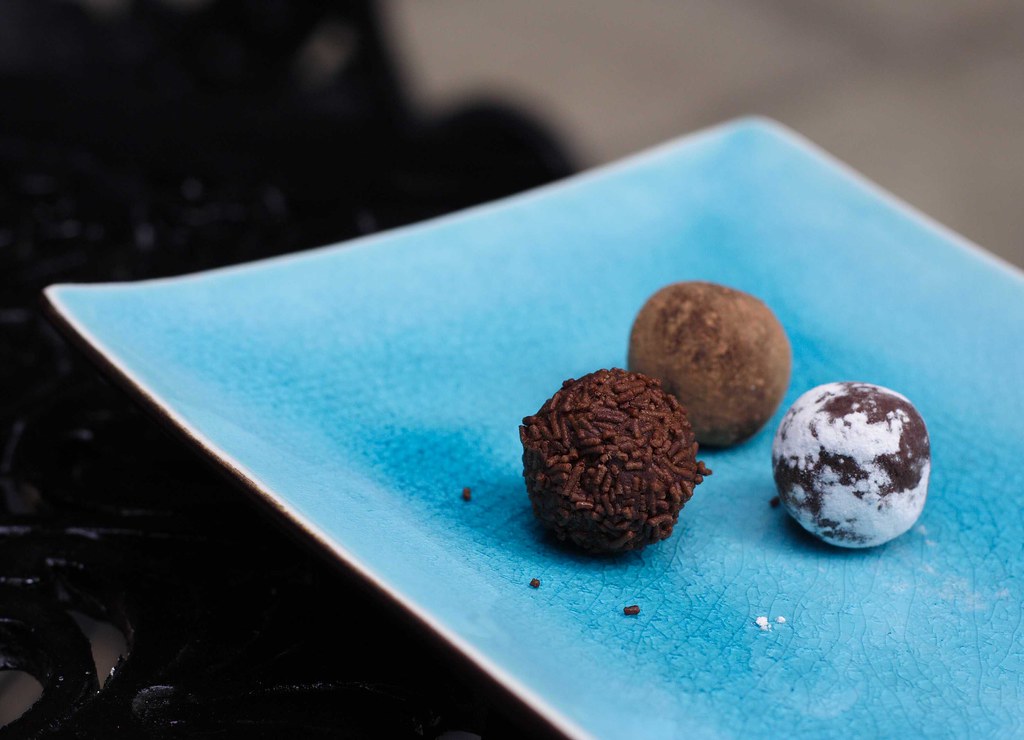
Since the mouth-watering movie “Chocolat” I always wanted to try cayenne pepper or chilli in chocolate. Having only the latter in my cupboard, the decision was easy. I also had some kirsch leftover – imported by myself from the Black Forest to make a real Black Forest birthday cake. This seemed to be a worthy occasion to use it all up. I decided not to add any more spices because I wanted to know the pure taste of the main ingredients. However, I tried two different types of chocolate. While having enjoyed both varieties, the dark chocolate works better in this recipe: The chilli gets tamed by the more intense chocolate flavour which would otherwise overwhelm the kirsch. In any case, I liked the sizzling hot sensation on my tongue – those are really fiery chocolate truffles.


Fiery Chocolate Truffles

The ingredients

100g milk chocolate
100g dark chocolate
4 tablespoons thickened cream, heaped
5-6 tablespoons kirsch
½ teaspoon chilli flakes
Cacao, icing sugar, chocolate streusel topping

Makes about 30 truffles

1
Using separate bowls break each sort of chocolate into small pieces. Pour 2-3 tablespoons of kirsch in each bowl.

2
Pour the cream in a little pot, add the chilli flakes and let simmer for a couple of minutes. Strain the cream and divide it evenly between the two chocolate mixtures.

3
Place the bowls over a pot with hot water to melt and combine the ingredients, stirring thoroughly. When the chocolate is melted, let cool down, place glad wrap on top and pop it in the fridge over night until very firm.

4
Place your chosen toppings on three plates, sifting cacao and icing sugar. Use a teaspoon to scoop portions of the truffles compound. The rounder you get it in this stage the less you will have to form it later. Press with your fingers into a ball-like shape. If the mixture gets too sticky, put it into the freezer for a couple of minutes to firm up again. It also helps to wash your hands with very cold water before starting and in between.

5
Roll the truffles in your chosen coating. If you’re not happy with their shape yet: Place them in the freezer, after an estimated 20 minutes you’ll be able to roll them between your palms to flatten bumps. However, do it as quickly as possible or it will get messy again!


The source
A blend of several recipes found on www.chefkoch.de


The hint
Especially in summer, keep the truffles in the fridge but make sure to let them regain room temperature before eating.

Monday, 13 November 2006

Guilt-free Cream-Dream


What to do if you feel the urge to have something sweet while actually being on a diet? What to do if you are not strong enough to resist – no matter how strong your resolutions were – when everybody around you is enjoying a sinful treat? This dilemma can only be topped by having invited guests for afternoon tea. After telling them for ages that you will eventually get serious with you dietary ambitions, you cannot eat the tiniest butter cream slice in public without feeling guilty. But apart from that, there is still the responsibility to come up with something delicious. First, you want to make your friends happy. Second, you have a reputation to lose.

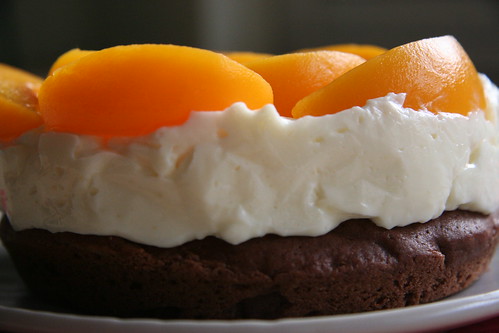
There is only one way of earning compliments for a delicious treat without loading too much on your daily calorie account: The Peach Torte. This fluffy chocolate sponge with a creamy, yoghurt-based filling and peach slices on top looks and tastes as good as a representative of the heavy weight class. But the sponge base is made without additional fat, and the filling contains roughly one kilogram of yoghurt and only about 150 ml whipping cream – it is even possible to decrease the amount of cream to your liking. And the fruit on top turns it into a healthy thing anyway.

After explaining this dilemma far too long, let's get started. It is best to make the sponge base one day ahead. But if you feel a sudden cake craving and you want to devour it as soon as possible, let the sponge rest for two hours before assembling the cake and it’ll be all right.


The pastry base

1
Heat up the oven to 175-180 degrees, without using the fan.
2
Prepare a round baking tin, 26 centimetres in diameter (a baking tray is also possible). Cut a sheet of greaseproof paper into the shape of the tin base, spread soft butter generously on the tin base, making sure not to grease the side walls of your tin. The sensitive batter will slip down a greased wall and will not rise properly. Put the greaseproof paper on the base and then turn it upside-down, so you end up with the buttered side on top. If your baking tin is really non-stick, forget the paper.
3
Mix the flour with the corn starch, the baking powder, the cocoa powder, the instant coffee and set aside.
4
Stir the eggs (no need to separate the yolks from the egg whites) for about one minute until slightly bubbly, and then add sugar and vanilla sugar. Beat until thick, pale, and creamy – for at least five minutes.
5
Sift the dry ingredients on top of the egg-and-sugar foam and make sure that the firm instant coffee grains get minced. Gently fold in the flour mixture, using a wire whisk. Do not overwork but make sure there are no lumps left.
6
Pour the batter into the prepared pan and pop it immediately into the preheated oven. Bake for about 30-35 minutes. Don't open the oven during the first 20 minutes, otherwise the sponge could collapse. Palm the centre of the pastry to test it: It's ready when the top feels only slightly soft with a little drawback. Turn off the oven and open the door leaving the pastry inside for another ten minutes. Cooling it down too abruptly could also result in the cake collapsing.


The filling

Here, you can experiment as you wish and adjust the amount of yoghurt, cream, and sugar to your liking. Only one thing is crucial: orange sugar – it gives the filling its unique flavour. Although citron-flavoured sugar is widely used, this peculiar variation is pretty uncommon. If you’re not able to find it in your supermarket, just try to make it yourself: Wash an organic grown orange with hot water, dry properly and grate the orange zest (make sure not to take anything of the bitter white skin underneath). Put the zest into a tight-closed jar, fill up with caster sugar, mix well, and let it stand for several days. The flavour of the home-made mixture is more subtle than the store-bought one. To substitute a sachet of orange sugar, use at least two tablespoons of your own version. This sugar will give any dairy-based mixture an elegant and unexpected twist. It is unusual enough not to be guessed right away but light enough for not to overwhelm other flavours. This orange-flavoured cream-mix works very well with peaches, but also with strawberries and raspberries.

1
Mix 1.2 kilograms of yoghurt with sugar and orange sugar, to your liking. When using store-bought orange sugar, one sachet will be enough. When using your own, add 1-2 tablespoons, mix well, then add more according to your taste.
2
Dissolve the gelatine according to the instructions on the package. For this amount of yoghurt, I used 7 teaspoons of powdered gelatine. When using gelatine sheets, 12 sheets should be enough.
3
First mix a few tablespoons of yoghurt with the liquid gelatine, and then fold the gelatine-mixture into the yoghurt. This will slowly cool down the warm gelatine and prevent it from getting stiff and forming small hard bits as it does when touching the cold yoghurt all of a sudden.
4
Pop the mixture into the fridge until it sets (usually after half an hour). If your yoghurt turns very stiff quickly, just stir in the pouring cream. If your mixture is set, but not very firm, whip the cream and fold in carefully.
5
If you choose not to diet, you’ll be able to increase the cream from 150 ml up to 500 ml. In this case you should make sure that your yoghurt mixture is pretty firm and whip your cream before folding in – otherwise the whole mixture will get too soft and fall apart when you’re slicing the cake.


The assembling


1
The next day – or two hours later – you can start to assemble the torte. If you used a round baking tin, cut the pastry lengthwise into half. To get a smooth surface, score just along the edge of the cake roughly one centimetre deep, then put a normal sewing thread into the chink and pull both ends across, until the cake is cut through. (If you used a baking tray, this flatter cake base can’t be cut lengthwise.)
2
Spread half of the filling on the base using the brim of the spring form to keep the filling in place. Top with cake layer and spread with the remaining filling. Arrange slices of canned peach on top and chill. Carefully remove the brim when the filling is firm.
3
If the Peach Torte is not to be eaten the same day, a transparent gelatine glaze will protect the fruit from drying out.

And now, dig in and enjoy your guilt-free creamy Peach Torte!


The ingredients


4 whole large eggs
180 g caster sugar
1 sachet or a heaped tablespoon of vanilla flavoured sugar
75 g all-purpose flour
75 g corn starch
2 teaspoons of baking powder
30 g cacao
1 teaspoon instant coffee

1.2 kg low-fat yoghurt
150 ml whipping cream
1 sachet or 2 heaped tablespoons of orange flavoured sugar
100 g of caster sugar (to your liking)
7 teaspoons powdered gelatine or 12 sheets of gelatine
A few tablespoons of hot water to dissolve the gelatine

1 big can of peach slices (or as much as you like)

Gelatine glaze (optional)


The source

This chocolate sponge recipe was torn out of a magazine by my mother, some twenty years ago. Since then, this easy and quick recipe is used for a wide range of tarts. The filling is my own creation.


The hint
For a delicious Strawberry Torte, just omit the cacao and the instant coffee in the sponge recipe and you’ll get a slightly vanilla flavoured sponge which makes – combined with the orange flavoured filling and fresh strawberries on top – a light and refreshing summer tart.