Google
 
Showing posts with label German treats. Show all posts

Thursday, 29 January 2009

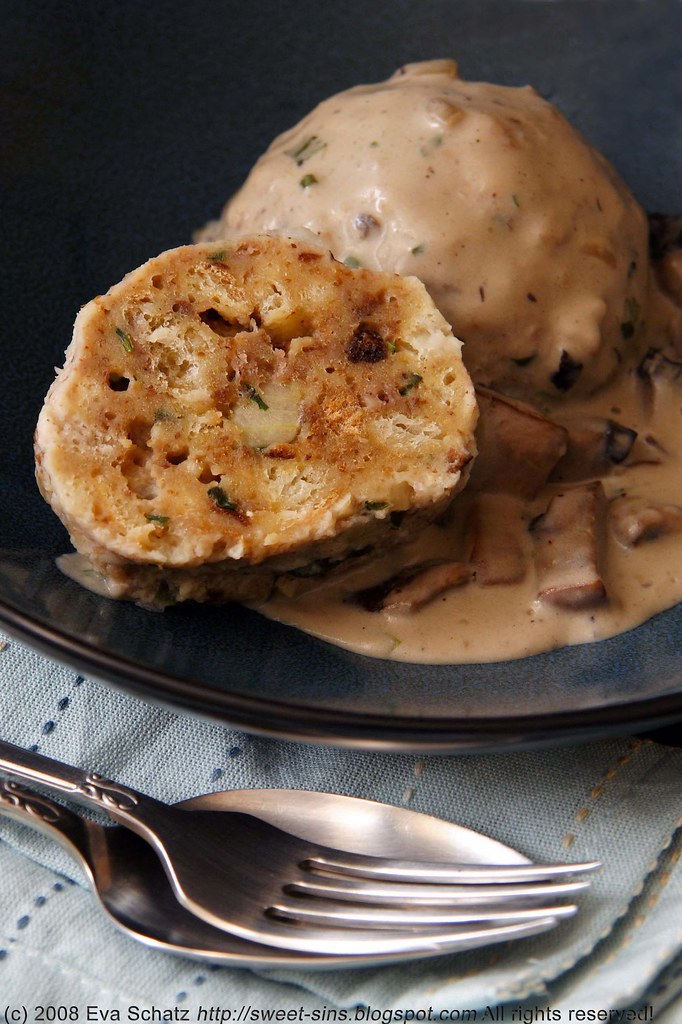
Bread Dumplings with Mushroom Sauce


During the last few days, all of Sydney has been suffering under the sweltering heat - even at night, temperatures wouldn't go down. And without a breeze lifting the suffocating blanket of humid hot air, we had to resort to the fan to be able to sleep at times.

Knowing that, bread dumplings with mushroom sauce might not be the dinner of choice at the moment, I grant you that. Admittedly, I made these in the midst of the Australian winter, some time last June, when the cold rain wouldn't stop for days - then these hearty dumplings are exactly what you need.

I was instantly reminded of them when talking to my family about the pretty rough winter they have at the moment in Europe. Usually my family lives in an area of Germany with a moderate climate so cold it might get but not bone-chillingly so. However, this year the temperatures dropped way beyond zero for quite a while. Listening to descriptions of a walk through snowy landscape while wiping away the sweat on your own brow feels quite funny!

So this one is for all the people that are currently shivering in the Northern hemisphere - enjoy and keep warm!


Bread Dumplings with Mushroom Sauce

The ingredients

Dumplings
In Sydney, I usually never have leftover bread rolls (get eaten too quickly) but leftover bread works just as well. Just make sure to cut it finely - you may have to remove very hard rinds - and let it soak long enough.

10 medium-sized bread rolls (about 500g), cut into fine slices
salt
3/8 to 1/2 l milk, warmed
2 tbsp onion, diced
plenty of chopped parsley
1 tbsp butter
4-5 eggs
1 tbsp flour

1
Put the finely cut bread rolls into a big bowl, sprinkle with salt and pour the warm milk on top. The exact amount of milk needed depends on how dry the rolls are. The drier the rolls, the more milk is needed and the longer it will take them to absorb it all. The soaking will take at least 30 minutes. Stir the mixture every now and then.

2
Gently fry the onions and parsley in the butter until softened. Note: If in a hurry, you can skip this step - the dumplings will still taste delicious.

3
Add the onions and parsley to the bread rolls, followed by the eggs and the flour. If your eggs are very big, use only four. Using a bare hand, mix together until evenly combined. If you can still feel lots of hardened bread roll pieces, let your mixture soak a little longer.

The resulting mixture will be quite soft but should not be too soggy. If it is too liquid, the dumplings won't hold their shape. If necessary add a tablespoon of bread crumbs but don't add too much at a time.

4
With wet hands, shape the dough into round dumplings. They should be about the same size to ensure even cooking. Whenever the dough begins to stick to your hands, wet your hands again in cold water.

5
While shaping bring a pot with three liters of salted water to the boil. If you're unsure about the consistency of your dumplings, put only one in the pot, reduce the temperature, and let it simmer for roughly 20 minutes. Check after a few minutes that the dumpling doesn't stick to the bottom of the pot. It will be ready when it floats on top.

If you're happy with the consistency of your trial dumpling, simmer the remaining ones. They need to have enough space to float freely so work in batches if necessary.

6
Lift out the dumplings using a slotted spoon and serve immediately with creamy mushroom sauce or a hearty meat stew.


Mushroom Sauce

Butter
Onions
Parsley
Mushrooms of your choice
Dairy of your choice

There's no recipe - it's your choice if you first sautee onions and mushrooms and then deglaze the pan with cream, sour cream, milk whatever or if you make a roux out of butter and a little flour and then go from there.
Just one bit of advice: I've long tried to make a somewhat diet-friendly mushroom sauce - forget it, it always tasted awful. I think that's one of these cases when you need to use real cream!


The source
Hedwig Maria Stuber: Ich helf Dir kochen

The hint
Making dumplings might sound a little irksome but it isn't difficult at all. I don't even bother making a trial dumpling.

If you have leftover dumplings, you can slice them up, turn in beaten egg and fry until browned. Together with a green salad, it makes for a quick and tasty lunch.

Thursday, 16 October 2008

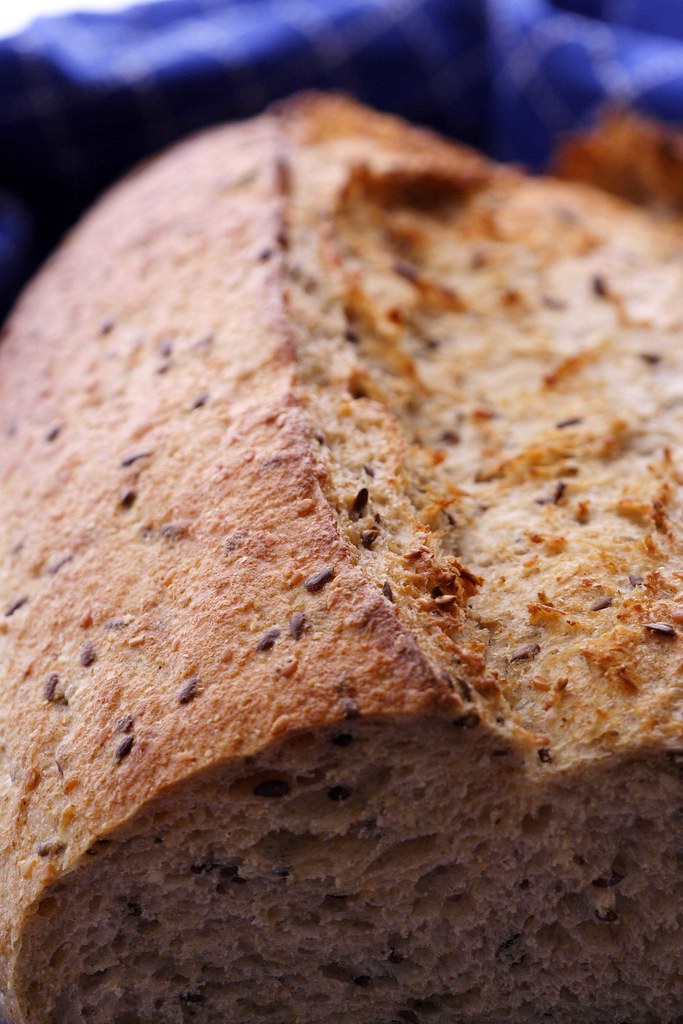
World Bread Day - German Seed Bread


People, World Bread Day is almost over (at least on this side of the earth) and I'm loaded with work but didn't want to miss out completely on this event that's created by the lovely Zorra of Kochtopf and that's very dear to me!

So this is going to be a short one. During my recent trip to Germany, I had plenty of stuff on my to-do list. Next to "meet as many friends as possible", there was "eat as many German specialties as you can possibly stomach". What shall I say, I really worked hard on that one...

Of course, one of the most memorable things I ate (apart from an incredible number of sausages and cured meats) was a certain type of bread - full with seeds but not dense and heavy at all. Still chewing, my better half requested this particular loaf to be recreated in Sydney and who am I to deny that..;-)

I started off with this recipe from Petra of Chili and Ciabatta and made the changes following below. For non-German-speakers, just a rough summary of the procedure: let the soaker rest for 3-4 hours (covered), mix the dough, let rise until doubled, degas it while stretching and folding it 2x, shape into a loaf, let rise until nearly doubled, and bake at 220 degrees Celsius.
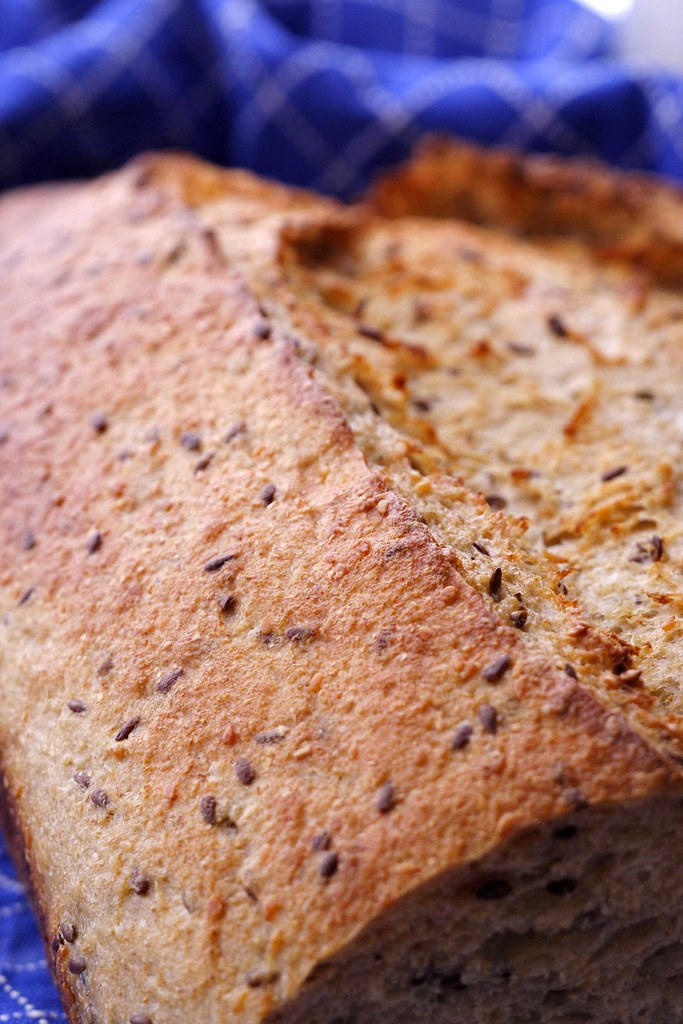
The dough is relatively moist and rather sticky but not too hard to work with (stretch & fold helps a lot to get a good dough structure). My version produces a soft but hearty crumb (due to the different kinds of grains and seeds) and a compact but rather soft crust. It goes well with honey, jam, and mild cheeses.

PS: The first time I made it with a mixture of sourdough and instant yeast as below, the second time around I used sourdough only but can't remember for the life of me if I therefore upped the amount of sourdough or not. Hence, I need to make it again to find out...

Seed Bread

The ingredients

Soaker:
45g flax seeds
45g rye flour
35g sesame seeds
35g rolled oats
11g salt
206g boiling water

Final dough:
180g water or whey
all of the soaker
250g wheat sourdough, 100% hydration
1tbsp honey
360g bread flour
30g wheat germ
1 tsp instant yeast
1 tbsp malted barley flour
up to 4 tbsp whole wheat flour (depending on the stickiness of the dough)

The source
Adapted from Petra of Chili&Ciabatta

Friday, 15 February 2008

A Heart for my Valentine... or two


Celebrating Valentine's Day is not considered a German tradition. In recent years, it seems to have caught on a bit but you probably won't see many of the last-minute, rose-buying, desperate-feeling boyfriends storming into a flower shop. Whilst I understand that many men think it ridiculous to buy completely overpriced stuff just because it's the 14th of February, I still think it's never too late to have a bit more romance in your life!

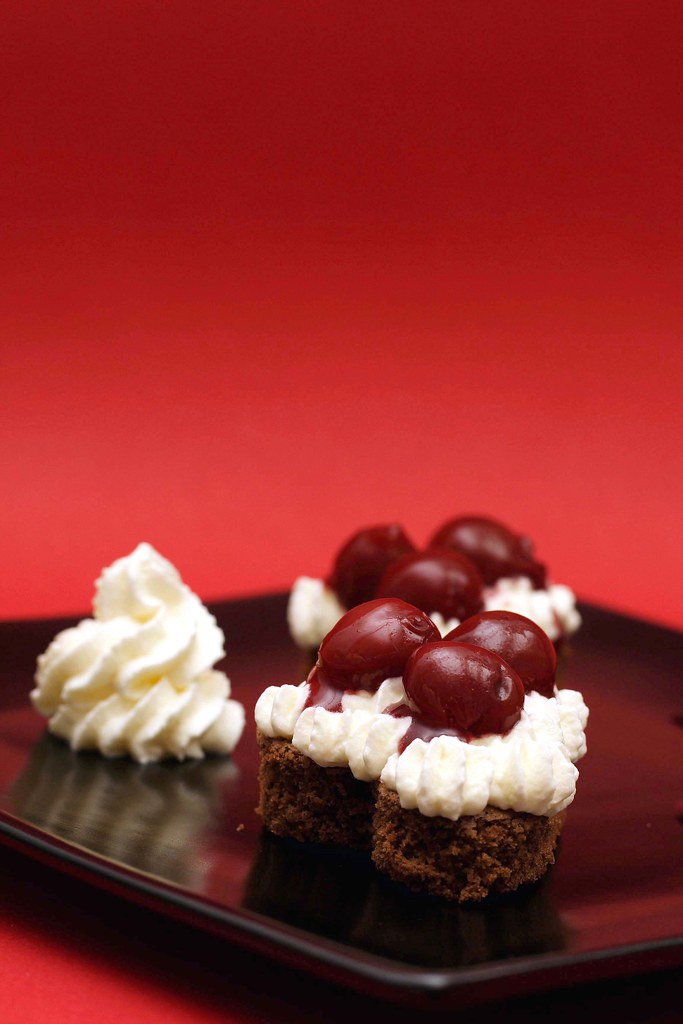
When I saw Zorra's announcement of A Heart for Your Valentine , I knew that I had to participate. With my boyfriend coming from the Black Forest Area, I also knew instantly what to make for him. The only problem, I didn't have any kirsch which is more or less the crucial ingredient for a proper Black Forest Cake. However, love is all about ignoring little imperfections, right..;-)

With only a cookie cutter in heart-shape, this black forest cake comes in very small portions but it's entirely up to you how many you'll eat...

Zorra is posting the round-up continuously in two parts, so check-out all the wonderful heart-shaped creations!


Black Forest Cake

The ingredients

6 eggs, separated
pinch of salt
175g caster sugar
90g butter
140g dark chocolate, in pieces
150g flour
1 tsp baking powder (optional)
vanilla (optional)

For assembly:
canned cherries (I like to use the juice, too, slightly thickened with cornstarch, and a hint of cinnamon)
whipped cream, sweetened to taste with vanilla sugar

optional:
kirsch for dousing the cake
chocolate shavings

1
Preheat oven to 175 degrees Celsius (no fan-bake).

2
Melt the butter. Once the butter isn't bubbling anymore, add chocolate. Stir until chocolate is melted and evenly combined. Let cool until lukewarm but still liquid.

3
Using a heatproof bowl resting on a hot water bath, beat egg yolks and sugar until pale, creamy and voluminous. This will take a couple of minutes.

4
Using another bowl and clean beaters, beat egg whites with salt until soft peaks form.

5
Sift the flower and baking powder (if using) onto the foamy egg yolks. Pour the chocolate-butter mixture on top. Do not mix at this stage.

6
Add one third of the meringue and stir in to lighten the batter. Lightly fold in the remaining meringue.

7
Pour into a baking pan (26 cm in diametre or a baking sheet) that's buttered only at the bottom. To be safe, use baking paper, too. Bake immediately. A round cake takes roughly 35 minutes, a sheet cake a bit shorter. The cake is done when the top feels springy. Don't overbake or the cake will dry out.

8
Once cooled, cut out little hearts and assemble or fill one large cake with cherries and cream.

The source
GU: "Die grosse Schule des Backens"

The hint
Some recipes specify that you can also add kirsch to the cream. If you want to really taste the kirsch that way, you'll have to add a lot and I recommend stabilizing the cream with gelatin. Many, many years ago, I added too much kirsch, the cream wouldn't become stiff, I kept beating and ended up with kirsch-flavoured butter...

Thursday, 31 January 2008

BBD#6 - Part Three

In order not to miss my own deadline, I'm finally posting my main Bread Baking Day #6 event: soft pretzels prepared with a lye solution - the way you get them in Germany! Pretzels are a very popular snack allover my home country - no matter if for breakfast, lunch, afternoon snack or dinner. You see, the Germans really like their pretzels. There are many slight, regional differences but for me, a five-star pretzel needs to have a very fine-textured, soft crumb that doesn't dry out easily whilst the surface has to be of a shiny, reddish brown colour and needs to be quite crusty.

Obviously, it's one of the typical things that an ex-pat might miss fairly soon because chances aren't very high to get the real thing anywhere outside of German-speaking countries. Luckily, in case the desire for pretzels becomes overwhelming, there is a German bakery in Sydney where one can get a quick fix. Since living in Australia, I twice tried to reproduce pretzels but both times the results had been only so-so. Fresh from the oven, they had been good enough - however almost anything that comes straight out of the oven usually tastes good.

Where would I get a proper recipe? German baking books seldom provide one as no one I know has ever bothered to make them at home. When reading Jeffrey Hamelman's "Bread - A Baker's Book of Techniques and Recipes", I found out that he actually started his career with making hundreds and thousands of pretzels. So he should know what he was talking about, right? Indeed, he does. Using a preferment not only improves the tastes but also the shelf-life quite dramatically. In contrast to pretzels made with the straight dough method that deteriorated fast once they had cooled down, these pretzels tasted in the evening as good as they had during my lunch break. The only thing that hadn't turned out a 100 percent perfect was the crust. It wasn't quite crusty enough but still well above average.

In case you're not too intimidated by handling a lye solution, please give it a try! It's not at all complicated. Most importantly, never touch the lye with your bare skin and give the kitchen a good airing during and after the process. The biggest problem will be to buy the lye. Pharmacist sell it, however, I've always gotten odd looks for this request - like I'm asking for bomb material. I've also boiled a few pretzels in a baking soda solution which is a common replacement. However, it only produced a slight yellow hue instead of the brown colour and the characteristic taste. Next time, I'll just have to improve the crust and I will hopefully get my perfect pretzel!


Jeffrey Hamelman’s Soft Pretzels

I had to convert the recipe and ended up with slightly odd numbers so don't be put off by that. Regarding the yeast, I used instant dry yeast instead of fresh. For the preferment, I've simply used a light sprinkle of yeast. If unsure, you can use a little more than that. The time to ferment will be shortened but if retarding the dough anyway, this should not impart the overall flavour.

Preferment
72g bread flour
47g water
1.5g salt
0.01g fresh yeast

Final Dough
290g bread flour
170g water
5.8g salt
7.1g fresh yeast
18g butter, soft
3.6g diastatic malt powder (I substituted a teaspoon of malt syrup)
121g preferment (all of the above)

Makes about 600g of dough (recipe could be doubled).

1
Mix pate fermentee using a wooden spoon. It should have the rather stiff consistency of finished bread dough. Let stand for 12-16 hours at room temperature. When ripe, the preferment should have doomed and just start to recede.

2 Mix the final ingredients for 3 minutes together, and then add the preferment in chunks. It will be fairly stiff. Mix for another 5-6 minutes. The dough should come off the walls of the bowl.

3
Let sit at room temperature for about two hours or until doubled in volume.

4 Divide dough into pieces of roughly 85g. Shape into cylinders and let rest for a few minutes under a cover.

5

Roll into stretches of 40 centimeters in length with the middle slightly thicker. Quickly pick up the pieces and swirl around into pretzels (or simply fold the dough strands around one another). Press ends into dough.
Note: I didn't manage to get my dough strands as long as that and ended up with slightly chubby pretzels.

6
Let proof for 30-45 minutes or until risen to 75 percent. Refrigerate for 30 minutes to allow a skin to form.
Note: Hamelman suggests that the pretzels can be retarded overnight. To do this, refrigerate after the first 20 minute of proofing. To accomodate my schedule, I decided to retard the finished dough after step 2 instead of the finished pretzels.

7
Prepare 3 percent lye solution: Put a litre of water into a pot, add 30g of lye and bring to a boil.
Note: Use gloves and take care not to get any lye solution onto your skin. Use a slotted spoon for handling the pretzels.

8
Completely submerge pretzels for about 5-10 seconds. Let drain on the slotted spoon and then transfer to the baking sheet. Quickly slash at the thicker part and sprinkle with coarse sea salt. Note: If you don't have a very sharp knife for slashing, rather use scissors instead. The cut won't be perfectly straight (as you can see) but that's better than destroying the dough structure.

9
Bake at 450 F/220 degrees Celsius in a preheated oven for 14-16 minutes.

The Source
Jeffrey Hamelman: Bread – A Baker’s Book of Techniques and Recipes

Friday, 25 January 2008

BBD#6 - Part Two

In the last few days, I did some more braiding with a simple bread dough (mostly bread flour with a little rye for added flavor) using some overripe sourdough. As I had thought during the first time, braiding with unfilled strands is definitely easier. The strands keep their shape much better that way. However, I realized that the hardest part starts way before the braiding action: It isn't easy at all to get really even strands in the first place as you can see below. I will practice some more during the next weeks but my final contribution to BBD#6 will be different. Just building up the tension..;-)

Saturday, 19 January 2008

BBD#6 - Part One


Two weeks have already gone by since my announcement of hosting Bread Baking Day #6 - it's definitely time to get to work! Being the host of the event, I had decided to make several shaped breads (that means at least two if I wasn't to break the promise I only gave to myself). In the German tradition of bread making, my first contribution wouldn't even count as bread as it's something sweet. However, following the tradition of Zorra's Bread Baking Day, one doesn't have to be too strict with oneself, right?

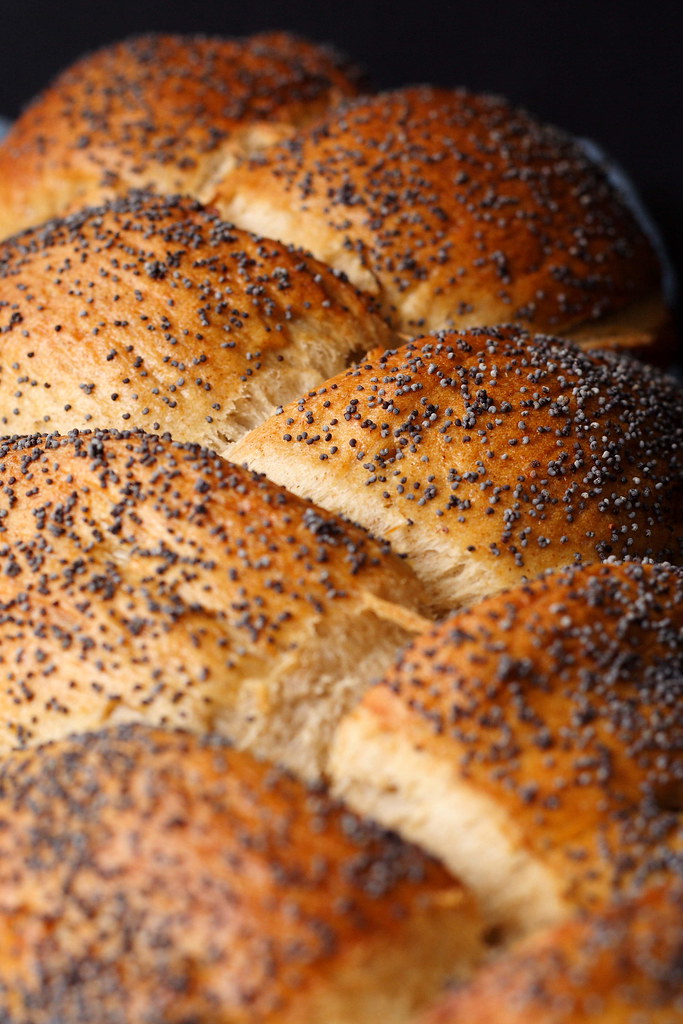
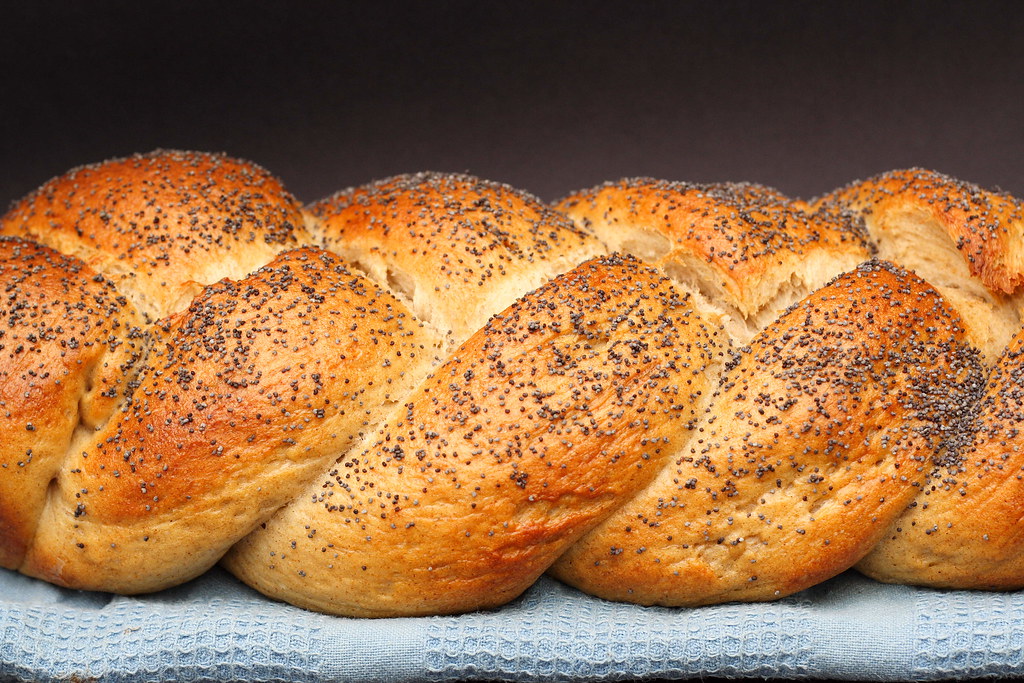
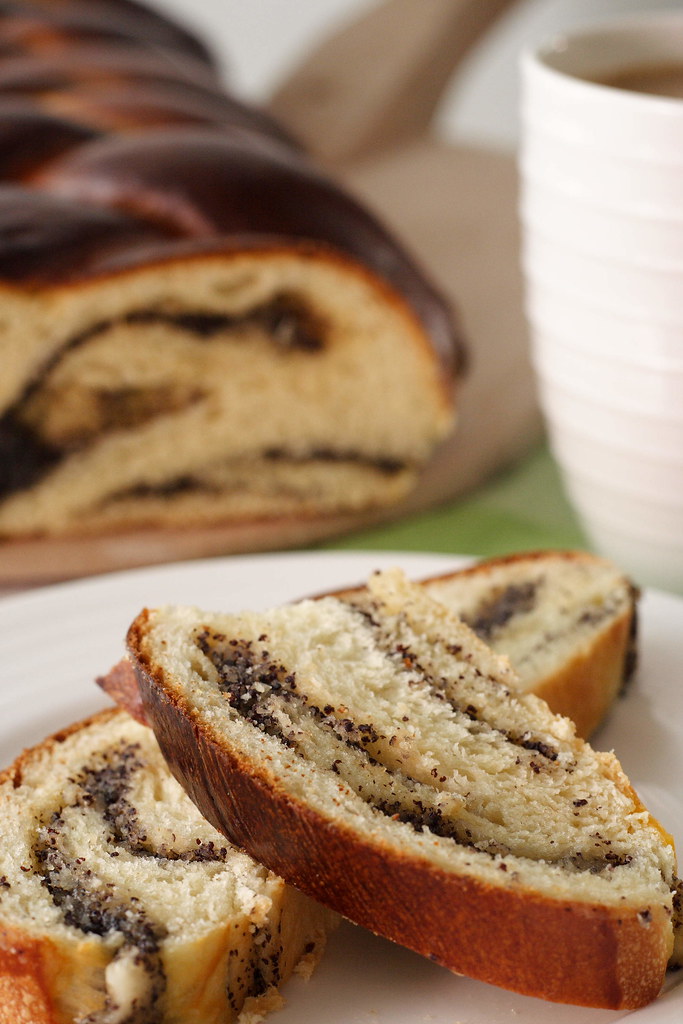
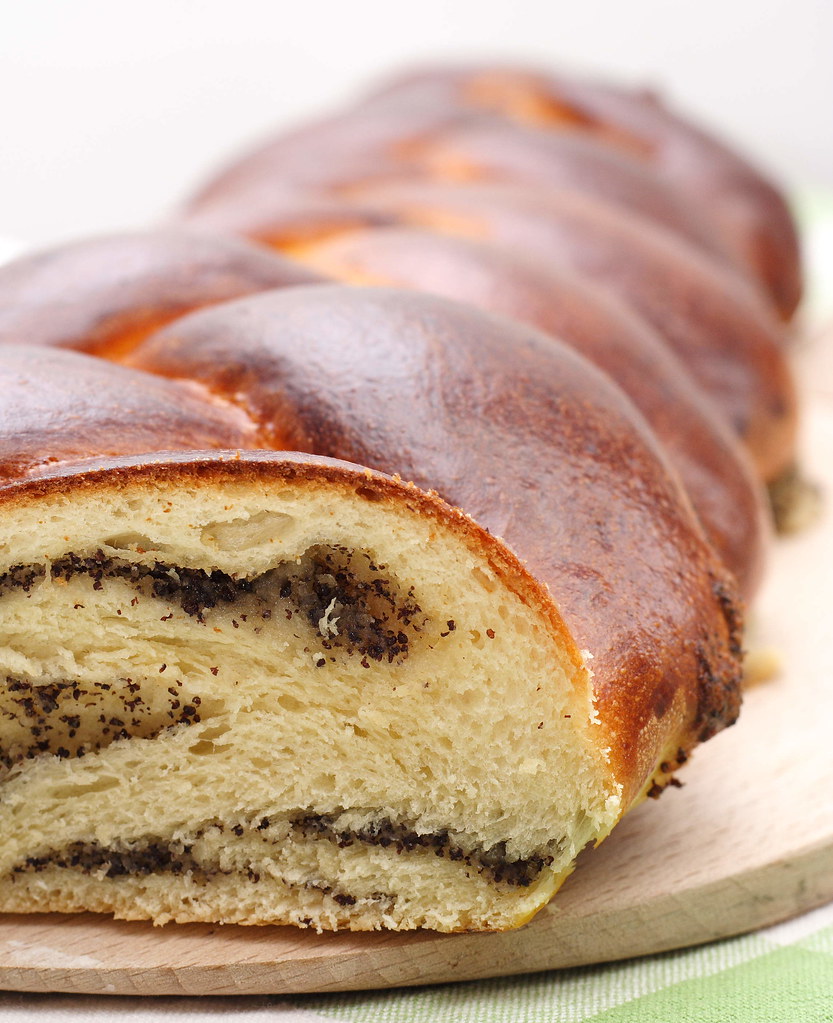
Therefore, I present something I made for the first time ever: "Mohnzopf" - a braided sweet yeast bread filled with a poppyseed mixture (and marzipan, in this case). In the past, I rarely had Mohnzopf at all and if so, it was always bakery-bought. I liked it but never got overly excited about it. Secretly, I always wondered if there really wasn't more to this old German classic than a "that's okay" verdict. However, now I know that this recipe is just another proof of the well-known fact that home-made goods are simply the best! This sweet bread is very substantial but not heavy enough to prevent you from reaching out for seconds, or thirds, or...

But I digress, back to my theme - shaped breads. Plaiting a three-strands braid isn't especially difficult but I found it quite tricky to handle filled and rather heavy strands. Starting off with a very plump braid, the strands got longer and thinner until I could barely fit the whole thing diagonally onto my biggest baking sheet. At least the braid is tapered consistently... However, I'm planning to do something much more elaborate in terms of shaping for Part Two - stay tuned!


Mohnzopf


I've used my favourite sweet yeast dough. For 500g of flour, use only 2 eggs. You don't want this dough to be too soft to handle.


The filling

I haven't figured out where to get freshly ground poppyseeds in Sydney, therefore I've used a pre-made mix I've imported from Germany myself - you can find it here. It's so sweet that you don't have to use any additional sugar - that's why there is no sugar in the recipe. If you can get freshly ground poppyseeds, you will need to boil it in milk until it's of a thick, mushy consistency like semolina pudding.

250g Mohn-Back (ready-to-use mix)
1 egg, large
1 tbsp desiccated coconut
100g almonds, ground
25g butter, melted
1 tbsp vanilla sugar
1 pinch of salt
1 glug of dark rum (can be substituted with milk)

200g marzipan, chopped (optional)

1 egg yolk and a few tbsp of milk for egg wash (optional)

1
Mix everything except the marzipan together; the filling should be of a very thick but still spreadable consistency.

2
Divide the yeast dough into three equal portions and pull gently to shape into long strands. Roll each strand into a very long rectangle and spread with the filling.

3
On one long side of each rectangle, evenly distribute the marzipan pieces. Roll into long strands with the marzipan as the core. Make sure to pinch the seams or the filling will come out during baking.

4
Plait the three strands into a braid and tuck the ends underneath. Cautiously place the braid on a baking sheet prepared with baking paper. Let rise until the braid has grown 1.5x in size.

5
Fan-bake at 150 degrees Celsius until golden-brown (in my oven this took barely 30 minutes).

The source
Adapted from "Das Vohenstrausser Kochbuch"

The hint
The poppyseeds can be substituted with hazelnuts, walnuts or almonds.

Monday, 22 October 2007

Cheese Cake, German style, and more Bread


This years World Day of Bread on 16th October has been a complete success. Zorra of Kochtopf the creator of this blog event had to be really busy: check out her round-up of 184 entries with more than 200 bread recipes from 28 different countries!

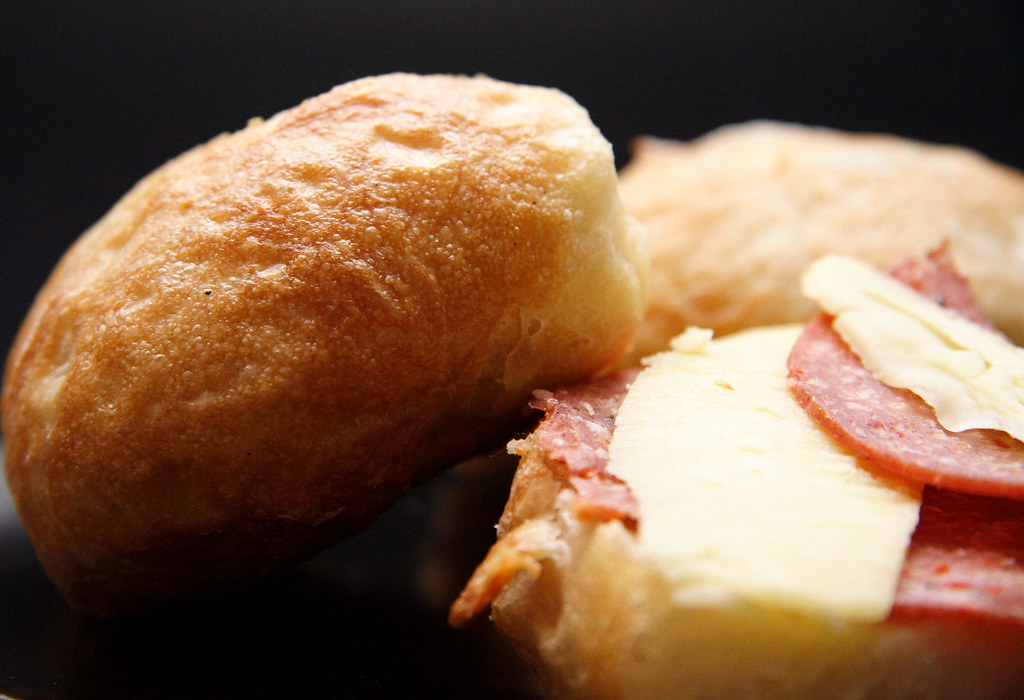
And it looks like that this streak of bad bread baking luck has finally left me. Since then, I've been able to make the crusty bread rolls pictured above which was quite a miracle in itself. I started off with a recipe by Peter Reinhart and realized mid-way through that I didn't have certain ingredient. So I switched to a Rose Levy Beranbaum recipe - all the way ignoring the difference between dry active yeast (that's what I have at home) and instant yeast (that's what these guys are using). Luckily, I noticed it early enough and could adjust fermenting and rising times accordingly...

For the ones who were interested in a traditional German-style cheese cake, I've finally managed to inquire about the recipe (after baking I had simply forgot to jot it down). Over the years, I've tried many a recipe for this kind of cake which is one of the most popular in Germany. I've also gotten very good results using a few tablespoons of semolina as a stabilizer but the following recipe is the favourite of my family.

Usually, the recipe calls for rum-soaked raisins which also act as a stabilizer. However, this time we had run out of them - but I'm not fond of raisins anyway. That means, most of the time, two cakes have to be baked to make everyone happy..;-)

Shortcrust Pastry
The ingredients

150g butter, softened
100g sugar
pinch of salt
1 egg
1 sachet vanilla sugar (equals a heaped tablespoon)
1-2 tbsp rum
250g all-purpose flour
1/2 sachet baking powder (equals 7.5g)

1
Cream butter with both types of sugar and the salt until pale and fluffy.

2
Incorporate the egg and the rum, mixing thoroughly.

3
Add flour and baking powder mixing on low speed until it all comes together.

4
Take the dough out of the mixing bowl and briefly knead together. Shape into a ball, cover with foil and chill in the fridge until ready to use (at least 30 minutes).

The hint
This dough will be softer than shortcrust pastry that is made by cutting the butter into the flour. However, it should not be sticky. Don't add anymore flour otherwise you'll end up with concrete and not with a tender crust.


The filling
The ingredients

(suitable for a springform 28 centimetres in diameter)

60g butter, softened
200g sugar
2 sachets vanilla sugar
pinch of salt
4 eggs, separated
1 kg quark (can be substituted with ricotta)
50g all-purpose flour
1/2 sachet baking poweder (7.5g)

If using a springform of 26 centimetres, only change the following amounts:

50g butter
150g sugar
3 eggs, separated
1 sachet vanilla sugar
750g quark

(the amounts for flour and baking powder stay the same)

1
In a dry, fat-free bowl, beat the egg whites with the salt until stiff peaks form. Set aside.

2
In another big bowl, cream butter with both types of sugar.

3
Mix in egg yolks until thoroughly incorporated.

4
Mix in quark. To make sure that everything is evenly distributed, use a spatula to scrape down sides and bottom.

5
Scrape egg whites on top of quark mixture, sift flour and baking powder atop. Gently fold everything together.

6
Butter your preferred springform pan and line it with the shortcrust pastry. I usually don't roll it but rather tear off pieces and press them into the tin. I make the rim by rolling pastry into little rolls and pressing them onto the sides of the tin.

7
Pour in the filling and fan-bake at 150 degrees Celsius for up to an hour or until well-set. The crust should be golden-brown and the filling should be speckled with brownish dots.

The hint
After turning off the oven, let the cake rest in there for at least another hour. That way, the quark filling won't collapse as much.

Thursday, 4 October 2007

Enjoying German Specialties

After processing all the pictures I've taken while traveling through Germany, I came to realize that I didn't photograph that many meals at all... Anyway, here are a few food related memories. A little bit late, I know - having just arrived in Australia again, I went to Western Australia for work. I was already looking forward to paying another visit to my favourite Australian grocery store as I did last time. However, my only day in Perth turned out to be a Sunday. All I could do was staring through the shop window at the huge bags filled with millet flour, pearl barley, and other hard-to-get foods. Of course, it should be possible to get the same stuff here in Sydney - however, they'll cost me an arm and a leg, I'm sure...

Where was I? You see, no matter how much I've enjoyed the stay in my home country, as soon as I had set my food on Australian earth, the daily life just sucked me in again.

One of the first things I did at home was baking a real German Cheese Cake (pictured above). Made with real quark instead of cream cheese or ricotta, it has a slightly tarter taste and a much lighter texture than American cheese cake. Eating it on a sunny terrace made it taste even better...

After having eaten my way through this and this, I attended the next feast, the wedding of a dear friend.

Another opportunity to indulge in Bavarian doughnuts (a very local food, this version from another part of Bavaria looks slightly different from mine), layer cakes, and God know what else. I'd rather not list all the cakes I've tried and I haven't even said a word about the savoury dishes...

At my parents' place, I used the occasion to watch once again how to make a real Bavarian pork roast. For traditionalists, this is the only way to celebrate a proper Sunday lunch. Whilst I'm not against having something else for lunch, I really enjoy it once in a while. So far, I didn't dare to try my hands on it. Provided I'm still able to decipher my handwritten notes, I'll dare cooking it some time soon. Hopefully, this time I'll be able to take a nicer picture - this one was taken just before shoveling in...


Furthermore, I made some pralines to give away as a birthday present. The cutest ones were these pistachio marzipan hearts - the recipe will follow soon. For some reason I thought using couverture would save me the tedious tempering process. First, I didn't want to go through all this trouble. Secondly, I don't have a candy thermometer. However, this was a misconception and the chocolate coating lost its shine after three or four days. However, they still tasted pretty good; even though I usually don't like marzipan. But who wouldn't love anything heart-shaped?

Tuesday, 28 August 2007

SHF#34 - Going Local

A long time ago, when I first thought about moving to the other side of the world, my boyfriend would always start to chuckle: "I´d love to see you explaining to some Aussie bloke who never ever left Australia, from which particular, tiny area in Bavaria you´re from!" Well, if there´s one thing I´m getting missionary about then it´s the cultural diversity of my home country. Mind you, I´m not making any judgements - I just love to get to know all these little, graspable things that are part of this very abstract concept of identity. And let me tell you, there´s a lot to be proselytized - not even the people from our neighbouring state (on the Western side of southern Germany) knew enough about us.

Ladies and Gentlemen, let me introduce you to one of the seven districts of Bavaria which is located next to the Czech border: the Upper Palatinate (aka Oberpfalz)!

Ok, I know it´s pretty small. It´s not even an economically important area - once blooming industries like porcelain and lead crystal manufacturing are now wilting; and the long time in the shadow of the Iron Curtain wasn´t a good thing to begin with. There even is a rather mean saying that all the area has in abundance is stones on the fields.

However, with their limited supplies (milk products, potatoes, and apples were a staple) the people from the Upper Palatinate not only managed to get by but also produced some really tasty, hearty country fair.

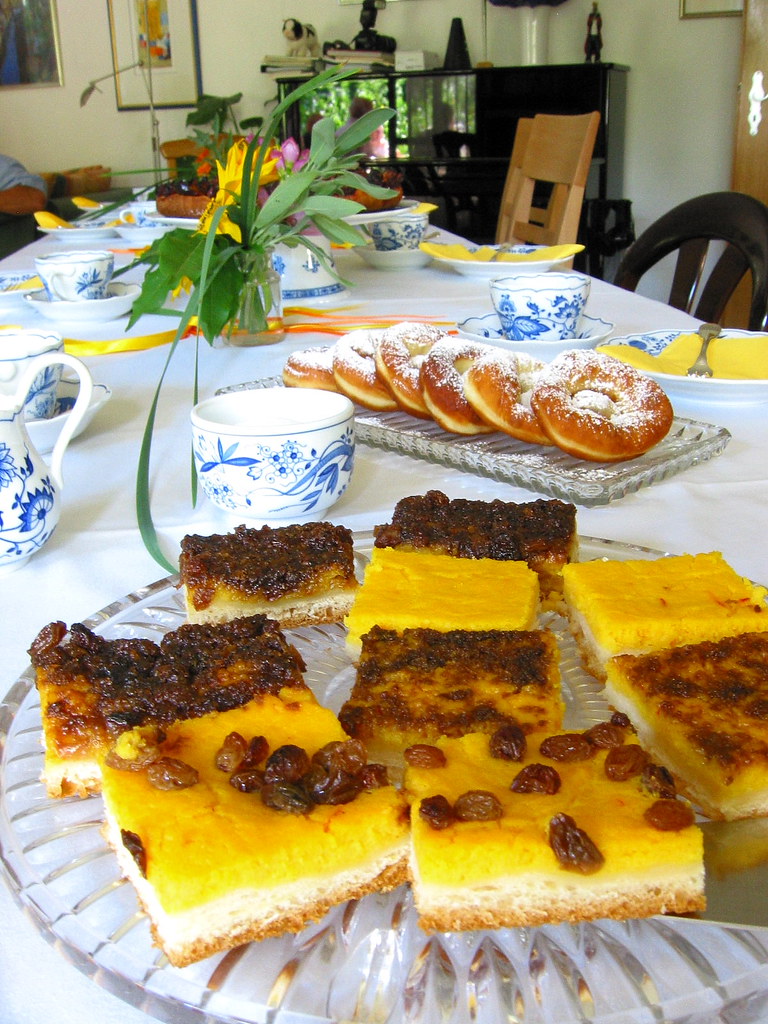
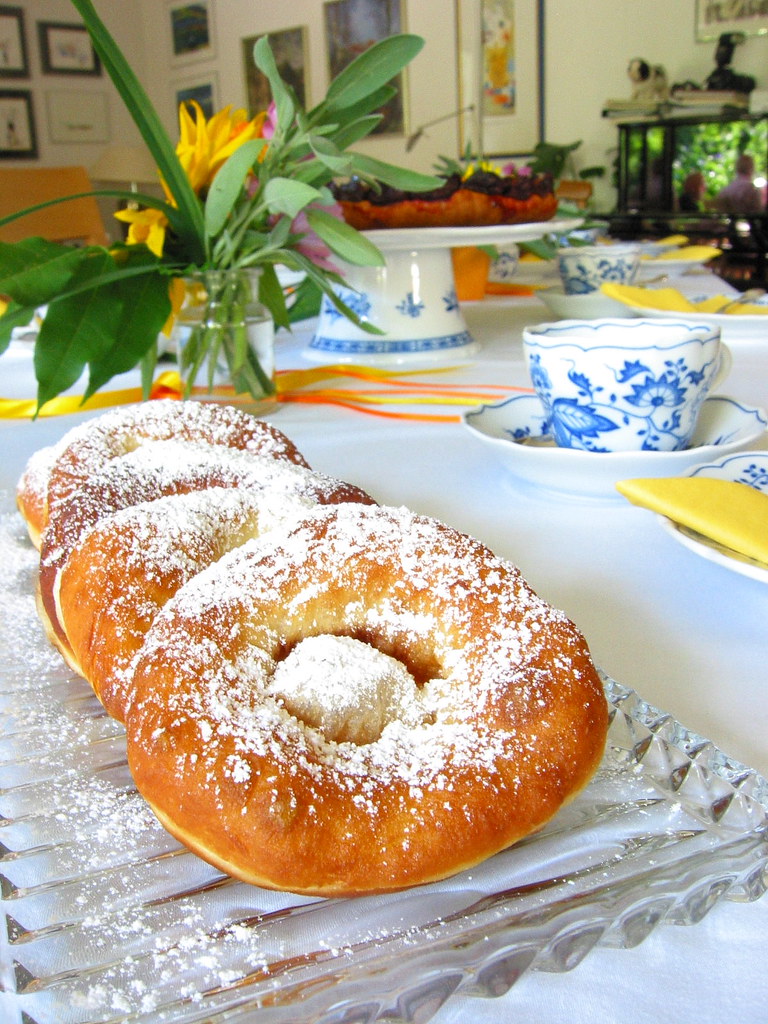
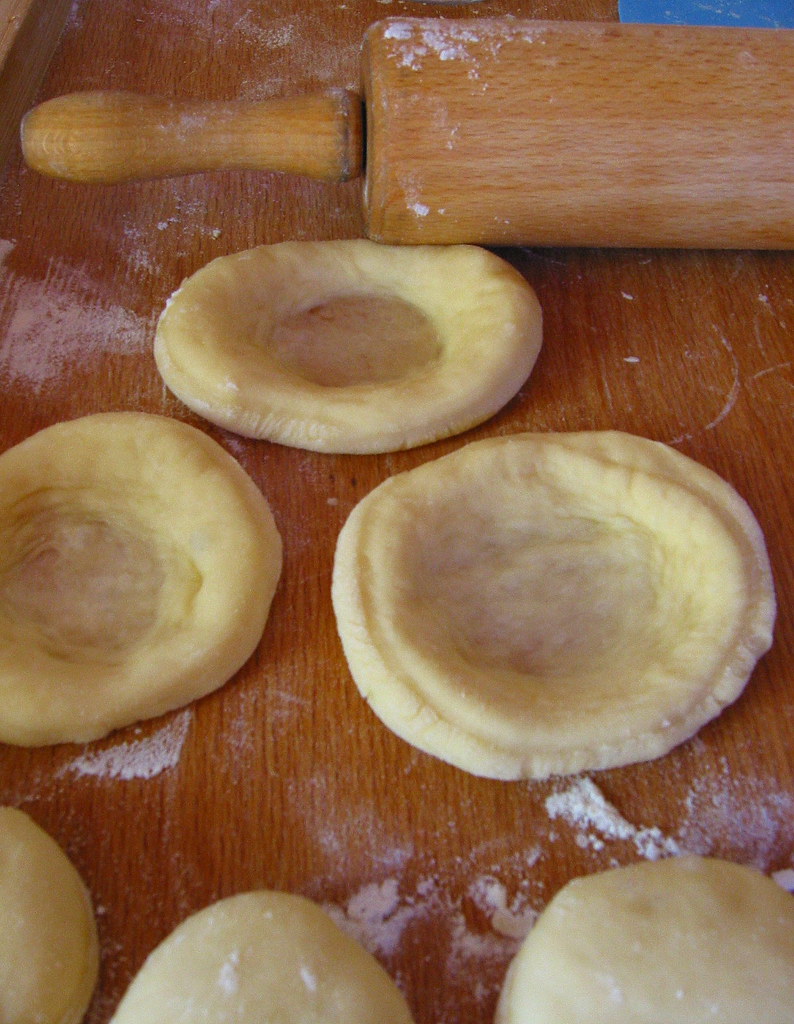
Whenever there is a feast in this area it won´t be complete without some of the local doughnuts (which don´t have a hole in the middle but a very thinly stretched piece of dough). One of the bigger feasts was the annual church anniversary where the whole village would come together and party for an extended weekend. This occasion would call for another traditional cake, the so called "Church Anniversary Cake" or "Parish Fair Cake" - I can´t even find a proper translation for that one... The pronounciation in my home dialect may seem a bit weird: it´s "Kirbakejchln" (doughnuts) and "Kirbakoucha" (cake).


The doughnuts are very crispy in the middle, buttery-soft in the thicker parts, and not sickly sweet. As a kid, the first thing to do when visiting my grand mother, was looking into her pantry for some of these doughnuts...


Whilst doughnuts are well-known allover the world in some way or other, I bet that this cake with its peculiar yellow colour won´t be know to many people outside my area. The colour of the semolina pudding layer comes from the generous use of saffron. This traditional spice is still rather expensive and that´s probably the reason why people had this cake only once per year. Saffron also makes for a particular taste that I didn´t cherish as a kid (but I do now). You can have this cake to your liking either plain, topped with raisins, with a mixture of brown sugar, ginger bread crumbs, and syrup or with simply everything. Enjoy!


Although I´m pretty late, this is my entry for this month´s Sugar High Friday invented by the Domestic Goddess herself and this time hosted by Johanna from The Passionate Cook. Her theme of local specialties was just perfect for last weekend when I made these things for the 60th birthday party of my father which happened to be on the same day as our local parish party!

PS: Hidden behind the flowers is a traditional plum cake - I told you, I don´t do anything but eating...

PPS: Please excuse the subpar pictures, without the camera I´m used to, I´m pretty hopeless...


Parish Fair Doughnuts


You can use your preferred recipe for sweet yeast dough like this one. The only adjustment for soft doughnuts is to make a very soft dough by adding more liquid including alcohol. For 500g of flour add a shot of rum or kirsch and at least double the amount of milk (depending on your preferences).

After the first rise, roll out the dough to almost one centimetre in thickness on a lightly floured worksurface. Using a small drinking glass, cut out rounds. Cover with a towel and let rise until doubled. Now comes the tricky part that I haven´t quite mastered yet: You have to turn and stretch the round piece of dough between your thumbs and index fingers until the middle is like a window pane and the rim is of an even thickness (well, more or less). Deep-fry each round on one side until golden brown, then turn around. It is important that there is no hot oil in the cavity after the turn (otherwise the middle won´t stay yellow). Let cool down on sheets of kitchen towel and serve with lots of icing sugar. The next day, refresh in the hot oven for a couple of minutes.


Church Anniversary Cake

Again, use your favourite sweet yeast dough as a base but make sure that this one isn´t too soft.

The ingredients

1.5 l milk
225g soft semolina
sugar to your liking
0.5g saffron (or a little bit more)
250g butter
5 eggs, separated

2 big pieces of ginger bread
400g light brown sugar
1-3 tbsp sugar beet molasses
250g raisins
rum (optional)

This makes enough to cover two big baking sheets as seen above.

1
Cook a thick semolina pudding, stir in butter, saffron, and sugar to your liking.

2
Add egg yolks. Beat egg whites until they hold soft peaks and gently fold in.

3
Roll out the dough onto your baking sheets and let rise for 15-20 minutes, cover with yellow semolina mixture.

4
Depending on your preferences, either bake plain or with raisins plumped in rum or with a sticky mixture of brown sugar/crumbled ginger bread/molasses or put everything on top.

5
Fan-bake at 150 degrees Celsius until the edges of the dough are golden brown.


The source
Adapted from a local cookbook: "Weidener Kuechengeheimnisse"


The hint
Tightly wrapped, the cake keeps very well for several days. The doughnuts can be frozen.

Saturday, 30 June 2007

"Waiter, there's something in my...dumplings!"


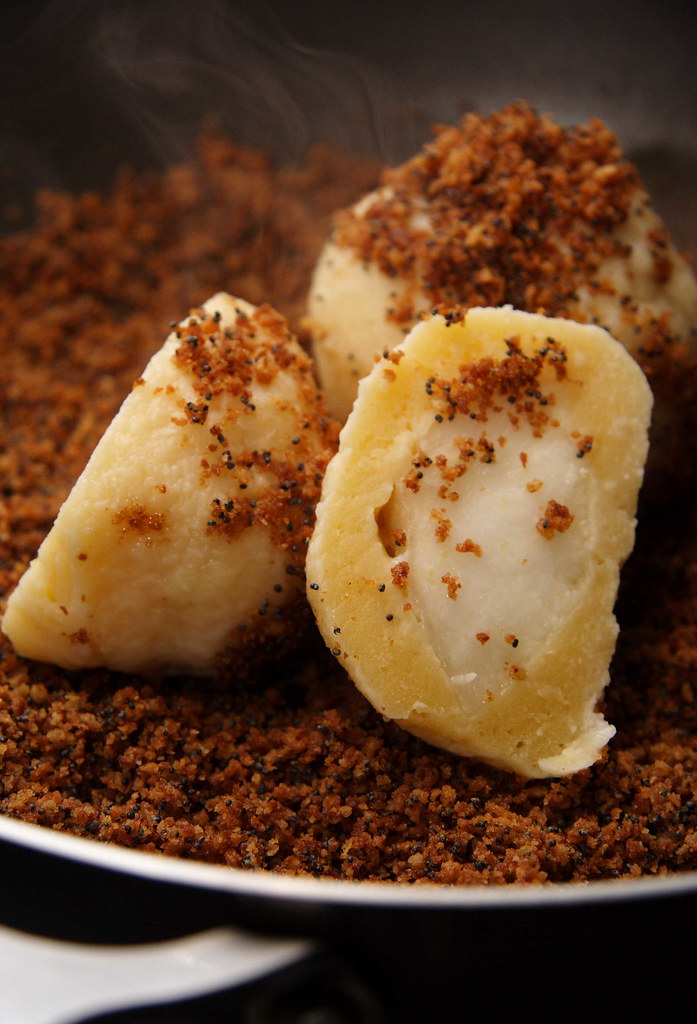
Well, pear, to be precise. When I read about Johanna's challenge for the June edition of the "Waiter, there's something in my..."-event, I was very happy. I had always wanted to make fruit-filled dumplings (you didn't expect me to make savoury ones, right?) but for some reason never got around to do it. And regarding the chilly temperature this past month here in Sydney, my dumplings couldn't be wintery enough.

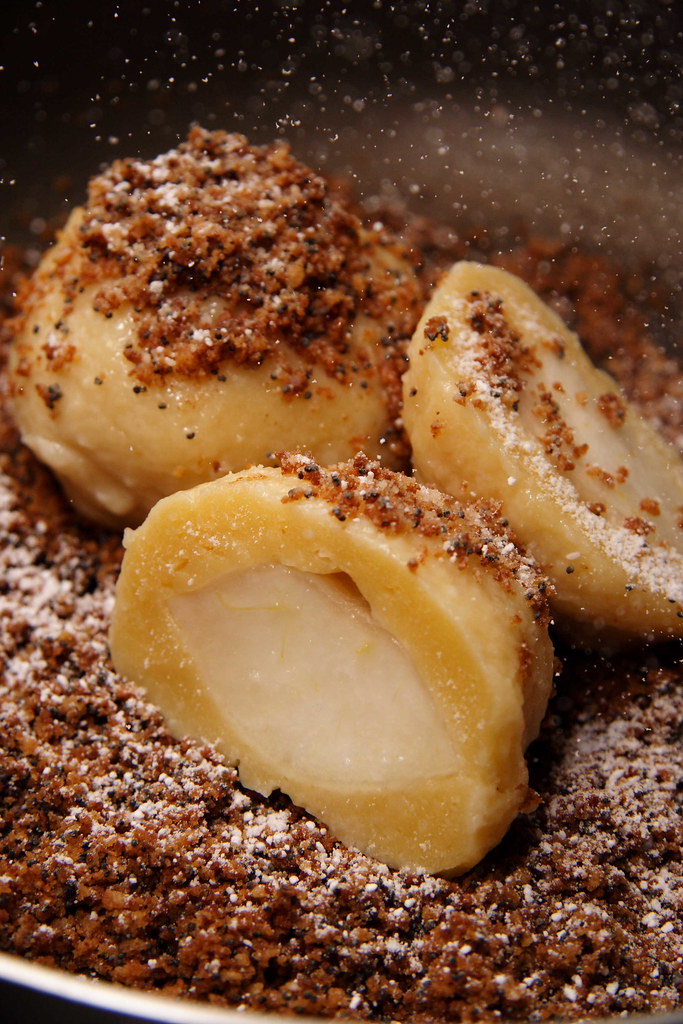
The only problem: Plums or apricots are just not in season right now and I didn't want to shell out almost six dollars for a tiny punnet of strawberries (it's still a mystery to me that those always seem to be in season in some part of Australia). However, the pear season is in full swing right now so that was settled eventually. In the beginning I had dreamed of some wonderfully complicated filling like pot roasted pears but in order to get dinner ready at a reasonable time, I simply used big chunks of a very ripe packham pear. With a salad as a starter, these pear dumplings are a substantial meal - and when you only eat two dumplings each, it's no overindulgence. However, I don't want to stop anyone...

Special thanks to my boyfriend who first sneered at the idea of a sweet main meal but then helped me taking really good photos: It was his idea to picture the steam and to let it "snow". Needless to say, he ended up liking these dumplings a lot... The cooking time was just right to get sweet and soft pear centres without overcooking them. The fried breadcrumbs added texture and a nice contrast to the soft but still firm dumpling dough. Can't help it, I want more...


Pear Dumplings


The ingredients

40g butter
250g ricotta
2 egg yolks
1 pinch of salt
250g flour
6-8 tbsp milk

1 large, ripe packham pear, peeled, cored, and cut into six chunks

about 3 litres of salted water

50g butter
100g breadcrumbs
2 tbsp poppy seeds
pinch of cinnamon
pinch of mixed spice
icing sugar for dusting

1
Cream the butter, add egg yolks, ricotta, flour, and salt, mixing well.

2
If your ricotta is rather stiff like mine, you'll end up with a crumbly mixture. Add milk by the tablespoon until the dough comes together in a smooth ball. It will still be rather stiff. If your ricotta is soft, omit the milk.

3
Shape the dough into a thick roll and pop it into the fridge for 30 minutes. In the meantime, prepare the pear.

4
Boil the salted water. Cut the chilled dough roll into 6-8 slices (depending on how big your dumplings are). Flatten each pieces until it's big enough to be wrapped around the pear chunks. Make sure to pinch the seams well (which is a bit easier using naturally round fruit).

5
Carefully put the dumplings into the water and let it come to a boil. Then let the dumplings simmer for about ten minutes. They are ready when floating. Note: Make sure to stir once or twice to prevent them from sticking to the bottom. Otherwise they won't float when ready...

6
In the meantime, melt the butter in a pan. Add bread cumbs, poppy seeds, and spices. Fry until crisp, stirring frequently.

7
Turn the cooked dumplings in the breadcrumbs and sprinkle with lots of icing sugar.

The source
Adapted from Hedwig Maria Stuber: Ich helf Dir kochen

The hint
Makes 6 large dumplings or 8 smaller ones when using smaller fruit. After an entre, serve 2-3 large dumplings per person as main course. As dessert, this is enough for four people.

If you have leftovers, freeze the dumplings and the breadcrumbs seperately. To thaw the dumplings, put into cold water and let come to a boil or use a microwave.

Wednesday, 27 June 2007

Craving Vanilla Custard


Sadly enough, there haven't been many posts in this month. Due to a couple of very busy days, I didn't even have time to read my favourite blogs. But even worse, I've even managed to miss the deadline for this month's Sugar High Friday... If I'm very lucky, Jennifer - The Domestic Goddess who not only invented this popular blogging event but also hosts it this time - will have mercy on me - but if not, I can't blame her...

Anyway, I still want to tell a story about one of my all-time cravings. But beware, it's not something very interesting. Most likely, most people will have made something like that ages ago: homemade vanilla custard.
However, when I was little, I thought vanilla custard came out of a box. I did know that milk does come from cows and not from the supermarket (after all, I grew up in a little village and visited said cows almost every evening). But whenever I was craving vanilla custard, my mum would just open a paper package with a flour-like mixture, stir it into milk, and after a little boiling I was a happy camper. Up to today, I still don't know anyone personally (at least in Germany) who would make it from scratch. Although it might be possible that I accidentally made something that qualifies as custard when working on a more involved dessert recipe, I haven't done it consciously - until last weekend.
Jennifer's task to create something that you crave regularly but never actually made yourself was the proper occasion to finally try my hands on my very first vanilla custard. That said, this recipe isn't particularly difficult and it was whipped up in no time. However, I felt a bit timid. Would it be able to stand up against the beloved package mix? Could I - at the ripe old age of 30 - leave my childish custard addiction behind and fall in love with the real thing?

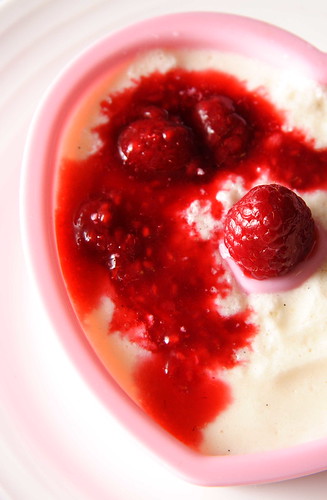
I tasted at every stage, carefully monitoring the changes in texture, colour, and taste. And truth be told, once the egg yolks were incorporated, this custard tasted exactly like the one I was already used to (but I take care to buy the good stuff with real vanilla). Not only taste, even colour and creaminess were exactly the same. A bit startled, I folded in the egg whites. And that's where things started changing. My eggs had been too big. Whilst this foamy feather-light custard was still pretty good, it had nothing to do with my treasured memory. And it was by far too soupy to set and be inverted later (I tried and it resulted in a very unphotogenic puddle on the plate). End of the story: I guess I will still resort to my package mix - unless it's a very special occasion...


Homemade Vanilla Custard

The ingredients
750ml whole milk
100g cornstarch (if you want to invert it - the original recipe stated only 60g)
75-100g caster sugar
1 tsp vanilla bean paste
2 small eggs, separated (If you only have large eggs, use two yolks and one egg white)

Serves 6

1
Whisk cornstarch, sugar, and vanilla bean paste into roughly 150ml of the milk.
2
Bring the remainder of the milk to a boil. Once boiling, remove from heat and stir in the cornstarch mix, using a wire whisk. Move back to heat and let it come to a boil again. Let boil for at least a minute or until noticeably thickened.

3
Stir the egg yolks into the thickened milk. (I waited a couple of minutes to let it cool down a little bit - didn't want to end up with scrambled eggs). The mixture will thicken a bit more.

4
Beat the egg whites until stiff and fold into the custard.

5
Pour custard into moulds and let cool. Refrigerate until serving.

The source
Adapted from Hedwig Maria Stuber: Ich helf Dir kochen

The hint
Serve with your favourite fruity sauce. I used frozen raspberries heated up in some Cointreau with a little sugar added.

Monday, 18 June 2007

Pia's Plum Tart


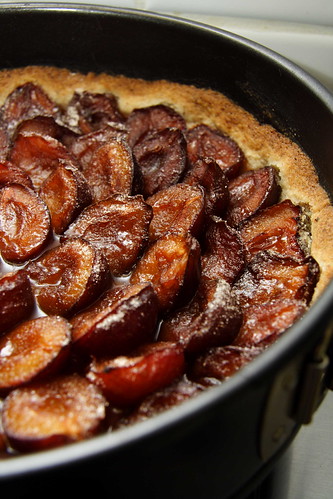
The plum season is gone since quite a while but I still haven't blogged about the latest result on my quest for the perfect plum cake. There has been the traditional one and the not-so-traditional one - both delicious in their own right but both not quite able to satisfy the expectations of my boyfriend. Usually, he's quite happy with the outcome of my kitchen adventures so I was really curious to know more about the superior plum cake of his mother with the mysterious "brown dough" - and I got her recipe.

It turned out that this dough was pretty similar to the pretty famous Austrian Linzer Torte which is said to be the world's oldest known cake recipe. I had never made it before so I was very intrigued and rushed to the store to get ground hazelnuts. I know, the recipe says almonds but that's where the trouble starts. To get the full taste - and the desired brown colour - the almonds need to be ground with their skin on. Unfortunately, the store-bought almond meal is completely white and I don't have a food processor to make my own. That said, the best option is using a manually operated grinder. There you'll get tiny flaky bits (instead of a uniform floury meal) which will improve the texture of all sorts of baked goods, especially flourless cakes.
Anyway, none of those options was open to me so I decided to cheat a bit and used a mixture of 50g of ground hazelnuts and 50g of ground almonds. That way, the dough was decidedly brownish.
However, this story doesn't come with a happy end - simply because I was too impatient. Once the tart started to look done around the edges, I decided that it was fully cooked through even after only half an hour in the oven. When slicing the tart, I realized that I had outsmarted myself: What had looked all right around the edges was completely undercooked in the middle. Luckily, even undercooked, the cake was still tasty albeit not at all crunchy. Now I'll have to wait for the next plum season to get the ultimate plum cake experience... If any one happens to have some plums in the freezer and wants to try this tart, please let me know about the outcome...

Pia's Plum Cake

The ingredients

150g butter
100g sugar
2 egg yolks
pinch of salt
some lemon zest (or vanilla extract, if you prefer)
150g all-purpose flour
100g ground almonds

1
Cream butter with sugar until sugar dissolves. Add egg yolks, salt, and flavouring, mixing carefully after each addition.

2
Add the flour and the ground almonds, while mixing on low speed. Once the dough comes together, shape it into a disc, wrap in plastic foil, and chill in the fridge for an hour (because the dough is quite soft).

3
Press the dough into a buttered 26 centimetres tart form (the dough will still be too soft to roll it out) and cover tightly with plums. If using frozen plums, don't let them defrost or they will get soggy.

4
Bake at 180 degrees Celsius for about an hour (and try to be patient - it doesn't matter that the edges of the cakes could get a bit dry and crumbly). Take the cake out of the oven and immediately sprinkle with cinnamon sugar.


The source
Pia's recipe

The hint
You can easily double the recipe for a whole tray of plum cake.

Sunday, 13 May 2007

Chocolate Crumble Cake by Mum

In Germany things like baking powder or vanilla sugar are sold in little sachets. Pretty convenient for the lazy baker who doesn’t want to bother with measuring. But the best part is the recipes on the back. My mom used to collect them (and I do it, too, sometimes). She has quite a stack of them; all bundled up and secured with rubber band. Some are 15 years old – or even older. Looking through them, you can stumble upon real treasures. We’ve got our family vanilla ice cream recipe from one of them (something I hope to make and blog about pretty soon).

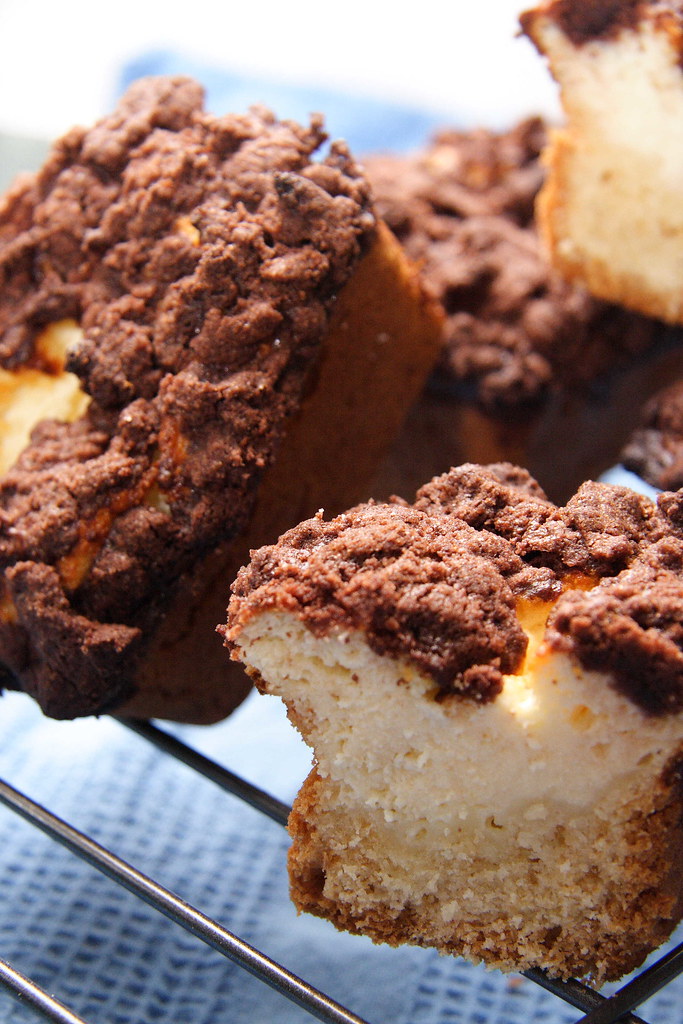
Another one is a cake that never failed to impress – the combination of pound cake, ricotta filling, and most importantly the chocolate crumble topping is uncommon enough to spark interest at once.
The original recipe didn’t have the filling but a spread of red currant jam instead. That was quite good but my mum came up with the idea of a quark filling that was even better. It pretty much sums up her approach to cooking and baking: nothing fancy-schmancy – just down-to-earth and simply good. Happy Mother’s Day, mum!

Chocolate Crumble Cake with Ricotta Filling

Pound Cake Base
75g butter
75g caster sugar
1 tbsp vanilla sugar (heaped)
1 egg
150g all-purpose flour
50g cornstarch
1 tsp baking powder
2-4 tbsp milk

Beat butter until soft, add both types of sugar. Beat until pale and fluffy, the sugar should be dissolved. Add the egg and mix well. Add the dry ingredients and as much milk as needed (the dough should be rather on the stiff side). Spread into a prepared springform pan creating a little rim if desired).

Ricotta Filling
2 egg yolks
100g caster sugar
1 tbsp vanilla sugar, heaped
500g Ricotta (should be rather sour, do not use the ricotta for baked cheesecake)
2 egg whites

Beat the egg whites until stiff. In another bowl, beat the egg yolks and the sugar until pale and fluffy and the sugar is dissolved. Add ricotta and mix well. Gently fold in egg whites. Spread ricotta filling on top of vanilla dough.

Chocolate Crumble Topping
150g flour
30g cocoa
100g sugar
1 tbsp vanilla sugar, heaped
100g butter, cold, diced

Mix with your fingers until coarse crumbles form. Do not over mix (otherwise the butter will melt and mixture will get too soft to form proper crumbles). Sprinkle atop ricotta filling.

Fan-bake cake at 150 degrees Celsius (otherwise 170 degrees Celsius in a preheated oven) for about half an hour. If the ricotta filling is still wobbly, bake for another five minutes. Let cool down thoroughly before unmolding. Otherwise the cake might crack.

The source
My mum and a very old vanilla sugar sachet

The hint
If you can track it down, use European-style quark or curd for the filling – that’s what the original recipe calls for.

If using a mini-loaf pan, you’ll have leftover ricotta filling which can be baked separately as little soufflé. The leftover crumble can be frozen.

Monday, 9 April 2007

Easter - Downsized Celebration

This year’s Easter is a bit of a boring story – I’m home alone, my boyfriend is overseas, and my family is as far away as usual. So embarking on all sorts of culinary Easter adventures didn’t seem to make much sense – after all, who’s gonna eat it? Furthermore, half of the long Easter weekend is occupied by work. However, lucky me, on the two free days I’ve been invited to an Easter brunch as well as a chocolate fondue, thanks to Katherine and Nora! You see, all is not lost!

And trying to see the brighter side of things, I quickly decided to dye the four remaining eggs in my fridge. I wanted to do it with natural colour and used turmeric, hoping for a bright yellow. Unfortunately, after letting them soak for a whole night, there is not much of a yellow colour to be seen. However, they have some yellowish spots here and there so they will hopefully qualify as Easter eggs.

Back home, I would have spent the evening of Good Friday with my mom, dying dozens of eggs in all sorts of colours. The following day, we would bake as much as possible – my family is used to eat cake rather by the square meter… Having no seasonal fruits yet, we would usually make two big baking sheets covered with yeast dough, topped with juicy quark filling, and crunchy streusel. With 1.5 kg of flour as the basic ingredient for the dough, we would have enough dough leftover to make two sweet Easter breads: one with raisins and candid orange or lemon peel for my parents and my brother and another one just with almonds for my sister and me (being both raisins and mixed peel haters). Traditionally, those breads get shaped into round loaves, slashed in the pattern of a cross, and brushed with egg yolk for a nice, golden brown colour. The sweet breads we would have for breakfast with butter and honey or just plain, and the cake for afternoon tea or whenever you happened to pass the pantry...

This year, there was neither the time nor the need to engage myself for several hours in a yeasty adventure of that sort. Luckily, I can at least show you our typical baking sheet-size cheesecake because I made it for a friend’s birthday a couple of weeks ago and never posted about it.
Finding European-style quark in Australia is rather difficult and in any case very expensive. Thus, you could substitute it with ricotta but make sure to choose a rather sour one and not the ricotta recommended for baked cheesecake. The real European quark gives a slightly sour note which is the necessary counterpart to the overall sweetness of filling and streusel topping.

Happy Easter!


Easter yeast cake with quark filling and streusel topping

I use my regular yeast dough recipe but you can also use your preferred brioche recipe or a less rich version if you feel like eating healthy. If you don’t feel like eating healthy at all, then add your favourite streusel topping – you won’t regret it!

The quark filling

Here, you can experiment as much as you want adding raisins, mixed peel (if you really like it) or a finely chopped apple.

4 egg whites
Pinch of salt
75g butter
200g caster sugar
2 sachets of vanilla sugar (or 1 tbsp vanilla essence)
4 egg yolk
1 kg quark or ricotta
100-200g sour cream
1 tbsp cornstarch (semolina works fine, too)
A few drops of rum essence or 1-2 tbsp rum (optional)

Yield: enough filling for a big baking sheet

1
Beat egg whites with salt until stiff.

2
In another bowl, cream butter with sugar and vanilla sugar until pale and fluffy, gradually add egg yolks mixing well after each addition.

3
Add quark and sour cream to the butter mixture, mixing well. Add cornstarch and rum essence, if using. At this point, you could also add raisins etc.

4
Gently fold in beaten egg whites.

5
Spread filling on the rolled-out yeast dough and cover with streusel if desired. Fan-bake at 150 degrees Celsius for about 45 minutes.

The source
Loosely based on "Hedwig Maria Stuber: Ich helf dir kochen"

The hint
Check the dough base on the edges for doneness: It should be golden yellow and not dark. The quark filling will stay whitish and only get a golden yellow colour on some spots. If you are like me and pile up as much streusel topping as possible, then the entire surface will be covered with a crunchy, golden crust...hmmm...

The streusel topping

250g flour
150g sugar (for crunchy streusel, don't choose caster sugar)
100-150g butter, cold, diced
1 sachet vanilla sugar

1
Put all ingredients into a bowl and quickly rub the butter into the flour using your fingers. If the mixture is too crumbly and doesn't come together at all, add a little more butter. If you work too slowly and the butter starts melting, don't add more flour (unless you want your streusel concrete-style). Rather pop the bowl into the fridge or freezer (depending on your patience) until the butter has firmed up again.

2
Crumble mixture on top of your cake. Leftover streusel can be frozen.

The source
My mom's creation

Monday, 12 February 2007

Almost a Pound Cake

At age twelve, when my mother started to teach me how to bake, my first attempt was a pound cake. Well, sort of a pound cake as it did not contain a full pound of each ingredient. It is said this type of cake is to be the easiest one of all. I strongly disagree with that.

Apart from the fact that there are quite a few steps involved where you can screw things up, there are so many different techniques and ingredients: using whole eggs/egg yolks/beaten egg whites, using margarine/butter/melted butter/oil, using caster sugar/powdered sugar, and using flour/starch/flour-starch-mix. You know what I mean? Even if you follow the same recipe with the same amounts of every ingredient once you start swapping ingredients as well as techniques you will end up with slightly different results. Ok, I’m not totally desperate. Apart from one completely under baked cake all my attempts so far were perfectly edible and got usually wolfed down in no time.

However, there is something that nags on my baker’s conscience: I have never been able to produce a cake with long strands of dough which give the cake a certain fluffiness while still being very moist. No matter how I might beat, whisk, or cream – I never came close to my ideal. Sounds a bit exaggerated? Maybe, but this legendary cake really does exist. One of my oldest friends, Martina, used to make a red wine cake just this way. Of course, I asked her for the recipe and she walked me through each step. However, while being tasty it still wasn’t like hers. It still isn’t.

That’s the reason why I’m always on the lookout for new recipes. You’ll never know when you’ve got a winner… This time, I found at Fool for Food as well as What’s for Lunch, Honey? recipes containing no baking powder at all. I never tried that, always felt too scared. But this time, taking up Meeta’s challenge ;-) I thought I’d give it a go. Meeta’s version was a bit too rich so I opted for Claudia’s version which was more suited for two eaters. Originally, this recipe comes from the highly-decorated chef Lea Linster of Luxembourg. That said, I was still a bit sceptical. However, much to my surprise, it really worked.

You have to use equal ingredients, 230g of each: butter, sugar, eggs, and flour (hence almost a pound cake). You let them come to room temperature - I placed my ingredients on the kitchen table 1,5 hours before starting which was alright. Mix the ingredients in the above stated order. Make sure that every egg is fully incorporated before adding another one and that the mixture is not over mixed once the flour is added. A pinch of salt is all you need for flavour but adding some vanilla or lemon zest won’t hurt (I used vanilla sugar, substituted some flour with cocoa, and added some chopped dark chocolate). The resulting batter was so smooth that it resembled butter cream. Could be eaten straight from the mixing bowl...

Fan-bake the batter at 150 degrees Celsius for 50 to 60 minutes (my cake took its time: 70 minutes). Despite my doubts, the cake was rising beautifully. You see, there is no need to use baking powder any more! However, I’m still missing those wonderful long, flaky strands in my crumb…


The ingredients

230g butter (at room temperature)
230g sugar
(at room temperature)
pinch of salt (at room temperature)
230g eggs (usually 4, at room temperature)
230g flour
(at room temperature)

optional: vanilla sugar, lemon zest, cocoa, chopped chocolate...

1
Beat butter until pale and fluffy, add sugar, salt, and vanilla sugar. Beat thoroughly (sugar won't be fully dissolved yet).

2
Add one egg at a time, making sure that each is fully incorporated.

3
Add flour and mix until properly combined but no longer. For the sake of completeness: Lea Linster lets her batter sit for 45 minutes at room temperature before baking but I don't have a clue why you should do so and skipped this step.

4
Bake at 180 degrees Celsius (150 when fan-bake) 50-60 minutes (original recipe states only 45 minutes - use a skewer inserted in the middle to test doneness).


The source

Fool for Food respectively Lea Linster.

Thursday, 8 February 2007

Simple Breakfast Bread


That's what I do with my leftover yeast dough: simply bake it in a loaf pan and eat it for breakfast. It's not as rich as a regular brioche (not enough butter and eggs) but light and fluffy. If you want it a tad richer, simply add raisins, flaked almonds (my favourite), or candid orange or citron peel (definitely not amongst my favourites) - whatever you like best. You could also turn it into French toast or use it for bread and butter pudding - it's very versatile.

But to me, my simple breakfast bread tastes good just the way it is. Either plain or smothered with butter and honey - I love it!

Wednesday, 31 January 2007

Summer Delight - Sugar Plum Cake


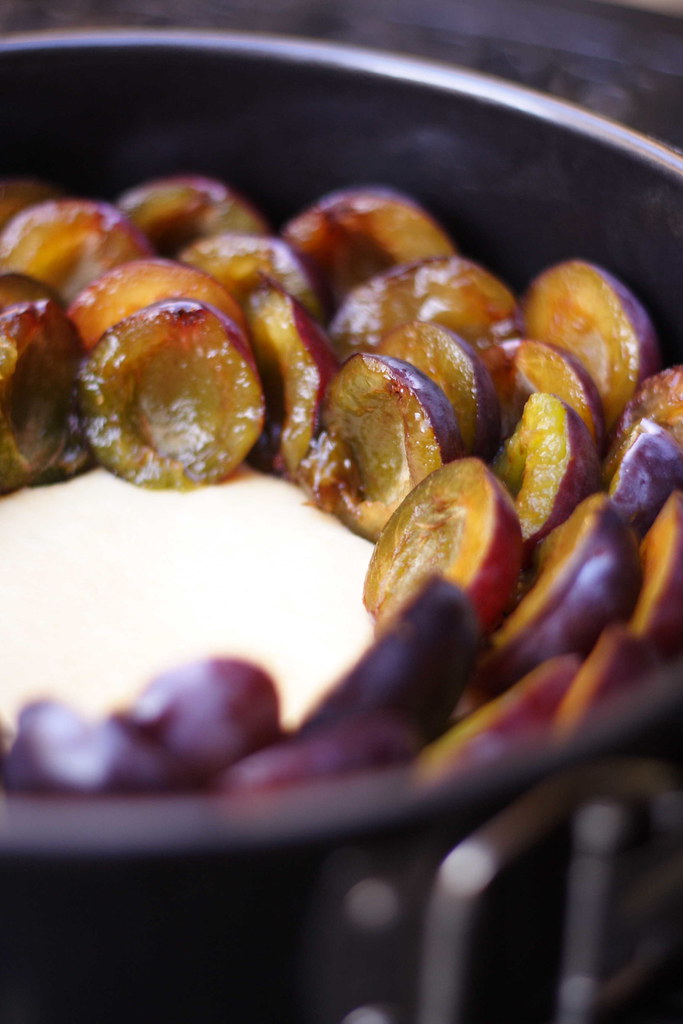
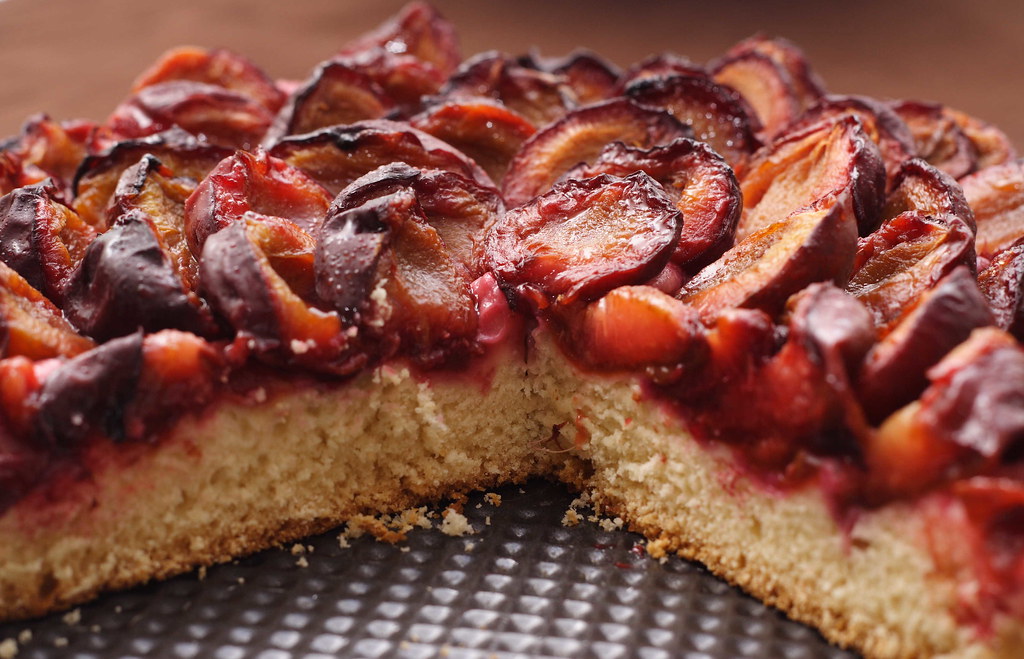
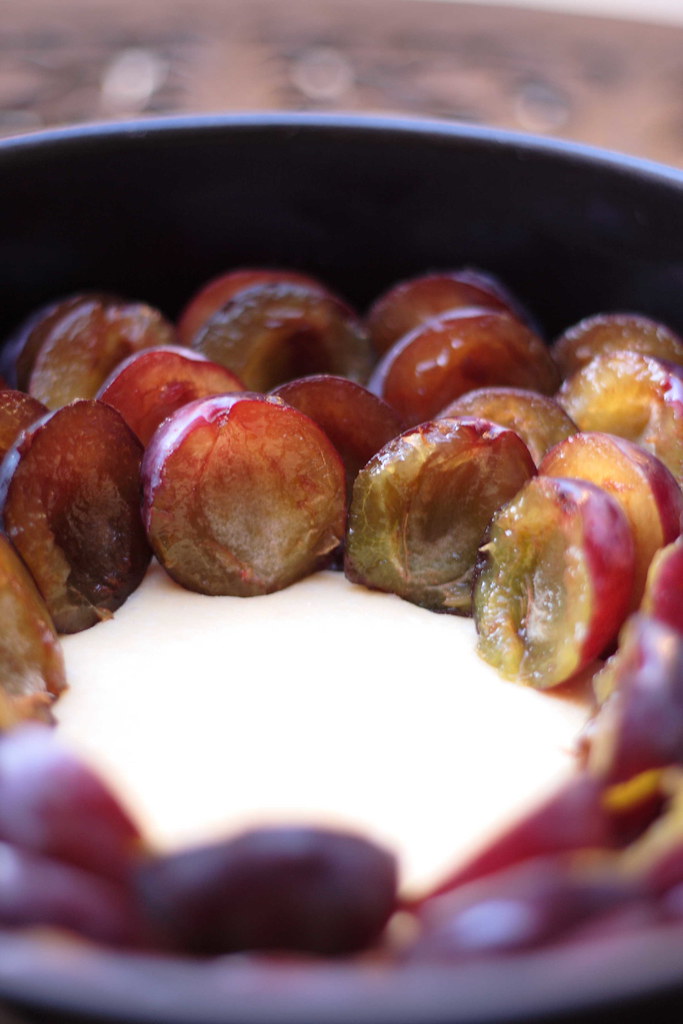
I remember it pretty well: those lazy afternoons in our garden, sitting on the terrace, and indulging ourselves in sugar plum cake. What, that doesn’t sound very decadent? Mind you, when I say indulging it means two huge baking sheets full of sweet yeast dough and studded with plums shared between five people. And it surly didn’t take all weekend to polish it off. Even with such an abundance of cake, someone peeking through our hedge-like shrubs could still find us fighting over the last piece – not to mention the heated discussions about who ate more than his or her fair share…

Some people might find this cake rather plain and won’t understand the fuss about it. However - tart-sweet plums on top of a tender yeast cake with a slightly soggy upper layer where all the purple juices join with the crumb – this simple combination sounds like heaven to me! Unfortunately, when moving to Australia I had to endure a full 15 months without sugar plum cake. Whilst one can find almost any exotic fruit in Sydney, I could spot not a single sugar plum. Until about ten days ago: Roaming through the bustle of Market City and doing my weekend shopping, there they were all of a sudden: purple-blue, nice and plump, with a seam and a pointed end. I happily bought a kilogram – of course, it was perfectly clear what to do with them. Had I just known that I wouldn’t be able to get some more the next weekend…I had big plans making plum compote, baking more plum cake, and freezing some for future use. Alas, the only thing I can do is to hope and wait for better luck the next weekend.


Sugar Plum Cake

The ingredients

100g butter
250ml milk
500g all-purpose flour
pinch of salt
100g sugar
1 sachet vanilla sugar
1 sachet dry yeast or 30g fresh yeast
2-3 eggs (depending on size – if using three large eggs, use less milk)

1kg sugar plums, halved, stones removed
2-3 tbsp caster sugar

The yield
One third of the dough is more than enough to cover a spring form 24 centimetres in diameter. The rest of the dough can be baked as a brioche (or topped with other fruits, streusel, cream cheese/curd/sour cream filling – whatever strikes your fancy).

1
Melt butter. Pour cold milk into the melted butter, the mixture should be lukewarm. Set aside.

2
Mix other ingredients in a large bowl, making sure not to put the yeast next to the salt. Pour in butter-milk-mixture.

3
Using your mixer with the dough hooks, beat the dough until it comes together in a soft and wobbly mass. It should not stick to the sides of the bowl anymore. This step may take between 20 and 40 minutes (I confess I used my bread maker for kneading).

4
Cover with a clean kitchen towel and set aside until doubled in volume. Put the risen dough on a lightly floured surface and knead until smooth again.

5
For the plum cake take about a third of the dough or less and flatten it inside the buttered baking tin. Be careful to roll out the dough very thinly because it will rise quite a bit during the baking process. Equal thickness of fruit and cake layer provides the best fruit-to-dough ratio in my opinion. Unfortunately, after my plum cake deprivation, I forgot about this important fact and made the cake base too thick.

6
Place plums on top of the dough in an upright manner trying to squeeze in as many as possible. Fan-bake at 150 degrees Celsius until the edges of the cake are golden brown (25-35 minutes).

7
Right after taking the cake out of the oven sprinkle roughly three tablespoons of caster sugar on top. This has to be done while still hot and will cause the plums to release their juices. Up to half of the cake base should get soggy from the juices – don’t be afraid, that’s the best part. Another reason is that the baking seems to bring out the tartness of the plums - even if sweet when tasted raw, the cooked plums will need some extra sugar.


The source

Vohenstraußer Kochbuch


The hint

Despite the obvious temptation, don’t eat this cake while still hot or lukewarm. It’s best when fully cooled. In fact, this cake tastes best on the second or even on the third day when all the flavours have thoroughly combined.

Wednesday, 20 December 2006

Baking Christmas Cookies – Part II

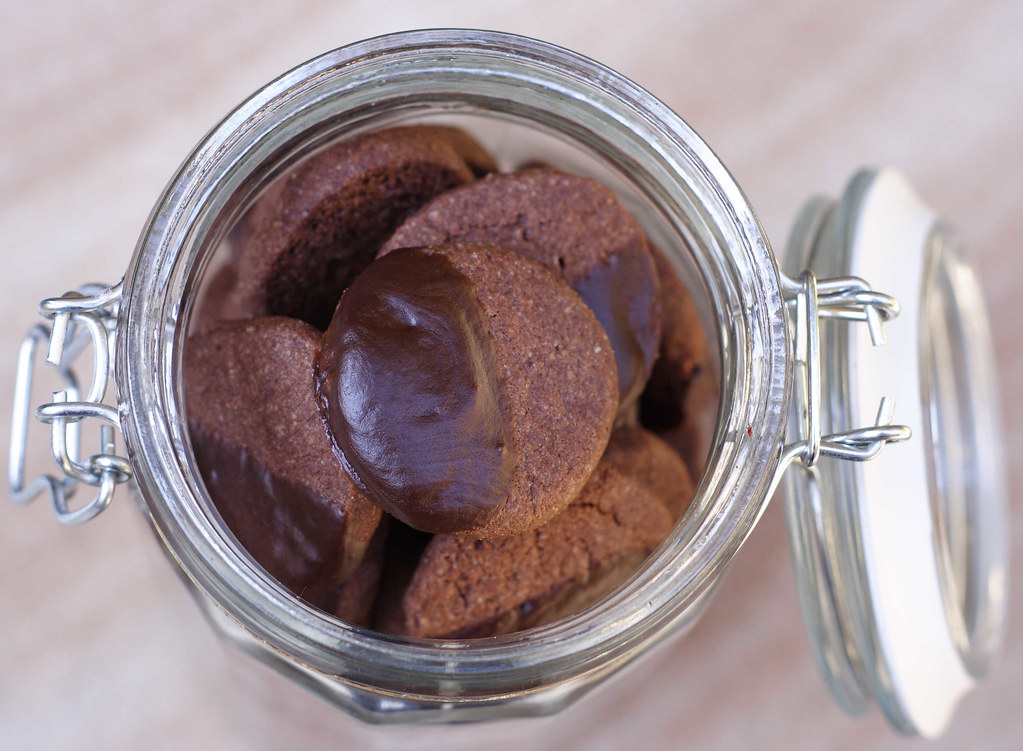
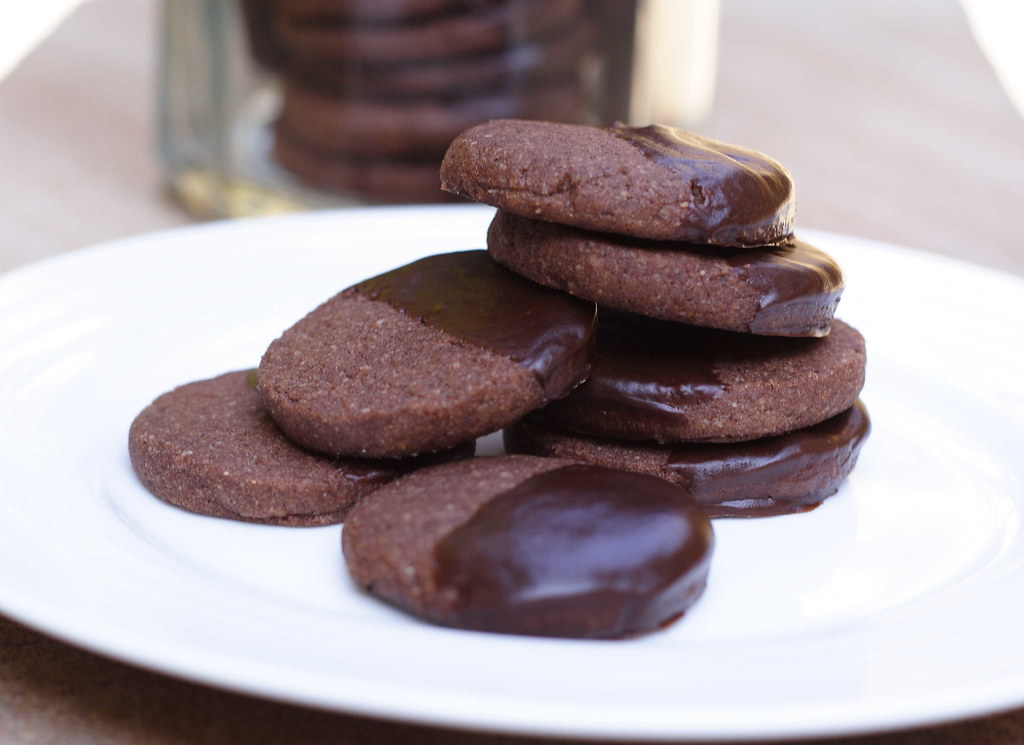
This year, I did do my share of baking for the upcoming holiday season: That's the second batch of my Christmas Cookies. I made the Chocolate Taler after my boyfriend had given me a not-so-subtle hint that he wouldn't mind an all-chocolate cookie... I haven't tried the recipe before and was very pleased with the result: chocolatey but not overly sweet, substantial but not too heavy for happily devouring one after another. Straight from the oven, they are pretty crunchy but get chewy after a few days. The original recipe didn't call for the dunking in rich chocolate ganache but we did not regret this little tweaking.

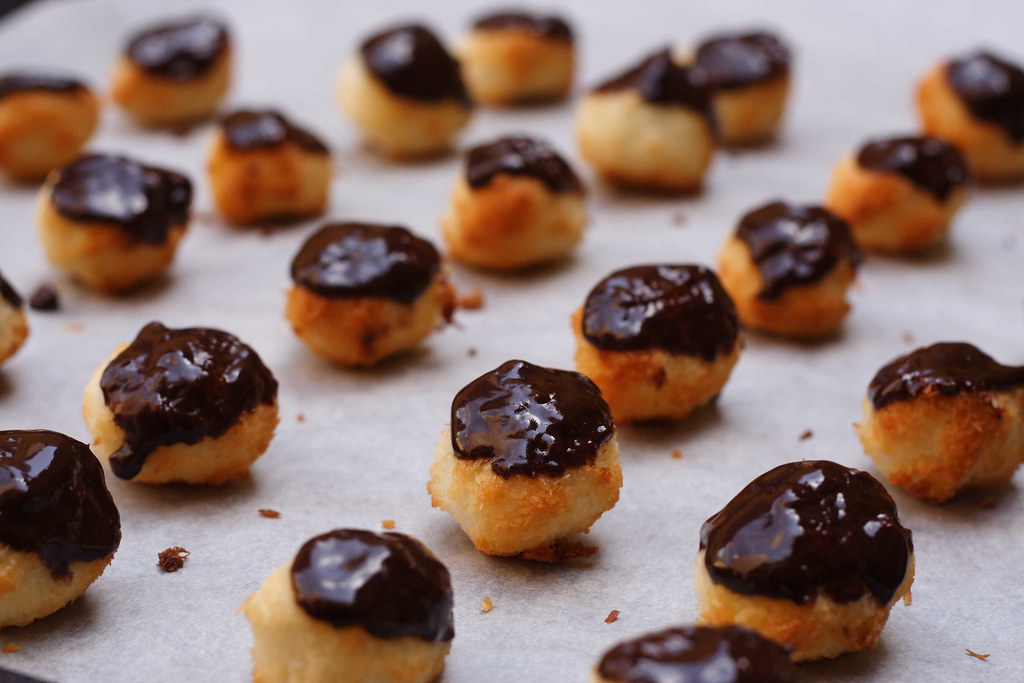
The other recipe for coconut macaroons is from Molly of Orangette. After reading this delicious description, I knew I had to try it. Alas, I didn't follow the recipe to the letter and the macaroons turned out to be not-so-great. I reckon I'm the one to blame that they were a bit dry - I made them bite-sized, much smaller than Molly did. However, I want to ask her about the details to figure out what exactly I have done wrong. After all, they're not entirely bad...


Chocolate Taler


The ingredients


125 g butter, cold, diced

150 g sugar
100 g ground almonds
250 g mix of flour and 3 tablespoons cocoa
5-10 tablespoons milk
1 teaspoon baking powder

Chocolate glaze

1
Mix dry ingredients on top of your work surface. Rub in butter and start kneading. Use as many tablespoons of milk as necessary for the dough to come together.

2
Form dough into four strands of equal thickness. Try to do this as quickly as possible so the butter doesn't start melting. Furthermore, try not to roll the dough strands to much as this will cause the strands to fall apart. Chill the dough at least 30 minutes.
Note: I once read that freezing the dough would enable you to cut off neat little discs. Let me tell you, this doesn't work.

3
Cut off slices about three millimetres in thickness and place on a baking sheet lined with parchment paper. Bake at 200 degrees Celsius for approximately ten minutes.
Note: If you bake the cookies at a lower temperature, they will get cracks. I baked the first batch at 150 degrees Celsius (fan bake) and the second batch as requested. The second batch looked much nicer.

4
Let cool and dunk in chocolate glaze. I used a chocolate ganache - it tastes wonderful but it doesn't get very firm. Here in Australia, I prefer to store them in the fridge (but let them get room temperature before serving).

The source
Vohenstrausser Kochbuch - an classic old-style cookbook from my homeland, the Upper Palatinate in Bavaria, Germany


Coconut Macaroons


It's best to follow Molly's instructions! Just one hint: She mentions that her recipe for chocolate ganache is much more than you need for dunking the macaroons. I used this ganache for dunking the macaroons, the Chocolate Taler, and for glazing the "Ischler Toertchen". It was just the right amount for all three batches and it tastes way better than any store-bought chocolate glaze!

Tuesday, 19 December 2006

Baking Christmas Cookies – Part I


With Christmas Eve coming up in less than a week, it was about time for me to start baking Christmas cookies. And I have to admit, it was the desperate attempt to get some sort of Christmas feeling, at last. I don’t insist on having a white Christmas – coming from an area in Northern Bavaria where you can’t bet on that – but having Christmas in summer is really another story. Additionally, you can’t get hold of any real pine tree in this climate zone so forget about having a proper Christmas tree. So far, I couldn’t get myself accustomed to the idea of putting presents underneath a plastic tree. Therefore, there won’t be any Christmas tree for me this year. To make matters even worse, I won’t see any members of my family as they will of course celebrate their Christmas back home in Germany.

After numerating this sad litany, I decided to cheer myself up a bit before getting another fit of severe self-pity. And what’s better than doing some baking? Unfortunately, it can’t get any of my beloved ones closer to me but there is some consolation in the fact that they will be eating just the same cookies.


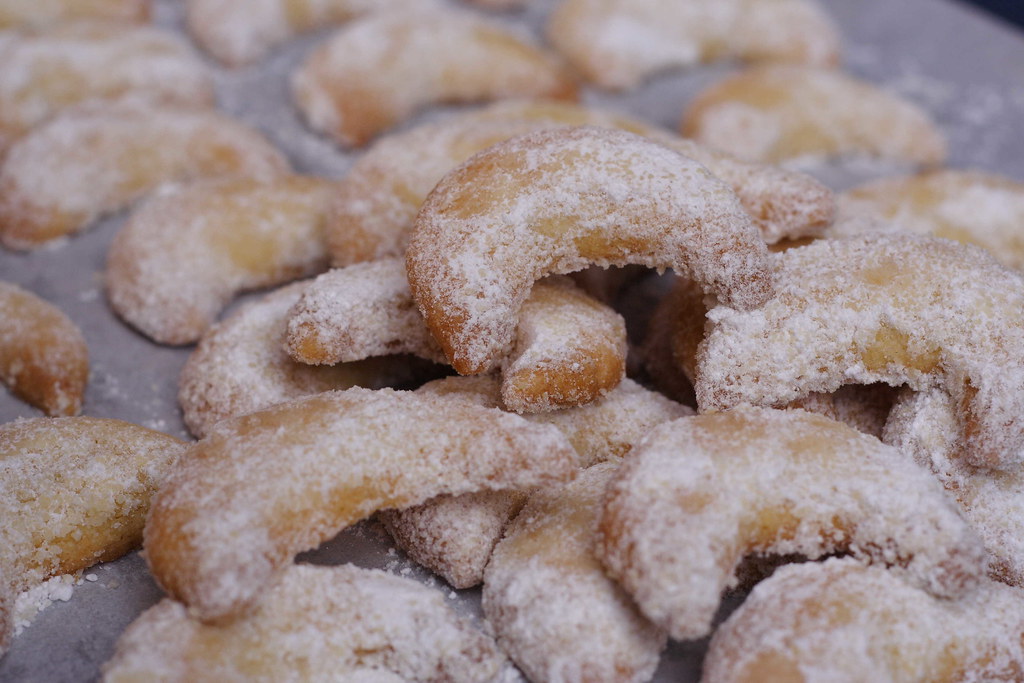
“Vanillekipferl” (Vanilla Crescents)

This recipe is a real classic. Its sweet vanilla scent is absolutely irresistible and the crunchy-crumbly feeling when biting into one of those – words can’t describe this… Another big advantage of this recipe is its versatility. The dough is pretty similar to the one of “Ischler Toertchen” (tartlets of Ischl, a town in Austria), another favourite cookie of mine. So I divided the dough into two halves and was able to make both types of cookies. This also saves you a considerable amount of time as intensive cookie baking can soon turn into some sort of kitchen slavery.

The ingredients

300 g flour
125 g sugar
1 sachet vanilla sugar (about a heaped tablespoon)
150 g ground almonds
250 g butter, cold, diced
3 egg yolks

Icing sugar, mixed with vanilla sugar

1
Sift flour onto your work surface, mix with sugar, vanilla sugar, and almonds.

2
Rub butter into the mixture, mix in egg yolks. Trying to work as fast as possible, knead until there are no butter lumps left. Chill the dough for at least 30 minutes (or put it into the freezer if you are in a hurry).

3
Form dough into two thin rolls (At this stage, you can save half of the dough for another purpose.). Try to get even strands but don’t roll the dough too long as it will fall apart. Cut dough strands into small pieces and form each into a small crescent. The middle part should be thicker than the ends.

4
Place crescents on a baking sheet lined with parchment paper. Make sure not to put them too close to each other as they will rise during the baking process. Fan bake at 150 degrees Celsius until light golden, approximately for ten to twelve minutes.

5
While still hot turn the crescents in a mixture of icing sugar and vanilla sugar until evenly coated. Handle with care, at this stage they can break easily.

The source

Hedwig Maria Stuber: Ich helf Dir kochen


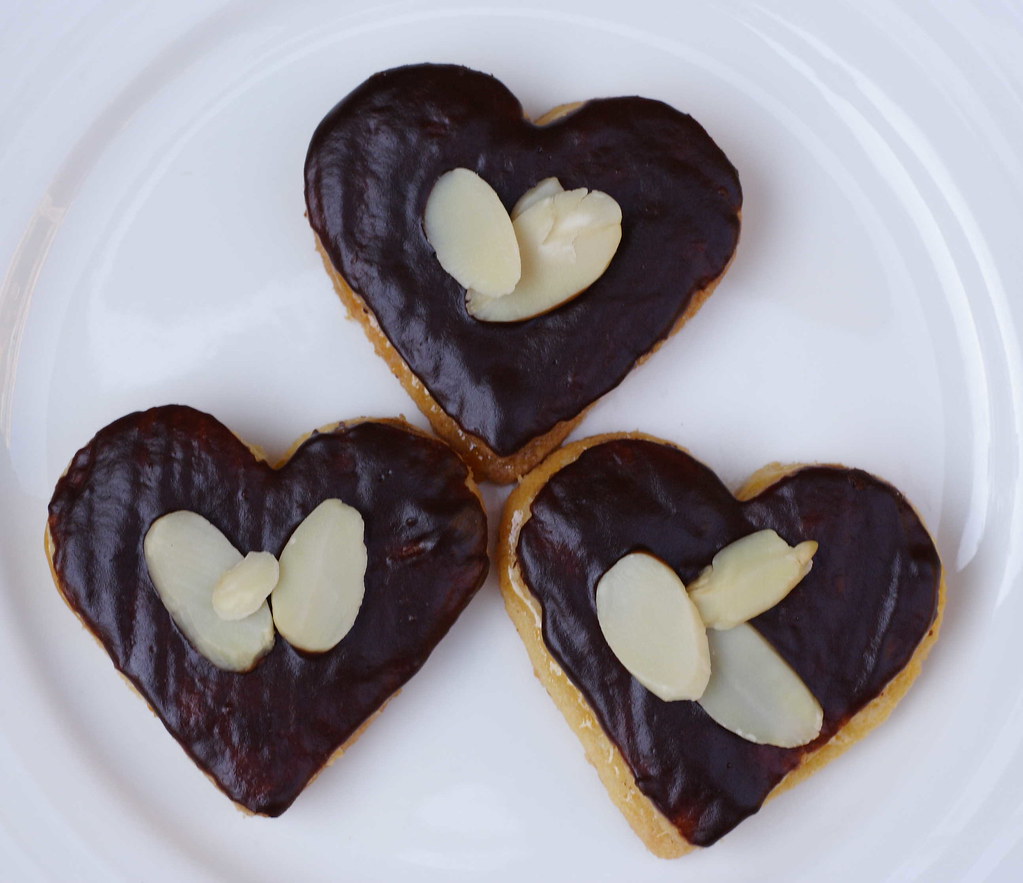
“Ischler Toertchen” (Tartlets from Ischl)

As said before, you can easily use the dough from the vanilla crescents to save some time. However, the nutty almond flavour won’t be very strong because store-bought almond flour is usually made of peeled almonds. The original recipe calls for unpeeled almonds to be ground and that makes quite a difference.


The ingredients

140 g butter
140 g flour
70 g sugar
70 g unpeeled, ground almonds
Pinch of salt

Apricot jam
Chocolate glaze
Flaked almonds or peeled almond halves

1
Rub butter into mixture of dry ingredients. Working as fast as possible, knead until dough gets a smooth and even consistency. Chill for at least half an hour.

2
Roll out the dough using as little extra flour as possible. Cut out cookies using a flower shaped cookie cutter (I didn't have one so I used a heart-shaped one). Place on a baking sheet lined with parchment paper and fan bake at 150 degrees Celsius until light golden.

3
Let cool and sandwich together with apricot jam. To get a spreadable apricot jam, heat the jam with a little water, stirring constantly. You can strain the jam to get rid of fruit pieces but this is optional.

4
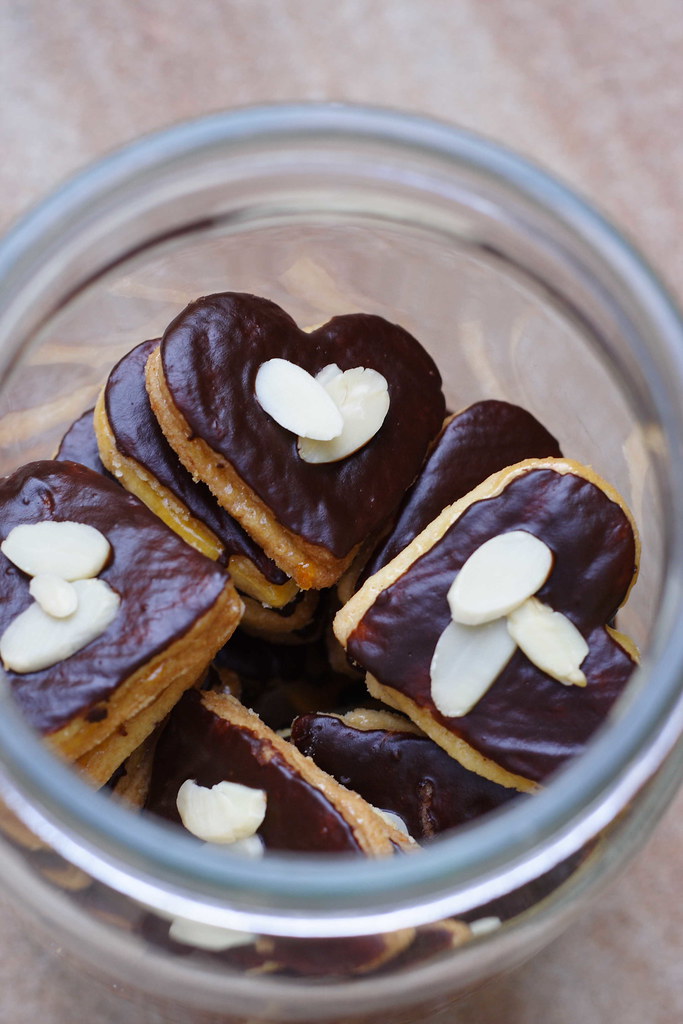
Spread chocolate glaze on top of the sandwiched cookies and decorate with almonds halves or flaked almonds.

The hints

If you can’t get store-bought almond flour made of unpeeled almonds and don’t own a food processor, you could substitute half of the almonds with ground hazelnuts.

This is the Christmas version of “Ischler Toertchen”. The original calls for a chocolate butter cream to sandwich in between.

In case you want more cookies and fewer calories when eating one: Forget the sandwiching and just glaze single ones with chocolate.

And, of course, if you opt for the original recipe, you could turn this dough into vanilla crescents as well.