Google
 

Friday 29 December 2006

Dinner on Christmas Eve


Back again: I spent Christmas with my boyfriend and some other friends in a quite lonely spot in New South Wales: Manilla. It's a small country town but famous for its paragliding site, Mount Borah. Keep in mind even if it's called "Mount", it won't be higher than a couple of 100 metres...

We stayed five nights at the camping ground next to the mountain and had our Christmas Dinner there. Not really what you would call refined food - Swabian potato salad and steaks - but it was really tasty. As you can see, I just remembered to take a picture when we had already started to shovel in. Tobi (left) and Hubert don't even have time to smile for the photographer... Due to our limited kitchen tools/time/whatever I only managed to throw together a few bought items for dessert. We had a trifle consisting of sponge fingers, brandy custard, and canned fruit.

I hope you all had a Merry Christmas!

Thursday 21 December 2006

Merry Christmas!

I'm heading off tomorrow morning to a spot in the middle of New South Wales, called Manilla. I'll be spending Christmas there - without a proper Christmas tree but at least with lots of cookies. I'll be back in a couple of days and I wish you all a Merry Christmas!
I'm not sure if I'm capable of that but I'll try to capture a picture of our Christmas Lunch - probably cooked on a camping stove...

Wednesday 20 December 2006

Baking Christmas Cookies – Part II

This year, I did do my share of baking for the upcoming holiday season: That's the second batch of my Christmas Cookies. I made the Chocolate Taler after my boyfriend had given me a not-so-subtle hint that he wouldn't mind an all-chocolate cookie... I haven't tried the recipe before and was very pleased with the result: chocolatey but not overly sweet, substantial but not too heavy for happily devouring one after another. Straight from the oven, they are pretty crunchy but get chewy after a few days. The original recipe didn't call for the dunking in rich chocolate ganache but we did not regret this little tweaking.

The other recipe for coconut macaroons is from Molly of Orangette. After reading this delicious description, I knew I had to try it. Alas, I didn't follow the recipe to the letter and the macaroons turned out to be not-so-great. I reckon I'm the one to blame that they were a bit dry - I made them bite-sized, much smaller than Molly did. However, I want to ask her about the details to figure out what exactly I have done wrong. After all, they're not entirely bad...


Chocolate Taler


The ingredients


125 g butter, cold, diced

150 g sugar
100 g ground almonds
250 g mix of flour and 3 tablespoons cocoa
5-10 tablespoons milk
1 teaspoon baking powder

Chocolate glaze

1
Mix dry ingredients on top of your work surface. Rub in butter and start kneading. Use as many tablespoons of milk as necessary for the dough to come together.

2
Form dough into four strands of equal thickness. Try to do this as quickly as possible so the butter doesn't start melting. Furthermore, try not to roll the dough strands to much as this will cause the strands to fall apart. Chill the dough at least 30 minutes.
Note: I once read that freezing the dough would enable you to cut off neat little discs. Let me tell you, this doesn't work.

3
Cut off slices about three millimetres in thickness and place on a baking sheet lined with parchment paper. Bake at 200 degrees Celsius for approximately ten minutes.
Note: If you bake the cookies at a lower temperature, they will get cracks. I baked the first batch at 150 degrees Celsius (fan bake) and the second batch as requested. The second batch looked much nicer.

4
Let cool and dunk in chocolate glaze. I used a chocolate ganache - it tastes wonderful but it doesn't get very firm. Here in Australia, I prefer to store them in the fridge (but let them get room temperature before serving).

The source
Vohenstrausser Kochbuch - an classic old-style cookbook from my homeland, the Upper Palatinate in Bavaria, Germany


Coconut Macaroons


It's best to follow Molly's instructions! Just one hint: She mentions that her recipe for chocolate ganache is much more than you need for dunking the macaroons. I used this ganache for dunking the macaroons, the Chocolate Taler, and for glazing the "Ischler Toertchen". It was just the right amount for all three batches and it tastes way better than any store-bought chocolate glaze!

Tuesday 19 December 2006

Baking Christmas Cookies – Part I


With Christmas Eve coming up in less than a week, it was about time for me to start baking Christmas cookies. And I have to admit, it was the desperate attempt to get some sort of Christmas feeling, at last. I don’t insist on having a white Christmas – coming from an area in Northern Bavaria where you can’t bet on that – but having Christmas in summer is really another story. Additionally, you can’t get hold of any real pine tree in this climate zone so forget about having a proper Christmas tree. So far, I couldn’t get myself accustomed to the idea of putting presents underneath a plastic tree. Therefore, there won’t be any Christmas tree for me this year. To make matters even worse, I won’t see any members of my family as they will of course celebrate their Christmas back home in Germany.

After numerating this sad litany, I decided to cheer myself up a bit before getting another fit of severe self-pity. And what’s better than doing some baking? Unfortunately, it can’t get any of my beloved ones closer to me but there is some consolation in the fact that they will be eating just the same cookies.


“Vanillekipferl” (Vanilla Crescents)

This recipe is a real classic. Its sweet vanilla scent is absolutely irresistible and the crunchy-crumbly feeling when biting into one of those – words can’t describe this… Another big advantage of this recipe is its versatility. The dough is pretty similar to the one of “Ischler Toertchen” (tartlets of Ischl, a town in Austria), another favourite cookie of mine. So I divided the dough into two halves and was able to make both types of cookies. This also saves you a considerable amount of time as intensive cookie baking can soon turn into some sort of kitchen slavery.

The ingredients

300 g flour
125 g sugar
1 sachet vanilla sugar (about a heaped tablespoon)
150 g ground almonds
250 g butter, cold, diced
3 egg yolks

Icing sugar, mixed with vanilla sugar

1
Sift flour onto your work surface, mix with sugar, vanilla sugar, and almonds.

2
Rub butter into the mixture, mix in egg yolks. Trying to work as fast as possible, knead until there are no butter lumps left. Chill the dough for at least 30 minutes (or put it into the freezer if you are in a hurry).

3
Form dough into two thin rolls (At this stage, you can save half of the dough for another purpose.). Try to get even strands but don’t roll the dough too long as it will fall apart. Cut dough strands into small pieces and form each into a small crescent. The middle part should be thicker than the ends.

4
Place crescents on a baking sheet lined with parchment paper. Make sure not to put them too close to each other as they will rise during the baking process. Fan bake at 150 degrees Celsius until light golden, approximately for ten to twelve minutes.

5
While still hot turn the crescents in a mixture of icing sugar and vanilla sugar until evenly coated. Handle with care, at this stage they can break easily.

The source

Hedwig Maria Stuber: Ich helf Dir kochen


“Ischler Toertchen” (Tartlets from Ischl)

As said before, you can easily use the dough from the vanilla crescents to save some time. However, the nutty almond flavour won’t be very strong because store-bought almond flour is usually made of peeled almonds. The original recipe calls for unpeeled almonds to be ground and that makes quite a difference.


The ingredients

140 g butter
140 g flour
70 g sugar
70 g unpeeled, ground almonds
Pinch of salt

Apricot jam
Chocolate glaze
Flaked almonds or peeled almond halves

1
Rub butter into mixture of dry ingredients. Working as fast as possible, knead until dough gets a smooth and even consistency. Chill for at least half an hour.

2
Roll out the dough using as little extra flour as possible. Cut out cookies using a flower shaped cookie cutter (I didn't have one so I used a heart-shaped one). Place on a baking sheet lined with parchment paper and fan bake at 150 degrees Celsius until light golden.

3
Let cool and sandwich together with apricot jam. To get a spreadable apricot jam, heat the jam with a little water, stirring constantly. You can strain the jam to get rid of fruit pieces but this is optional.

4
Spread chocolate glaze on top of the sandwiched cookies and decorate with almonds halves or flaked almonds.

The hints

If you can’t get store-bought almond flour made of unpeeled almonds and don’t own a food processor, you could substitute half of the almonds with ground hazelnuts.

This is the Christmas version of “Ischler Toertchen”. The original calls for a chocolate butter cream to sandwich in between.

In case you want more cookies and fewer calories when eating one: Forget the sandwiching and just glaze single ones with chocolate.

And, of course, if you opt for the original recipe, you could turn this dough into vanilla crescents as well.

Thursday 14 December 2006

Last Minute Solution


Sydney is really a great place for foodies – I don’t think that there is any other place in the world where you can get such good food for little money. Therefore, we are regular customers at our favourite Thai place and at the Chinese, the Taiwanese, the Vietnamese… you get the picture. There is only one drawback. Faster than you would ever imagine all the stuff in the fridge starts rotting. Call it an inability to estimate what two people can eat in a week or sheer shopping frenzy – after my usual Saturday afternoon trip to the Chinese market, I always get home loaded with fruits and veggies. Even with careful planning what to make out of it, at the end of the week there is always some item in the fridge that screams: “Eat me, right now, or I’ll go to waste!”

When I opened the fridge this time, there were several veggies looking rather scornfully at me from the bottom shelf: Two forgotten corn cobs, some very ripe tomatoes, a bunch of asparagus – slightly wrinkly at the end – and several opened and just half used cans.

After considering possible combinations, I decided to blanch some of the veggies first, then top it with tomato-based sauce béchamel and some feta cheese (also better used before it’s too late) and pop it into the oven for a couple of minutes. The result was tasty and colourful, and it didn’t look like a makeshift solution. The veggies had a good crunch and were held together nicely by the velvety béchamel sauce. With its deep orange colour it had an entirely new twist. And for someone who likes feta cheese as much as I do, the salty white chunks on top were almost the best part.


Spring Vegetables with béchamel sauce and feta topping

The ingredients

10-15 stalks of green asparagus (one and a half bunch)
2 corn cobs
4 roma tomatoes

1 tablespoon butter
2 tablespoons flour
1-2 tablespoons tomato paste
Splash of milk
100 ml evaporated milk
2 ladleful of veggie cooking water
Salt and freshly cracked pepper
100-150 g feta cheese

Serves 2-3 people.

1
Wash and trim asparagus. Blanch the whole stalks in salted water for a couple of minutes depending on how crunchy you like your asparagus. With a sharp knife, scrape the corn kernels into the boiling water and let cook for another two minutes. (I don’t know if that’s the proper method to separate the kernels from the stem but that’s how I did it.)

2
Using a slotted spoon, transfer the veggies into a greased ovenproof dish and set aside. Don’t discard the water.

3
For the béchamel sauce, let the butter melt over medium heat, stir in flour and let roast until golden yellow. Add the tomato paste and roast a little longer. Using a wire whisk, stir in the cold milk and cold evaporated milk. Stir until there are no lumps left and let cook until the mixture thickens.

4
To get your desired consistency, add some of the water you used for blanching the veggies. I used two big ladleful. Season to taste with salt and freshly cracked pepper.

5
Spoon your tomato béchamel sauce over the veggies. Top with sliced tomatoes and diced feta cheese. Pop into the oven at 150 degrees Celsius until everything is just heated through. This should only take a couple of minutes as the feta cheese doesn’t melt anyway.

Serve with freshly cracked pepper and some fresh crusty sourdough bread. In case you have a hungry meat lover to feed, serve it alongside a steak or a grilled gourmet sausage.


The source

My own creation


The hint

You will probably end up with too much béchamel sauce. Using the veggie cooking water it will make the base for a nice soup the other day.

Wednesday 13 December 2006

Menu for Hope III

I’m a little bit late but it's never too late to do a good thing: Whoever out there is paying attention to my food blog right now should also pay some attention to this year's MENU FOR HOPE.

The well-known food blogger Pim from Chez Pim is organizing this highly successful online fund raising event - already the third year in a row. Last year, food bloggers managed to canvass more than 17,000 US-Dollars. This year, it will probably be even more - after all it's for the World Food Program of the United Nations.

But the best is yet to come: While donating money you will automatically purchase tickets for the most amazing raffle you can think of. Food bloggers from all over the world have donated an incredible range of prizes: professional kitchen equipment, vouchers for high-end dining experiences, cookbooks and food magazine subscriptions, and even gourmet tours with celebrity chefs!

So hurry up, the fund raising ends on the 22nd of December. With the third day just about to start, we've already raised more than 8,000 US-Dollars! Pim will announce the raffle winners on 15th of January - so stay tuned!

And that's how you can participate:
  1. Go to the donation page http://www.firstgiving.com/menuforhopeIII
  2. Make your donation. Each US$10 will earn you a raffle ticket towards your preferred prize. Please specify the unique prize code in the personal message section of your donation confirmation and specify the numbers of tickets for each prize. For example, if you donate US$50, you could say 3 x EU09 and 2 x AP25.
  3. For US donors, if your company matches your charity donation, please remember to check the box and fill in the information so we may claim the corporate match.
  4. And check the box to allow your email address to be seen. In case you win, you will be contacted by email.
Not every prize - but quite a few - can be shipped anywhere in the world. Please check out the prizes in your region of the world:

US West Coast: Becks and Posh
US East Coast: The Amateur Gourmet
US (the rest): Kalyn's Kitchen
Canada: Cardamom Addict
Europe and UK: Davidlebovitz.com
Asia Pacific/Australia/New Zealand: Grab Your Fork

The prize drawing will be done electronically. Derrick at Obsession with Food is responsible for this tricky business.

I wish you good luck!

Friday 8 December 2006

A humble cake rises up to the occasion


Once upon a time, there was a really plain looking cake. Sitting flatly in its baking sheet, it always adored those piled-up high layer-cakes coated in whipped cream or butter cream and garnished with all sorts of dainty things. The humble cake never expected to be appreciated like those masterpieces of pastry. It knew too well that most people tend to overlook it at first. However, this honest cake would never attempt to conceal any kind of culinary failure behind a cream cloud – hoping that no one would dare to cut into this lofty creation.

German streusel cake - that’s the incarnation of home-made goodness. It wants to impress you with quality not with its looks: On a bed of shortcrust pastry you’ll find pieces of peaches covered with sweet and crunchy streusel and a handful of flaked almonds. A light shower of powdered sugar fits this cake quite nicely. If you feel dainty, just dress it up with some vanilla-scented whipped cream. After that, this cake will look almost as elegant as its lofty relatives – but unlike them, its taste will never disappoint you.


German Streusel Cake

The ingredients

300g butter, softened
250g caster sugar
2 small eggs (or 1 whole egg and an egg yolk or egg white)
Salt
600 g all-purpose flour
3 teaspoons baking powder

1 big can of peaches
Handful of slivered almonds
Icing sugar for sprinkling


1
Cream the butter together with the sugar. Add eggs, one at a time. Beat thoroughly until pale and fluffy.

2
Mix dry ingredients. Pour half of the dry ingredients on top of the creamed butter, beat until incorporated. Mix in the rest of the dry ingredients using your hand while producing little crumbles.

3
Press a good half of the crumbling dough into a lightly buttered baking sheet. Top with peach slices.

4
Crumble dough pieces on top until almost all of the peaches are covered. I like my crumble topping very crunchy and sweet so I added a bit more sugar at this stage.

5
Scatter a handful of slivered almonds on top. Fan-bake at 150 degrees Celsius until the crumbles have a nice golden-brown colour, about 45-55 minutes. Let cool, sprinkle icing sugar on top and serve with whipped cream if desired.


The source

The German cookbook “Hedwig Maria Stuber: Ich helf Dir kochen”


The hints

Depending on the size of your baking sheet, you’ll probably end up with too much dough. It freezes very well and can be used either as shortcrust pastry or crumble topping.

For really crunchy crumbles, caster sugar is a bit too fine. Whilst the coarse sugar available in Australia might be a bit too coarse something in between should give your cake just the right amount of crunch.

This cake works equally well with apples, rhubarb or sour cherries. If your fruits are very juicy, you should cover the dough with bread crumbs first.

A quarter of the flour could also be substituted with almond flour.

Monday 4 December 2006

That's Summer...


Currently, I'm a bit busy - unfortunately too busy to spend much time in the kitchen. Having quite a lot of work and a friend from Germany visiting me, we mostly decide to dine out. However, here comes a little picture that reminds me that it's summer out there. Sydney weather tends to forget that sometimes these days...

Wednesday 29 November 2006

Creating my own chocolate tart – an experiment


Every now and then, I provide cakes for informal birthday parties in my boyfriend’s office. On the one hand, it gives me a reason for baking which is always a good thing. On the other hand, the guys are always pretty pleased with the results and give me some more money than necessary for the ingredients. I would not call it an income but it’s nice to get shown some appreciation in a measurable way.

To cater for a crowd of hungry engineers, I usually make a small round cake and a baking tray. The small one always has to be a chocolate cake – all guys are just the same when it comes to sweet things. A chocolate sponge filled and frosted with chocolate ganache and raspberry jam proved to be a real crowd pleaser. However, having already made the whole lot once this week, I decided to try something different. Additionally, the order came on short notice and I didn’t feel like going to the supermarket twice a day. Therefore, a quick look into the fridge: I always have a little supply of chocolate so the key ingredient was not a problem. However, there was almost no cream left and only a little cream cheese. Instead, a big tub of low-fat sour cream sat on the shelf. I’m not extremely fond of American cheese cake but don’t they throw sour cream into it? How would this pair with chocolate? Too sour or just a nice counterpart to cut down the sweetness? Partly out of curiosity and partly out of mere necessity, I decided to give it a shot.

Fortunately, I had some leftover shortcrust pastry in the freezer which just has to thaw. In the meantime, I start with the filling by melting 150g of chocolate. I add cream, cream cheese, and sour cream – and the stuff tastes far too acidic. What to do? After all, I don’t want to disappoint the guys. Frantically, I stir in four tablespoons of cocoa – still not chocolatey enough. Okay, more chocolate has to be melted. It’s getting better but still not sweet enough. Some icing sugar is stirred in, followed by some rum essence to lift it up a bit. And step by step, I start to feel like having created something really good! To balance the taste a little bit, I add a small egg yolk and notice that I really like it by now. However, I'm still a bit insecure. Would it get firm enough for slicing? Would it match the pastry base? Would the engineers like it?

I pour the filling into the tart shell. The smooth and shiny surface of my experimental tart looks already good to me but I want to dress it up with some walnut caramel. Those dark golden bits have a stunning look and add a much welcomed crunch.

The next day, the engineers clean their plates even faster than usual.


The ingredients

Pastry base

A fully baked tart shell, 20 centimeters in diameter.
(I used a recipe from the bible for German down to earth food - Hedwig Maria Stuber: Ich helf Dir kochen)

Chocolate filling

250 g dark chocolate
300g sour cream, light
1 ½ tablespoons cream cheese
4 tablespoons thickened cream
4 tablespoons cocoa
4 tablespoons icing sugar
½ bottle of rum essence
1 egg yolk

Topping

A handful of walnut halves, chopped
4 tablespoons sugar

1
Break chocolate into pieces; melt over a bowl with hot water. Thoroughly stir cream cheese into the warm chocolate using a wire whisk.

2
Add cream and sour cream; add cocoa and icing sugar, stirring vigorously.

3
Add half of the bottle of rum essence, maybe ten drops. You could use real rum but I reckon the mixture would get too runny. Stir in egg yolk.

4
When the mixture has cooled completely, pour into tart shell and pop into the fridge until firm (or overnight).

5
For the walnut caramel, melt sugar over medium heat until golden brown. Remove from heat and stir in walnut pieces. Spread the sticky mixture on parchment paper using a knife. When cool to the touch and firm, chop into crumbles. Decorate the firm chocolate filling with walnut caramel. Chill the tart until serving.


The source

My very own creation

Friday 24 November 2006

Fiery Chocolate Truffles – SHF 25


It must be about nine or ten months ago that I got to know the world of food blogs. When a friend told me about some of her favourite blogs, I started reading – and haven’t been able to stop ever since. Gorgeous pictures, wonderful recipes, a touching style of writing – and miraculously, everybody seemed to know each other. There was some sort of secret community between all those food lovers out there and they even gathered in certain events with weird names like IMBB or SHF. It took me a little while to figure out what “Is my blog burning?” or “Sugar High Friday” really meant. And after some more time I also figured out that you actually don’t need a formal invitation to join in. Although SHF is founded by Jennifer, The Domestic Goddess herself, there is no deity of the silver spoon you have to beg for permission – all you have to do is to cook or bake according to the chosen topic and blog about it. What a relief, I’m allowed to play with all the other kids in the sandpit!

After eventually getting serious with my blogging ambitions this November, I eagerly awaited the first opportunity to take part in SHF – sweet tooth that I am. Having already thought about making homemade pralines again, it came as a nice surprise that Johanna from The Passionate Cook had chosen the topic “chocolate truffles”. Thus, my official entry into the food blogger community will be a baptism in molten chocolate!

Since the mouth-watering movie “Chocolat” I always wanted to try cayenne pepper or chilli in chocolate. Having only the latter in my cupboard, the decision was easy. I also had some kirsch leftover – imported by myself from the Black Forest to make a real Black Forest birthday cake. This seemed to be a worthy occasion to use it all up. I decided not to add any more spices because I wanted to know the pure taste of the main ingredients. However, I tried two different types of chocolate. While having enjoyed both varieties, the dark chocolate works better in this recipe: The chilli gets tamed by the more intense chocolate flavour which would otherwise overwhelm the kirsch. In any case, I liked the sizzling hot sensation on my tongue – those are really fiery chocolate truffles.


Fiery Chocolate Truffles

The ingredients

100g milk chocolate
100g dark chocolate
4 tablespoons thickened cream, heaped
5-6 tablespoons kirsch
½ teaspoon chilli flakes
Cacao, icing sugar, chocolate streusel topping

Makes about 30 truffles

1
Using separate bowls break each sort of chocolate into small pieces. Pour 2-3 tablespoons of kirsch in each bowl.

2
Pour the cream in a little pot, add the chilli flakes and let simmer for a couple of minutes. Strain the cream and divide it evenly between the two chocolate mixtures.

3
Place the bowls over a pot with hot water to melt and combine the ingredients, stirring thoroughly. When the chocolate is melted, let cool down, place glad wrap on top and pop it in the fridge over night until very firm.

4
Place your chosen toppings on three plates, sifting cacao and icing sugar. Use a teaspoon to scoop portions of the truffles compound. The rounder you get it in this stage the less you will have to form it later. Press with your fingers into a ball-like shape. If the mixture gets too sticky, put it into the freezer for a couple of minutes to firm up again. It also helps to wash your hands with very cold water before starting and in between.

5
Roll the truffles in your chosen coating. If you’re not happy with their shape yet: Place them in the freezer, after an estimated 20 minutes you’ll be able to roll them between your palms to flatten bumps. However, do it as quickly as possible or it will get messy again!


The source
A blend of several recipes found on www.chefkoch.de


The hint
Especially in summer, keep the truffles in the fridge but make sure to let them regain room temperature before eating.

Monday 20 November 2006

First Anniversary of Living in Sydney


Even after checking my calendar several times, I can hardly believe it to be true: It’s now been a year since I relocated from Germany to Australia. Maybe it seems so short because we managed to move from one transitional lodging to another for quite a while. Fortunately, three months ago, we settled down in our current and fourth flat since my arrival in Sydney. Finally, I feel at home, can stuff up every kitchen compartment with equipment and food supplies, and – most important – do not have to share my kitchen with someone else. That said, I wouldn’t mind sharing it with my boyfriend but he usually prefers to be cooked for and I do enjoy spoiling him a bit.

Anyway, with my first anniversary of living in Sydney in my mind, I decided to make something special for our weekend breakfast. During the week, my de-facto spouse (that’s what the Australian government officially calls us) is in working mood as soon as he has gotten up and doesn’t want to waste time for having breakfast – something I cannot really understand. With a rumbling stomach I do have problems concentrating. Thus, our weekend brunches are quite special to me and I like to take my time.

Back home in Germany, the Saturday morning tradition of my family calls for a huge variety of fresh bread rolls and pretzels bought at our favourite bakery. Here in Sydney, I always made sure to have fresh home-made bread but never got around to bake my own bread rolls. I did try to make pretzels though but the results were never really satisfying. This time, I was determined to try my hands on my very first bread rolls.

The original recipe comes from the German cooking forum www.chefkoch.de – an endless source of inspiration. These are the changes I made: To get a hearty taste, I increased the amount of spelt flour from 50 grams to 100 grams. Furthermore, I substituted a little of the water with milk. By the way, I have to confess that I forgot the 5 grams of fat the original recipe called for. Anyway, it didn’t do any wrong. Using my electric bread maker for kneading, I checked the consistency of the dough and added a little water but then had to add a little flour, too. So better scrape down the pan and wait until nearly the end of the kneading process before adding something. Most likely, the original amounts of flour and water/milk will be alright. During the rising process, I brushed the rolls twice with water and made some vapor in the oven at the beginning and in the middle of the baking time. That resulted in a very crispy crust – something I really miss in most of the baked goods you can buy in Sydney.

As much as I enjoy bread rolls, I also wanted to have something sweet and decided to try the recipe for orange brioche by Nicky of delicious:days. Those cute little beauties are not as buttery as brioche usually is but that’s something I really like about them. The recipe is pretty similar to the one I use for all types of yeast-based goods so I expected it to be easy to handle which it was. The only slight change I made was to increase the amount of sugar from 75 to 100 grams. I like to eat my brioche plain and therefore it should be a tad sweeter than usual.


Whenever I will have the time for a more elaborate brioche, I’m going to try the browned butter and vanilla bean brioche by Melissa from The Traveler’s Lunchbox. I really admire her for the endless patience that was needed in finding the one and only brioche recipe.


Hearty Bread Rolls

The ingredients

400g bread flour
100g spelt flour
1 tsp sugar
1 tsp salt, heaped
1 sachet dry active yeast
250ml water
30 ml milk

Yields 12 bread rolls
Baking temperature: 240 degrees Celsius
Baking time: 18-20 minutes


1
Put the ingredients into the pan of your electrical bread maker according to instructions. In my case, that means starting with the wet ingredients, then comes the salt, the flour and the sugar. The yeast comes last: Make a little well into the flour and place the yeast in it. This will prevent the yeast from touching the salt which would affect its rising ability. Choose the dough kneading program.

2
When the program has finished, remove the dough from the pan and divide it into twelve portions of equal weight. Form round bread rolls and put them on a baking tray lined with parchment paper. Let the rolls rest in a warm and draft-free spot until they have risen obviously. During this process, brush twice with water. Then take a knife and give a thorough cut in the middle. Dust with flour and let rise a little longer. Preheat the oven to 240 degrees Celsius.

3
Pop the rolls into the hot oven and immediately pour some water on the bottom of the oven. Make sure to close the door as quick as possible to keep the vapour inside. Repeat this after ten minutes of baking. Let bake for 8-10 more minutes. Reduce heat in case the top of the bread rolls browns too quickly.


The source

The German cooking forum www.chefkoch.de

Friday 17 November 2006

Baking the Perfect Bread


Crusty or soft, moist or a bit dry, shiny white or packed with grains and healthy wholemeal flour – there are so many different types of bread out there. However, almost everybody has some kind of idea how the perfect bread should be. Mostly conditioned during childhood, certain grown-ups will search for this special mix of taste and texture which is the only one – at least for them. My own search was going to be a desperate one when I arrived in Sydney, now a year ago. There were so many interesting things to try and taste but I already knew from two former visits "Down Under": The Australian bread wasn’t something to look forward to. No Laugenbretzeln (lye pretzel), no Vollkornsemmeln (wholemeal roll), and no Roggenbrot (rye bread) anymore – not to speak of all the other unique things to be found in a German bakery… Being sick and tired after a few weeks from eating all sorts of toast, I decided to bake my own bread. I wasn’t sure if it was possible to come even close to my idea of the perfect bread but I was utterly determined to try. Although I didn’t want to buy bread anymore, I also didn’t want to spend too many hours each week with bread baking. Eventually, my boyfriend heard my not so silent prayers and I got a bread baking machine as a Christmas present.

First, I have to say that I have never made my own bread before. Therefore, when I started I was prepared to accept a defeat. Well, you couldn’t really call it a defeat. My trial breads were all perfectly edible. However, during the first seven months, none of those breads passed the all important examination which is just a simple question: Would I be able to eat this bread over years without getting tired of it? For a convincing “yes”, the bread should have a high content of rye flour; the crumb should be heavy and moist while the crust would have to be dark and tough with a nice crack when biting into it. Bread like this tastes still good after a few days. My bread should simply be entirely different from all those pillowy industry-made kinds.

Sadly enough, no matter how hard I tried – there was always something wrong. When the bread came out of the oven, I usually thought: “Yes, this is it. That’s how it’s got to be!” While freshly baked bread always tastes good, after three or four days the truth will reveal itself. So I started twisting recipes to slowly work my way to the perfect bread. One thing was pretty clear at some point: I wasn’t going to succeed without using sourdough. For wheat-based breads, yeast is the usual rising agent. During the baking process, the gluten which is part of the flour builds a framework and allows the dough to rise. However, rye flour doesn’t contain enough gluten for building up such a framework. With only yeast as a rising agent, rye-based dough will remain clingy and sticky and won’t be able to rise. Thus, I had no choice.

Sourdough – the word alone sounds both fascinating and frightening to me. This method to rise bread is known by mankind since thousands of years and is even mentioned in the bible. Any more questions why I am still a bit hesitating to try my hands on it? Therefore, I decided to cheat a little bit and used dried sourdough that my loving and caring mother had put into a little (well, maybe not so little) packet and sent to Australia. The first time, I used the directions on the package to create a so called Roggenmischbrot (bread with more rye flour than wheat flour). The result was pretty devastating. Taste wise, the bread was more or less okay but it hadn’t risen at all. The dough had stretched out over the whole baking tray and had only reached a height of approximately three centimetres – at the thickest part. I tried to console myself with the fact that the bread reassembled the famous “Vinschgauer”, a flat, hard and long-lasting rye bread from Southern Tirol. I did not use any sourdough for the next couple of months.

Anyway, I had to try again. On a certain evening, I decided to change a recipe for light rye bread. Instead of using two parts white bread flour and one part rye flour, I simply turned the ratio and – to make up for that – added the left-over sourdough from the formerly used package. I also added a bit more water noticing later that it was too much and then adding a bit more white flour. The resulting dough was relatively soft. I formed a big loaf with several hollows to obtain an uneven, rustic crust. I brushed with water, dusted with flour, let it briefly rise again, put it into the hot oven, made smothers to support rising and crust-building and simply hoped for the best. This time, I had also chosen a much higher temperature: 250 degrees Celsius for the first 15 minutes and then 220 degrees. In a bit less than half an hour, the bread was done. I was a bit worried when I first peeked through the oven window. The bread was done earlier than I had expected and I was afraid it would be too dark on the outside and undercooked on the inside. But when it was removed from the baking tray onto a cooling rack, I knew instantly: This time, simply everything had worked out. The crust was rather dark but had a smooth and glossy shimmer with a few floury streaks. The crumb was hearty and moist and smelled exactly like rye bread from home. And the taste – a thick slice just with butter on top was simply perfect. Even after four or five days (it was a big loaf), it did not dry out nor did the taste change at all. I have never felt so satisfied with my bread baking results.

However, there was already a worrying thought in my mind: Will I ever be able to reproduce this unique bread? I’ve written down the recipe right after the first piece of bread but – who knows? It will always be a challenge to bake the perfect bread.


Rustic Rye Bread, German style

The ingredients

375 ml water
3 tbsp vegetable oil
2 tbsp honey
1 tbsp salt
350 g rye flour
300 g white bread flour
2 tbsp gluten flour
50 g dried sourdough
2 tsp dry yeast


1
Put all wet ingredients in the baking pan of your bread baking machine. Put all dry ingredients on top and make sure that the salt does not touch the yeast. Choose the dough program.

2
When the dough program has finished, preheat the oven to 250 degrees Celsius (fan bake) and take the dough out of the baking pan.

3
Shape the dough into a big loaf without kneading too much. If you want to get a rustic crust, do not shape thoroughly. Better leave big, visible hollows on the surface. If you knead the dough too much at this stage, you will need to let it rise again.

4
Put the loaf on a baking tray with parchment paper. Brush the loaf with water and dust with flour if desired.

5
Put the loaf into the hot oven, close the door and wait a couple of minutes for reaching the desired temperature again. Take a cup with approximately 125 ml of water, open the oven door, splash the water on the bottom of the oven and quickly close the door.

6
After approximately 15 minutes, decrease the temperature to 220 degrees. After approximately 25-30 minutes, take the bread out. If it sounds hollow when tapped on the bottom, the bread will be done.


The source

Partly a recipe from my electric bread maker, partly my own creation.


The hint

If you want to enjoy a warm slice fresh from the oven, use a very sharp and serrated-edge knife for slicing. Otherwise, the steaming loaf will be squeezed too much and the crumb will cling together.
Feel free to experiment with different types of grains – sunflower kernels work very well.

Monday 13 November 2006

Guilt-free Cream-Dream


What to do if you feel the urge to have something sweet while actually being on a diet? What to do if you are not strong enough to resist – no matter how strong your resolutions were – when everybody around you is enjoying a sinful treat? This dilemma can only be topped by having invited guests for afternoon tea. After telling them for ages that you will eventually get serious with you dietary ambitions, you cannot eat the tiniest butter cream slice in public without feeling guilty. But apart from that, there is still the responsibility to come up with something delicious. First, you want to make your friends happy. Second, you have a reputation to lose.

There is only one way of earning compliments for a delicious treat without loading too much on your daily calorie account: The Peach Torte. This fluffy chocolate sponge with a creamy, yoghurt-based filling and peach slices on top looks and tastes as good as a representative of the heavy weight class. But the sponge base is made without additional fat, and the filling contains roughly one kilogram of yoghurt and only about 150 ml whipping cream – it is even possible to decrease the amount of cream to your liking. And the fruit on top turns it into a healthy thing anyway.

After explaining this dilemma far too long, let's get started. It is best to make the sponge base one day ahead. But if you feel a sudden cake craving and you want to devour it as soon as possible, let the sponge rest for two hours before assembling the cake and it’ll be all right.


The pastry base

1
Heat up the oven to 175-180 degrees, without using the fan.
2
Prepare a round baking tin, 26 centimetres in diameter (a baking tray is also possible). Cut a sheet of greaseproof paper into the shape of the tin base, spread soft butter generously on the tin base, making sure not to grease the side walls of your tin. The sensitive batter will slip down a greased wall and will not rise properly. Put the greaseproof paper on the base and then turn it upside-down, so you end up with the buttered side on top. If your baking tin is really non-stick, forget the paper.
3
Mix the flour with the corn starch, the baking powder, the cocoa powder, the instant coffee and set aside.
4
Stir the eggs (no need to separate the yolks from the egg whites) for about one minute until slightly bubbly, and then add sugar and vanilla sugar. Beat until thick, pale, and creamy – for at least five minutes.
5
Sift the dry ingredients on top of the egg-and-sugar foam and make sure that the firm instant coffee grains get minced. Gently fold in the flour mixture, using a wire whisk. Do not overwork but make sure there are no lumps left.
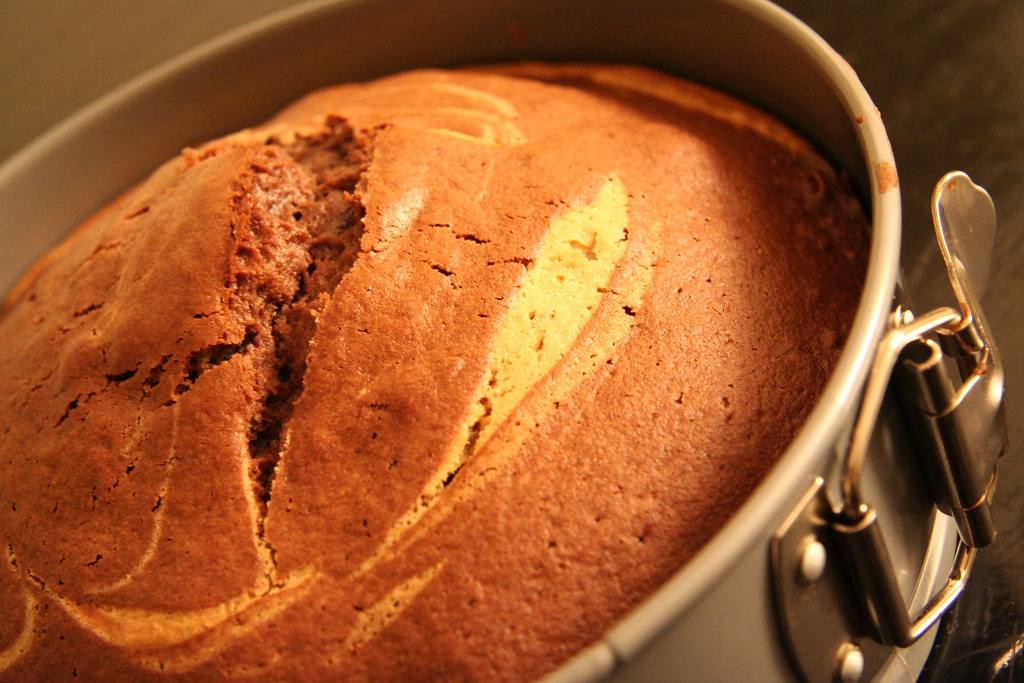
6
Pour the batter into the prepared pan and pop it immediately into the preheated oven. Bake for about 30-35 minutes. Don't open the oven during the first 20 minutes, otherwise the sponge could collapse. Palm the centre of the pastry to test it: It's ready when the top feels only slightly soft with a little drawback. Turn off the oven and open the door leaving the pastry inside for another ten minutes. Cooling it down too abruptly could also result in the cake collapsing.


The filling

Here, you can experiment as you wish and adjust the amount of yoghurt, cream, and sugar to your liking. Only one thing is crucial: orange sugar – it gives the filling its unique flavour. Although citron-flavoured sugar is widely used, this peculiar variation is pretty uncommon. If you’re not able to find it in your supermarket, just try to make it yourself: Wash an organic grown orange with hot water, dry properly and grate the orange zest (make sure not to take anything of the bitter white skin underneath). Put the zest into a tight-closed jar, fill up with caster sugar, mix well, and let it stand for several days. The flavour of the home-made mixture is more subtle than the store-bought one. To substitute a sachet of orange sugar, use at least two tablespoons of your own version. This sugar will give any dairy-based mixture an elegant and unexpected twist. It is unusual enough not to be guessed right away but light enough for not to overwhelm other flavours. This orange-flavoured cream-mix works very well with peaches, but also with strawberries and raspberries.

1
Mix 1.2 kilograms of yoghurt with sugar and orange sugar, to your liking. When using store-bought orange sugar, one sachet will be enough. When using your own, add 1-2 tablespoons, mix well, then add more according to your taste.
2
Dissolve the gelatine according to the instructions on the package. For this amount of yoghurt, I used 7 teaspoons of powdered gelatine. When using gelatine sheets, 12 sheets should be enough.
3
First mix a few tablespoons of yoghurt with the liquid gelatine, and then fold the gelatine-mixture into the yoghurt. This will slowly cool down the warm gelatine and prevent it from getting stiff and forming small hard bits as it does when touching the cold yoghurt all of a sudden.
4
Pop the mixture into the fridge until it sets (usually after half an hour). If your yoghurt turns very stiff quickly, just stir in the pouring cream. If your mixture is set, but not very firm, whip the cream and fold in carefully.
5
If you choose not to diet, you’ll be able to increase the cream from 150 ml up to 500 ml. In this case you should make sure that your yoghurt mixture is pretty firm and whip your cream before folding in – otherwise the whole mixture will get too soft and fall apart when you’re slicing the cake.


The assembling


1
The next day – or two hours later – you can start to assemble the torte. If you used a round baking tin, cut the pastry lengthwise into half. To get a smooth surface, score just along the edge of the cake roughly one centimetre deep, then put a normal sewing thread into the chink and pull both ends across, until the cake is cut through. (If you used a baking tray, this flatter cake base can’t be cut lengthwise.)
2
Spread half of the filling on the base using the brim of the spring form to keep the filling in place. Top with cake layer and spread with the remaining filling. Arrange slices of canned peach on top and chill. Carefully remove the brim when the filling is firm.
3
If the Peach Torte is not to be eaten the same day, a transparent gelatine glaze will protect the fruit from drying out.

And now, dig in and enjoy your guilt-free creamy Peach Torte!


The ingredients


4 whole large eggs
180 g caster sugar
1 sachet or a heaped tablespoon of vanilla flavoured sugar
75 g all-purpose flour
75 g corn starch
2 teaspoons of baking powder
30 g cacao
1 teaspoon instant coffee

1.2 kg low-fat yoghurt
150 ml whipping cream
1 sachet or 2 heaped tablespoons of orange flavoured sugar
100 g of caster sugar (to your liking)
7 teaspoons powdered gelatine or 12 sheets of gelatine
A few tablespoons of hot water to dissolve the gelatine

1 big can of peach slices (or as much as you like)

Gelatine glaze (optional)


The source

This chocolate sponge recipe was torn out of a magazine by my mother, some twenty years ago. Since then, this easy and quick recipe is used for a wide range of tarts. The filling is my own creation.


The hint
For a delicious Strawberry Torte, just omit the cacao and the instant coffee in the sponge recipe and you’ll get a slightly vanilla flavoured sponge which makes – combined with the orange flavoured filling and fresh strawberries on top – a light and refreshing summer tart.

Tuesday 7 November 2006

Humble Beginnings of a Great Enterprise

Does the world need another food blog? Purists and people with no understanding of the marvels of sweet and savoury discoveries may say “no”. But, as long as there are other food lovers out there, the only real answer to that rather odd question is “yes”. For everyone who can get excited over the 127th way to prepare an apple cake, there are never enough opportunities to share delicious recipes, to stare at mouth-watering pictures and to delight in 1001 tales of food experiences. This food blog – my first attempt at combining an old love with new technology – invites you to continue the tradition of telling stories at the kitchen stove. As I appreciate both sweet and savoury dishes, this food blog will cover both. But to be perfectly honest, I’m a person who judges a new cookbook by the attention given to the dessert section. If chefs use up all their creativity for main courses and their desserts are dull and uninspiring, I never appreciate their creations. You see, when it comes to sweet things, I can be pretty serious. So this food blog will pay slightly more attention to cakes, tarts and biscuits, as well as to mousse, ice-cream, fruity desserts and other kinds of sweet treats.

My intention is to present sophisticated but uncomplicated recipes that are interesting for experienced food lovers as well as easy to follow for kitchen novices. I have never quite understood the saying that baking is more difficult than cooking because you have to stick strictly to recipe – otherwise you will end up with an inedible concoction. In my opinion, there is not much difference between the two disciplines: As a beginner, it might be better to follow the instructions – but as soon as you gain some experience, you will be able to anticipate the result of slight or major changes. I like to experiment: Switching ingredients according to my pantry, combining two different recipes or simply changing my mind and trying something new. So, follow my recipes step-by-step and follow your own imagination. Feel the excitement of so many still-undiscovered possibilities about food – this is what this food blog intends to show.

"Small opportunities are often the beginning of great enterprises."
Demosthenes