Google
 

Tuesday 24 April 2007

"Waiter, there's something in...

...my Bread!" For the first time ever, I’ve managed to participate in the blogging event “Waiter, there’s something in my…” – a monthly blogging event that is hosted in turn by Andrew of SpittoonExtra, Johanna of ThePassionateCook, and Jeanne of CookSister. Despite a whole lot of interesting topics, there was always something coming that prevented me from taking part – much to my dismay. And I haven’t even mentioned that I also missed out on the last two Sugar High Fridays…:-(

However, since this month’s theme is bread and I’m baking quite frequently, it would have been really weird not to do anything about it. What I like about those blogging events is the opportunity to think the unusual, to try new ingredients or new techniques, and to step out of your comfort zone. Not that I’m doing completely crazy stuff but before SHF#27 I had never thought of making flourless cakes. And one of the monthly food photography challenges made me think about the different shades of white for the first time.

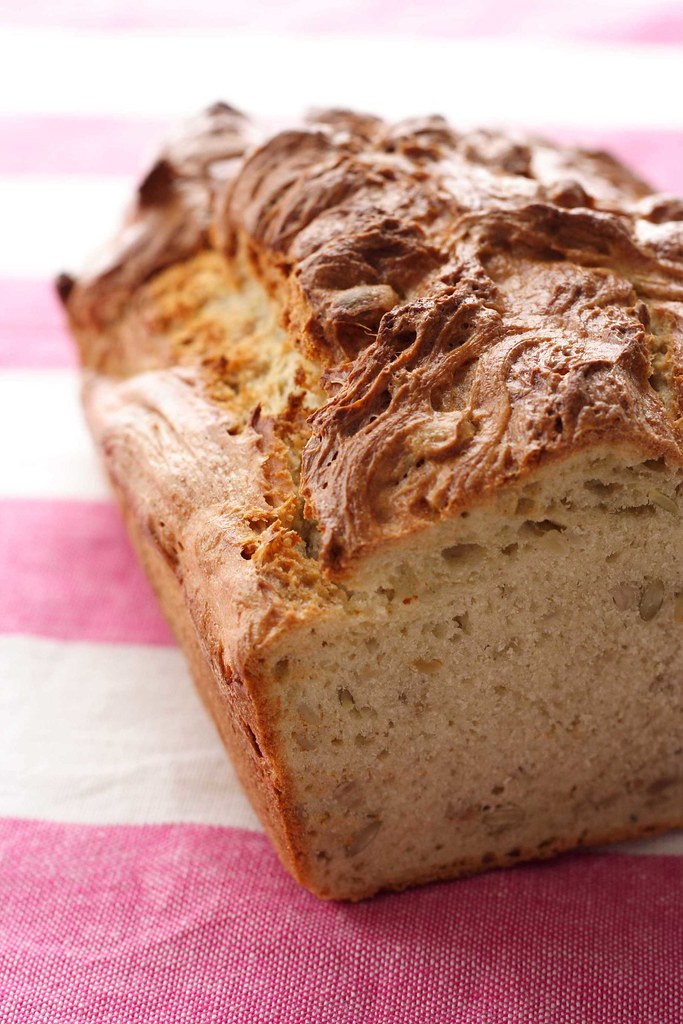
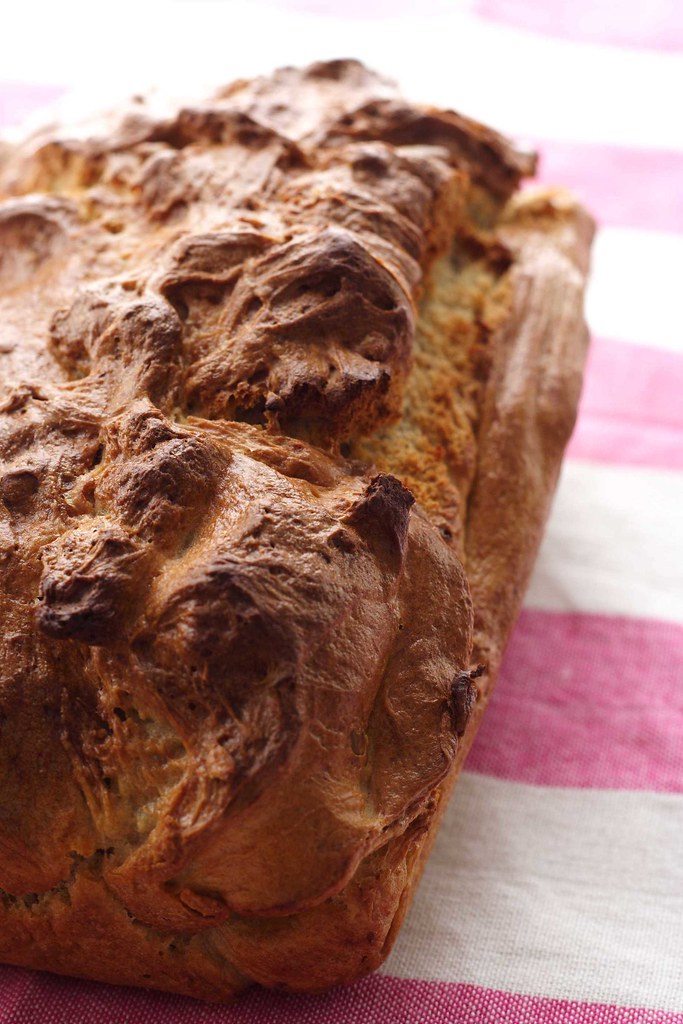
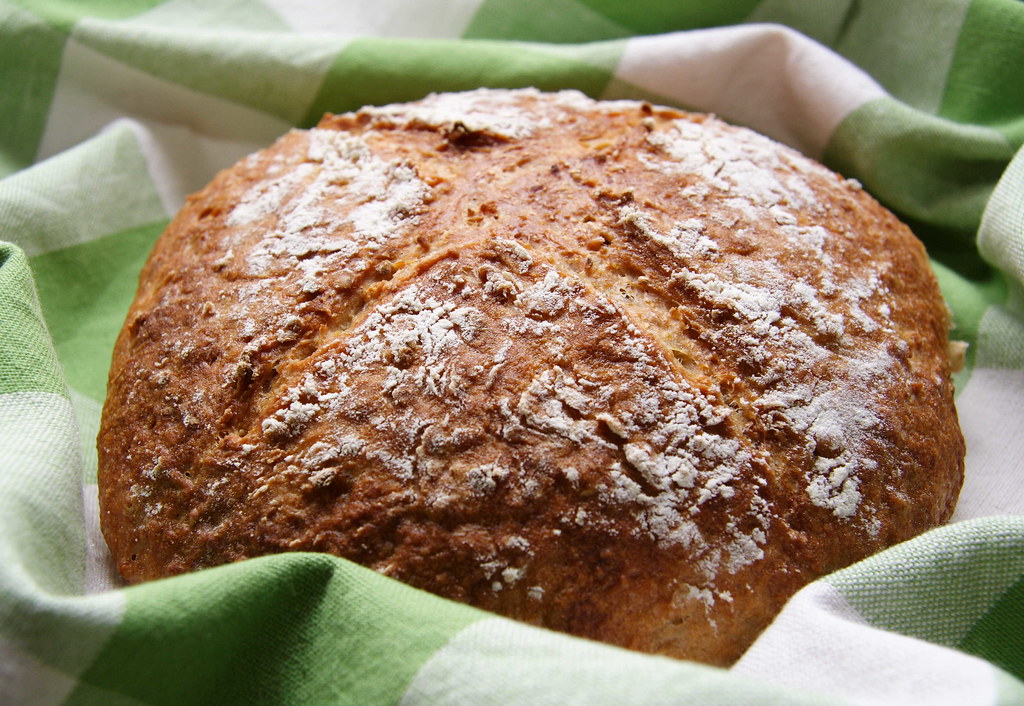
For "Waiter, there's something in my...Bread" I thought I should try my hands on a more involved recipe than the ones I’ve made recently – be warned, this is a 2-days recipe. Furthermore, I wanted to bake something healthy yet delicious: Coarse-grained whole wheat bread with cooked wheat berries, it is! The original recipe comes from the already widely mentioned cookbook “Amy’s Bread”. The leavening is done by a sponge starter which is pretty much the same thing as the poolish I’ve used before. However, there is big difference in texture: Amy’s sponge starter is rather stiff and stringy but not really hard to work with. Her sponge recipe would have been sufficient to make four batches of the bread so I halved the recipe. One part went into the whole wheat bread, the other part into a batch of crispy white bread rolls. The original recipe also calls for chopped walnuts which I omitted in favour of the wheat berries (I tripled the original amount). To be precise, I used cracked wheat and just guessed that it should be the same thing that Amy calls wheat berries. That cracked wheat gave the bread a little bit of extra bite and slightly nutty flavour (even if you can hardly see the grains).

Whole Wheat Bread with Wheat Berries

The ingredients

The sponge starter (I halved this recipe)
1 ½ cups/12 ounces/342g water
¼ tsp dry yeast
3 ½ cups/16 ounces/456g unbleached all-purpose flour

The dough
¾ tsp dry yeast
¼ cup/2 ounces/57g warm water
1 2/3 cup/8 ounces/228g whole wheat flour
1 cup/4 ½ ounces/128g bread flour
2 tbsp plus 2 tsp/1 ounce/28.5g polenta
1 tbsp kosher salt/1 tsp salt, heaped
1 cup/8 ounces/228g sponge starter
1 cup/8 ounces/228g cold water or reserved wheat berry cooking liquid
1 tbsp honey
1 tbsp oil
1 ½ cup/9 ounces/256g cooked wheat berries

1
You can cook the wheat berries ahead of time. If using volume measurements, cooked wheat berries have three times the volume of uncooked wheat berries. That means, for 1 ½ cups cooked wheat berries, you’ll cook ½ cup. If you like, cook some more berries and freeze for future use.
Place the wheat berries in a pot and add water until they’re covered at least by 2 centimetres. Let come to a boil and cook until the berries are plump which will take 30-40 minutes. Drain and reserve the cooking liquid.

2
Mix all ingredients, stirring 2-3 minutes with a wooden spoon, until a smooth but stiff dough has formed (this could also be done by a mixer with the dough hook attached). Put the dough into a 2-litre-vessel and cover with plastic wrap. If you want to use the sponge starter as soon as possible, let sit at room temperature until the dough has tripled in volume and just starts collapsing. This will take 6-8 hours. When the sponge is ready, it should be used immediately before it collapses too much. If you want to use the sponge the next day or the day after, put the sponge into the fridge and let it rise for at least 14 hours. When using in a recipe, let the sponge come to room temperature first or use warm water instead of cold water.

3
For the dough, place the yeast together with the warm water into a bowl and stir to dissolve. Let stand for three minutes.

4
Meanwhile, mix all the other dry ingredients in a bowl and set aside.

5
Add the sponge starter, the cool water, honey, and oil to the yeast water. Mix for 1-2 minutes to break up the sponge. Add the dry ingredients, stirring vigorously with a wooden spoon until a shaggy mass forms.

6
Place dough onto a lightly floured work surface and knead for 5-7 minutes until the dough becomes smooth and elastic. If the dough seems too stiff, add more cold water by the tablespoon. Form a loose ball and let rest for 20 minutes so the gluten strands can relax.

7
Flatten and stretch the dough into a large rectangle. Put the cooked wheat berries atop and fold together like a business letter. Knead gently for 2-3 minutes until all the berries are incorporated.

8
Shape the dough into a ball and let it rest in an oiled bowl, tightly covered with plastic wrap, for about an hour at room temperature. The dough should start to rise but not double during this stage.

9
Put the dough into the fridge for one night to develop more flavour.

10
The next day, let the dough come to room temperature (about two hours). After that, divide the dough into 2 halves and shape both into round loaves. Place on baking paper and let rise for 2-3 hours or until they’re doubled in size. (Note: I started dividing the dough after half an hour and also shortened the rising time to 1 ½-2 hours. I did this not only because of time pressure but also to get a bit more oven spring. Not sure, if I should recommend it but it worked just fine.)

11
In the meantime, preheat the oven with a pizza stone inserted (if using) to 230 degrees Celsius. This should take about 30-40 minutes. Slash the loaves with a very sharp knife and insert into the oven. Quickly pour a cup of hot water onto the bottom or mist with a plant sprayer and immediately shut the oven door. Repeat this twice during the first five minutes of baking.

12
Bake loaves for 20 minutes, then reduce the temperature to 200 degrees Celsius and bake for another 15-20 minutes. The loaves should be golden brown and sound hollow when tapped on the bottom.

The source
Recipe adapted from “Amy’s Bread”

Thursday 19 April 2007

Plum Cake Heresy

When it comes to food, most people have a certain conception of how things have to be. It's like any other kind of dogma you could easily start a fight about: Do you pour some olive oil in the water while cooking pasta or don't you? What's the right way to cut an onion? Should there be a law for or against rinsing meat? Some of your culinary beliefs might never get questioned at all, others will get shattered after the first contact with a truly inaugurated foodie.

However, I would have never imagined that my idea of the perfect plum cake could ever change. All people ate it that way, right? There simply is no other way, right? To my utter disbelief, my boyfriend wasn't quite convinced of the superior nature of my plum cake. In fact in his opinion, the one he always ate at his parents' place was exactly how a plum cake should be. Now my curiosity was sparked. Although being pressed hard, the only thing he stated was: It's a brown dough. Patiently asking my way through all sorts of possibilities - was it soft, was it crispy - we settled on some kind of shortcrust pastry. Alas, he couldn't tell me where the brown colour came from. So I decided to do some online recipe research and after a while came up with a recipe for Chocolate Plum Galette found on Food & Wine. I wasn't sure if using cocoa really would produce the right kind of "brown" but I had to try and he likes all things chocolate anyway.

I slightly increased the amount of cocoa for a really rich chocolate taste but lacking fresh rosemary as well as an organic orange I omitted both. Truth be told, this rosemary seemed to stray away from my idea of a plum cake just a bit too much... Maybe one day I'll try this rather unusual combination but this time I paired the plums with the trusted duo of rum and cinnamon. Apart from the fact that the carefully shaped rim of this free form tart collapsed while pre-baking, everything went well.

I freely admit that the beautiful combination of plums and chocolate caused me to reconsider my once firmly grounded beliefs. But of course, it was not in the least as my boyfriend had remembered his mom's plum tarts.

PS: Meanwhile, I've inquired about the mysterious plum cake and got the recipe. I'm looking forward to giving it a whirl very soon.


Thursday 12 April 2007

Experimenting with Buckwheat

Since the nice but short shopping trip in Western Australia I had some buckwheat flour in my cupboard. To be honest, when I picked it up, I had not the slightest idea what it would taste like - I had never eaten anything buckwheat before. The sole motivation was to enrich my flour supplies with an entire new candidate. Luckily, it turned out to be a good one. There are not too many buckwheat bread recipes around, so I quickly decided to change the "Barley-enriched Farmhouse Loaf" into a "Buckwheat-enriched Loaf" (pictured above) and everything was just fine. The original recipe comes from the "Bread Machine Kitchen Handbook". Using my bread maker for kneading, it was done in no time. It's hard to say what buckwheat really tastes like (maybe the buckwheat content wasn't big enough for a more distinctive flavour). However, the buckwheat gives the bread a wonderful hearty taste - for a straight yeast bread, the depth of flavour was amazing. So whenever I'm too short on time for using sourdough or a poolish, I' ll just grab the jar with the buckwheat flour!

The next bread on my list to try was the Buckwheat Walnut Bread (pictured below). Again pretty straight forward but tasty nonetheless and with a surprisingly long shelf life. My boyfriend declared this to be best bread I've ever made - although he's said that several times by now...;-) Anyway, it's the perfect accompaniment for a crisp winter salad with walnuts and blue cheese. Even here in Sydney, we're heading towards winter!


Buckwheat-enriched Farmhouse Loaf

The ingredients

260ml water
45ml/3 tbsp double cream
400g white bread flour
115g buckwheat flour
2 tsp sugar
2 tsp salt
1 1/2 tsp dry instant yeast
2 tbsp each of pumpkin and sunflower seeds

1
Pour wet ingredients into the bread pan (making sure that the kneading blade is inserted), add salt and sugar, add flours, and make a dent into the flour. Put the yeast into that dent. (If your machine instructions state another order for adding ingredients, do so.)

2
Start the dough setting and add the seeds when the machine beeps shortly before the end of the kneading time.

3
When the dough cycle has finished, take the dough out of the pan and shape into a rectangle. Dust with flour and slash lenghtways with a very sharp knife or blade. Preheat oven to 220 degrees Celsius (200 when fan-bake).

4
In case your dough cycle doesn't include the rising time, let the loaf rise until doubled in bulk. Otherwise let the dough rise just a couple of minutes or until the oven is properly preheated. Place the loaf on your preheated baking stone or on a baking sheet and insert into the oven.

5
Splash some water on the bottom of the oven during the first five minutes to create steam. This will result in a crisper crust. Bake for 20-25 minutes or more until golden brown. Tap the bottom of the loaf: If it sounds hollow, the bread is done. Let cool down before slicing.

The source
Adapted from "Jennie Shapter: Bread Machine Kitchen Handbook"


Buckwheat Walnut Bread

The ingredients

15ml/3 tsp honey
315ml water
30ml/2 tbsp walnut or olive oil
400g bread flour
100g buckwheat flour
1 ½ tbsp milk powder
1 ½ tsp salt
¾ tsp sugar
1 tsp dry yeast
100g walnut pieces

Same procedure as explained above.

The source
Adapted from "Jennie Shapter: The Bread Machine Kitchen Handbook"

Monday 9 April 2007

Easter - Downsized Celebration

This year’s Easter is a bit of a boring story – I’m home alone, my boyfriend is overseas, and my family is as far away as usual. So embarking on all sorts of culinary Easter adventures didn’t seem to make much sense – after all, who’s gonna eat it? Furthermore, half of the long Easter weekend is occupied by work. However, lucky me, on the two free days I’ve been invited to an Easter brunch as well as a chocolate fondue, thanks to Katherine and Nora! You see, all is not lost!

And trying to see the brighter side of things, I quickly decided to dye the four remaining eggs in my fridge. I wanted to do it with natural colour and used turmeric, hoping for a bright yellow. Unfortunately, after letting them soak for a whole night, there is not much of a yellow colour to be seen. However, they have some yellowish spots here and there so they will hopefully qualify as Easter eggs.

Back home, I would have spent the evening of Good Friday with my mom, dying dozens of eggs in all sorts of colours. The following day, we would bake as much as possible – my family is used to eat cake rather by the square meter… Having no seasonal fruits yet, we would usually make two big baking sheets covered with yeast dough, topped with juicy quark filling, and crunchy streusel. With 1.5 kg of flour as the basic ingredient for the dough, we would have enough dough leftover to make two sweet Easter breads: one with raisins and candid orange or lemon peel for my parents and my brother and another one just with almonds for my sister and me (being both raisins and mixed peel haters). Traditionally, those breads get shaped into round loaves, slashed in the pattern of a cross, and brushed with egg yolk for a nice, golden brown colour. The sweet breads we would have for breakfast with butter and honey or just plain, and the cake for afternoon tea or whenever you happened to pass the pantry...

This year, there was neither the time nor the need to engage myself for several hours in a yeasty adventure of that sort. Luckily, I can at least show you our typical baking sheet-size cheesecake because I made it for a friend’s birthday a couple of weeks ago and never posted about it.
Finding European-style quark in Australia is rather difficult and in any case very expensive. Thus, you could substitute it with ricotta but make sure to choose a rather sour one and not the ricotta recommended for baked cheesecake. The real European quark gives a slightly sour note which is the necessary counterpart to the overall sweetness of filling and streusel topping.

Happy Easter!


Easter yeast cake with quark filling and streusel topping

I use my regular yeast dough recipe but you can also use your preferred brioche recipe or a less rich version if you feel like eating healthy. If you don’t feel like eating healthy at all, then add your favourite streusel topping – you won’t regret it!

The quark filling

Here, you can experiment as much as you want adding raisins, mixed peel (if you really like it) or a finely chopped apple.

4 egg whites
Pinch of salt
75g butter
200g caster sugar
2 sachets of vanilla sugar (or 1 tbsp vanilla essence)
4 egg yolk
1 kg quark or ricotta
100-200g sour cream
1 tbsp cornstarch (semolina works fine, too)
A few drops of rum essence or 1-2 tbsp rum (optional)

Yield: enough filling for a big baking sheet

1
Beat egg whites with salt until stiff.

2
In another bowl, cream butter with sugar and vanilla sugar until pale and fluffy, gradually add egg yolks mixing well after each addition.

3
Add quark and sour cream to the butter mixture, mixing well. Add cornstarch and rum essence, if using. At this point, you could also add raisins etc.

4
Gently fold in beaten egg whites.

5
Spread filling on the rolled-out yeast dough and cover with streusel if desired. Fan-bake at 150 degrees Celsius for about 45 minutes.

The source
Loosely based on "Hedwig Maria Stuber: Ich helf dir kochen"

The hint
Check the dough base on the edges for doneness: It should be golden yellow and not dark. The quark filling will stay whitish and only get a golden yellow colour on some spots. If you are like me and pile up as much streusel topping as possible, then the entire surface will be covered with a crunchy, golden crust...hmmm...

The streusel topping

250g flour
150g sugar (for crunchy streusel, don't choose caster sugar)
100-150g butter, cold, diced
1 sachet vanilla sugar

1
Put all ingredients into a bowl and quickly rub the butter into the flour using your fingers. If the mixture is too crumbly and doesn't come together at all, add a little more butter. If you work too slowly and the butter starts melting, don't add more flour (unless you want your streusel concrete-style). Rather pop the bowl into the fridge or freezer (depending on your patience) until the butter has firmed up again.

2
Crumble mixture on top of your cake. Leftover streusel can be frozen.

The source
My mom's creation

Sunday 1 April 2007

SLW Challenge: Who Inspires You?


Who inspires you? That's a question I seldom think about consciously. No matter that there are ever so many people to set an example or to turn to for advice in difficult situations. When Lara - the administrator of my food photography group on flickr - asked this very question as the monthly food photography challenge, it took me almost all of March to decide about it. In terms of food photography, I don't know anyone personally who is into that. Mostly all I can do is staring at other people's mouthwatering pictures and pondering what'dahell they did to make it look so good. Add to this a bit of reading around the internet and Lara's helpful hints on her food photography blog StillLifeWith and that's basically all I know about it.

Hence, it may not be unexpected that I frequently reach my limits. I had finally figured out whose pictures I admire the most but then, the trouble started. I absolutely adore the macro shots of Nicky from Delicious Days like this one - but I don't have a macro lens. Second, I absolutely adore the well-arranged shots of Bea from La Tartine Gourmande like that one - but I'm lacking all those nice little plates/bowls/cutlery/place mats you would need to recreate such a shot. Let me tell you my heart is aching whenever I come near any homewear store... Another one of my favourites is Melissa from Traveler's Lunchbox. Usually, she, too, does most of her shots with elaborate settings like that one. However, her picture of a flourless chocolate cake didn't use too many different things (except one very beautiful cake fork as you can see here) so I tried to reproduce it. And oh boy, did I fail... While managing to reproduce the cake (except that I didn't have ground almonds so I had to chop them myself which resulted in a less smooth batter and a less smoothly cut slice) - I wasn't able to reproduce the picture with the original soft lighting. Very disappointing! I also tried once to reproduce a very nice bread picture of MattBites but I couldn't figure out the proper lighting on that one either. It hadn't looked particularly difficult but it was particularly difficult. In the end, after many a trial and error, I managed to take a picture that I really liked but it didn't have much to do with the original. You see, I'm still wondering how on earth they do it...