Google
 

Wednesday, 31 January 2007

Summer Delight - Sugar Plum Cake


I remember it pretty well: those lazy afternoons in our garden, sitting on the terrace, and indulging ourselves in sugar plum cake. What, that doesn’t sound very decadent? Mind you, when I say indulging it means two huge baking sheets full of sweet yeast dough and studded with plums shared between five people. And it surly didn’t take all weekend to polish it off. Even with such an abundance of cake, someone peeking through our hedge-like shrubs could still find us fighting over the last piece – not to mention the heated discussions about who ate more than his or her fair share…

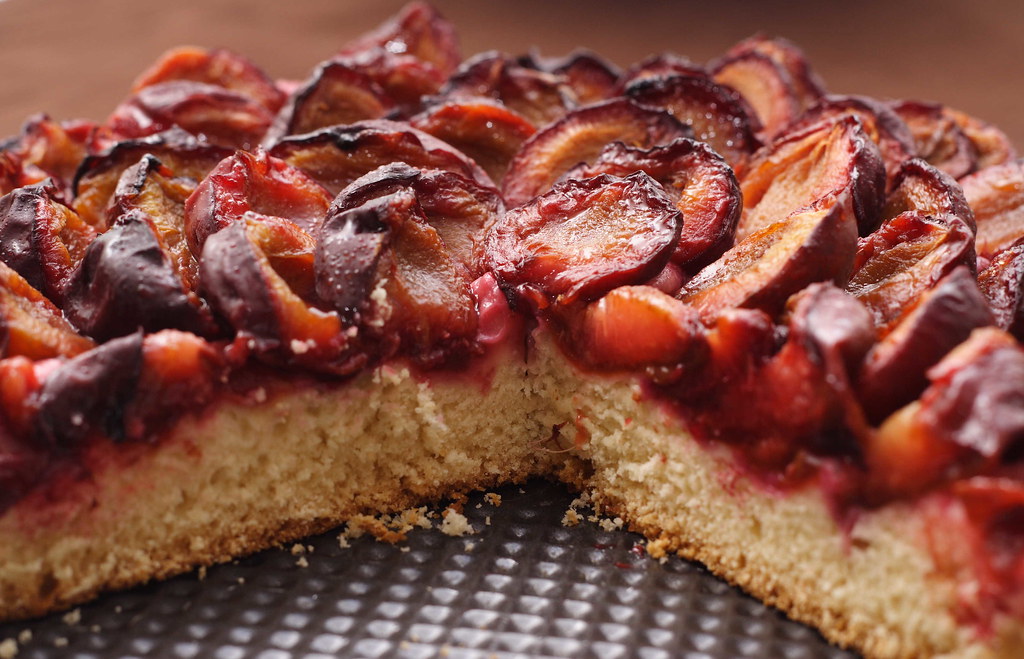
Some people might find this cake rather plain and won’t understand the fuss about it. However - tart-sweet plums on top of a tender yeast cake with a slightly soggy upper layer where all the purple juices join with the crumb – this simple combination sounds like heaven to me! Unfortunately, when moving to Australia I had to endure a full 15 months without sugar plum cake. Whilst one can find almost any exotic fruit in Sydney, I could spot not a single sugar plum. Until about ten days ago: Roaming through the bustle of Market City and doing my weekend shopping, there they were all of a sudden: purple-blue, nice and plump, with a seam and a pointed end. I happily bought a kilogram – of course, it was perfectly clear what to do with them. Had I just known that I wouldn’t be able to get some more the next weekend…I had big plans making plum compote, baking more plum cake, and freezing some for future use. Alas, the only thing I can do is to hope and wait for better luck the next weekend.


Sugar Plum Cake

The ingredients

100g butter
250ml milk
500g all-purpose flour
pinch of salt
100g sugar
1 sachet vanilla sugar
1 sachet dry yeast or 30g fresh yeast
2-3 eggs (depending on size – if using three large eggs, use less milk)

1kg sugar plums, halved, stones removed
2-3 tbsp caster sugar

The yield
One third of the dough is more than enough to cover a spring form 24 centimetres in diameter. The rest of the dough can be baked as a brioche (or topped with other fruits, streusel, cream cheese/curd/sour cream filling – whatever strikes your fancy).

1
Melt butter. Pour cold milk into the melted butter, the mixture should be lukewarm. Set aside.

2
Mix other ingredients in a large bowl, making sure not to put the yeast next to the salt. Pour in butter-milk-mixture.

3
Using your mixer with the dough hooks, beat the dough until it comes together in a soft and wobbly mass. It should not stick to the sides of the bowl anymore. This step may take between 20 and 40 minutes (I confess I used my bread maker for kneading).

4
Cover with a clean kitchen towel and set aside until doubled in volume. Put the risen dough on a lightly floured surface and knead until smooth again.

5
For the plum cake take about a third of the dough or less and flatten it inside the buttered baking tin. Be careful to roll out the dough very thinly because it will rise quite a bit during the baking process. Equal thickness of fruit and cake layer provides the best fruit-to-dough ratio in my opinion. Unfortunately, after my plum cake deprivation, I forgot about this important fact and made the cake base too thick.
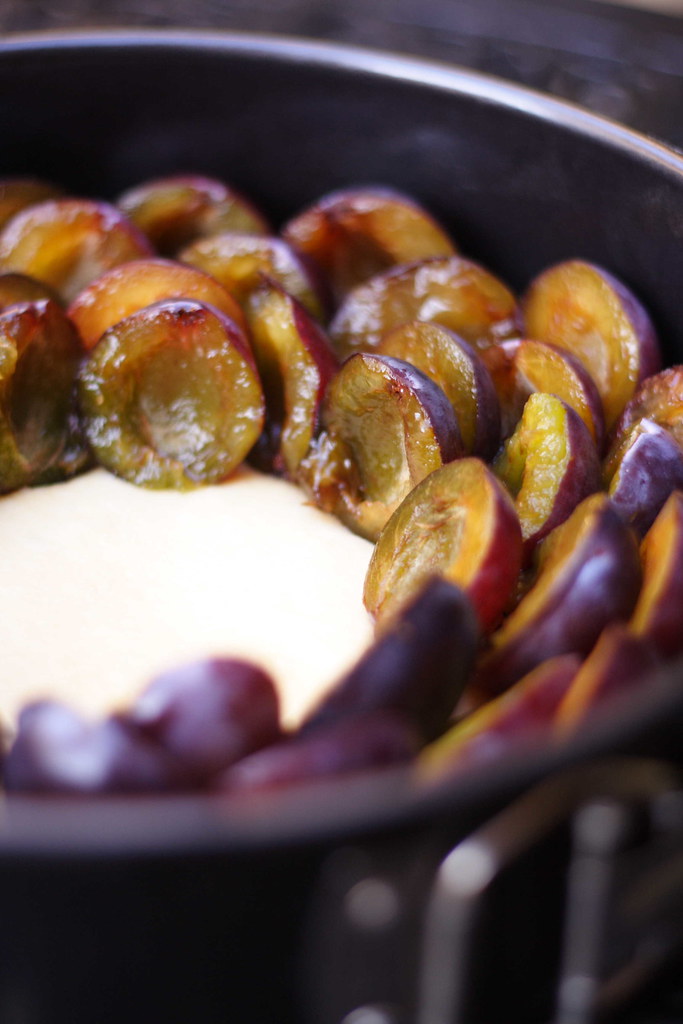
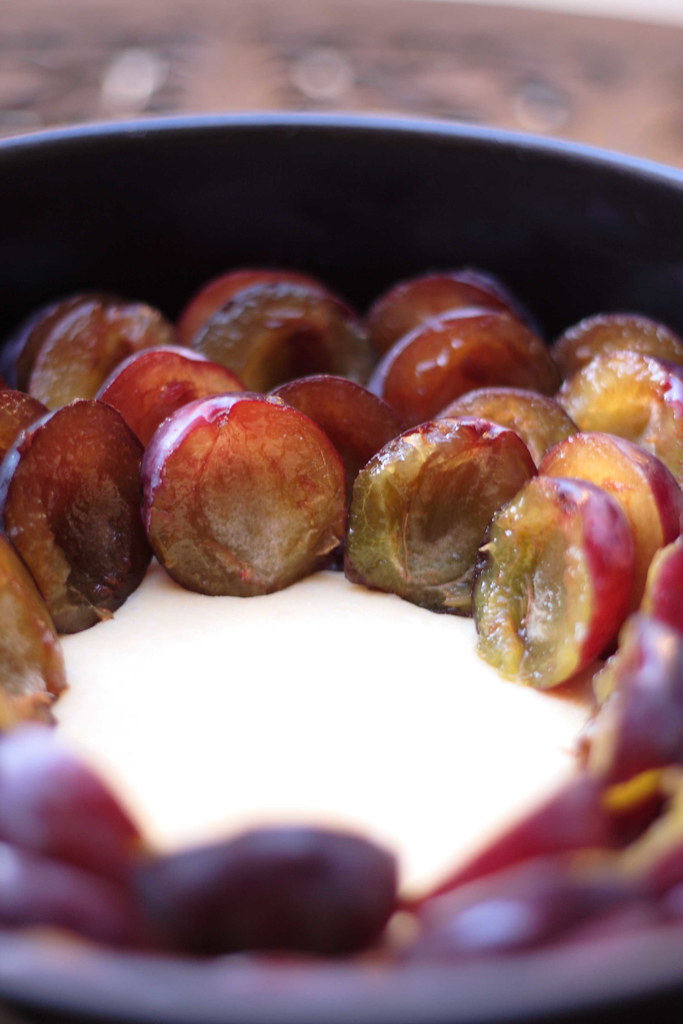
6
Place plums on top of the dough in an upright manner trying to squeeze in as many as possible. Fan-bake at 150 degrees Celsius until the edges of the cake are golden brown (25-35 minutes).

7
Right after taking the cake out of the oven sprinkle roughly three tablespoons of caster sugar on top. This has to be done while still hot and will cause the plums to release their juices. Up to half of the cake base should get soggy from the juices – don’t be afraid, that’s the best part. Another reason is that the baking seems to bring out the tartness of the plums - even if sweet when tasted raw, the cooked plums will need some extra sugar.


The source

Vohenstraußer Kochbuch


The hint

Despite the obvious temptation, don’t eat this cake while still hot or lukewarm. It’s best when fully cooled. In fact, this cake tastes best on the second or even on the third day when all the flavours have thoroughly combined.

Saturday, 27 January 2007

Adventure with Happy End

After my first and failed attempt to make my own sourdough I was pretty discouraged. Without knowing what went wrong - how would I be able to succeed the next time? I don't know what was different but this time everything worked beautifully! My sourdough culture florished, was divided into a pure rye and a wheat part, and continued to multiply. After a few days, I could hardly believe it but it was time to built my own starters for my own sourdough bread. I decided to begin with a rye sourdough starter and with a levain starter from "Amy's Bread". However, after having done so, I realized that there are not many recipes for rye sourdough in this book. Mainly, Amy and Toy are using sponge starters, old dough starters or white sourdough. So I decided to try the Sauerlaender Mengbrot of Petra from Chili&Ciabatta. Her site is a wonderful source for all kinds of bread recipes. And there I finally found what I wanted: A recipe that relies solely on the sourdough starter with no commercial yeast added and that wouldn't take too much time to make. With the levain starter I made a "Country Sourdough Boule" from "Amy's Bread" which was pretty time-consuming as you will see. Anyway, all this starter building, waiting, dough mixing, kneading, waiting, forming, waiting, and baking was well worth it! I proudly present my own sourdough breads!

Sauerlaender Mengbrot

Assuming that only German native speakers are interested in this dark rye bread, I don't translate the German recipe. However, if anyone else wants it, please email me and I'll be happy to do it for you.

Regarding the recipe: I used only half the amounts which still resulted in a pretty big loaf (at least for two eaters). The original rye starter is not quite the same as the one from "Amy's Bread". But the required amount of starter was just as much as I had made so I simply hoped that it would work which it did.

For the final rise, I put the bread into my colander using a floured kitchen towel. I floured it a bit too thoroughly that's why my bread has such a thick layer of flour on top. I gently dumped the bread on the preheated pizza stone and let it bake for half an hour. In hindsight, I should have waited a bit longer to get a crisper crust. However, the color looked already relatively dark. Judging the doneness would have been easier with less flour on top.

In comparison with Petra's picture, the crumb of my bread seems to be a bit sticky but this could also be due to my not-so-sharp bread knife.

And this is the recipe for the rye sourdough starter:

5 ounces/142g rye mother (cold from the fridge)
3 ounces/85g rye flour or pumpernickel flour
2 1/2 ounces/71g warm water

Place all ingredients in a clear plastic container and stir vigorously to combine. Let sit at room temperature until doubled in volume. If it hasn't doubled in 8 hours then your rye mother wasn't strong enough and you have to repeat the process. The mature (doubled) starter is ready to use but could also be stored in the refrigerator for up to 24 hours. Use the amount of starter your recipe calls for and discard the rest.

This was Happy End No. 1 - with No. 2 to come we had a lot of bread to eat in the following days. Luckily, we were invited to several BBQs so quite a few people got some homemade sourdough bread to try. I can proudly say that they all liked it very much!

Making the Country Sourdough Boule really was a lengthy process. I built the levain starter on evening 1, let it mature for 8 hours overnight, refrigerated the starter during the day (due to work), mixed the bread dough on evening 2, chilled the dough overnight to let the flavours develop, got up early on day 3 to take the dough out of the fridge, shaped the loaves before leaving for work, rushed home during my lunch break to bake the risen loaves - and finally on evening 3, I was able to taste the outcome!

Levain Starter

2 ounces/57g white sourdough mother (cold from the fridge)
2 ounces/57ml warm water
5 ounces/142g unbleached all-purpose flour
1/8 teaspoon kosher salt (I substituted regular salt)

Combine in a small bowl using your fingers until you get a shaggy mass. It will be very dry and stiff. Knead the dough until you have a smooth ball. Place it in a bowl covered with cling wrap. Let sit at room temperature until doubled in volume. This should happen within 8 hours otherwise your mother wasn't strong enough. Then you have to repeat the process. The doubled levain starter can be used right away or stored in the fridge for up to 24 hours.

Country Sourdough Boule

¾ teaspoon active dry yeast
56g very warm water
214g levain starter
540g cool water
684g unbleached all-purpose flour (I substituted bread flour)
142g pumpernickel (rye) flour
Scant 2 tablespoons kosher salt (when substituting for regular salt: you may want to use more but using two rather heaped tablespoons proved to be a bit too much in fact, it’s the other way round: you have to use less because of the flaky structure of kosher salt)

1
Place the yeast and warm water in your mixing bowl and stir to dissolve. Let stand for three minutes.

2
Add the levain starter and cool water and mix with your fingers until the starter is broken up in small pieces and partially dissolved.

3
Add the other ingredients and stir together using your fingers or a wooden spoon.

4
Knead dough on lightly floured surface for 6-8 minutes until the shaggy mass turns into a supple and elastic dough. Let rest for 20 minutes (this autolyse period makes sure that the gluten can relax; the following kneading will be shorter and easier).

5
Knead again for 2-3 minutes until dough is very smooth. Place in oiled bowl, turn to coat, cover with plastic wrap, and let rise at room temperature for 1 hour (it does rise but does not double in volume).

6
Refrigerate overnight for the flavours to develop.

7
Remove dough from fridge and let rise for two hours. Line two baskets/bowls/colanders with floured kitchen towels (round-bottomed looks better than flat-bottomed).

8
Dived dough into two equal pieces, shape into round loaves, let rise in the bowls/colander for 3-4 hours or until doubled in volume (I had to let it rise for 4 1/2 hours which unfortunately resulted in almost no oven spring).

9
30 minutes before baking preheat oven with pizza stone to 230 degrees Celsius. Bake loaves for 20 minutes, then reduce temperature to 200 degrees Celsius and let bake for another 20-25 minutes. For a crisp crust pour water on the bottom of your oven: three times during the first 10 minutes, about half a cup of water each time.


The sources

Chili&Ciabatta

Amy Scherber & Toy Kim Dupree: Amy's Bread

Monday, 22 January 2007

SHF#27: Chocolate by Brand

I’ve eagerly awaited this month’s Sugar High Friday hosted by David Lebovitz, patissier and chocolatier in Paris: His theme is Chocolate by Brand. Great – who doesn’t like chocolate? But on the other hand, it really made me think: What on earth should I make? There are thousands of chocolate-laden recipes out there. And what type of chocolate should I use since it was of such paramount importance?

I have to say that so far, I have never used any sophisticated chocolate brand. It was during my first contact with the blog world that I learned about Scharffen Berger, Valhrona, and all those other fancy brands. Of course, none of my local supermarkets had any of those in stock. So what’s there to choose from? Nestle (I like their classic dark one but I wanted to try something different), Cadbury (which I can’t stand at all), and Lindt (I like their pralines a lot but I’m not a big fan of their bars).

Apart from those, I found a brand from New Zealand that was completely unknown to me. Unfortunately, there is no reason why you should know Whittakers – at least that was my first thought after tasting a piece. I didn’t want to spoil the whole experience so I decided not to use it. (What am I going to do with that 250g-bar sitting in my fridge?) Luckily, on my way home I had also picked up a few bars of my favourite German chocolate brand, Ritter Sport.

While thinking back and forth, I had also managed to settle on a certain recipe: flourless chocolate cake. I had never before made such a cake – so it was about time. And I reckoned that with such a pure recipe – only chocolate, sugar, butter, and a tiny bit of flour – the character of the chocolate would really shine. Originally, I wanted to try Clotilde’s version on Chocolate&Zucchini. However, due to my on-going not-so-strict diet, I decided to make the waistline-friendly version of Petra of Chili&Ciabatta. I strictly sticked to the recipe but baked the cake in muffin tins. Without any experience, I shouldn’t have done it… In such tiny baking pans over baking can happen pretty quickly. One minute too long in the oven and the gooey centre is getting solid. To my great relief, the cakes were not completely dry – so all was not lost. They were nice and chocolaty but due to my mistake didn't quite live up to their reputation. Next time, I’m going to try Clotilde’s version and maybe I’ll be able to track down those fancy chocolate brands!


Friday, 19 January 2007

My first proper Pizza

For some reason unknown to me, it is very hard to find a well-prepared pizza in Sydney. Despite the huge number of Italian immigrants I have never eaten any pizza that tasted like the ones I had in Italy. There, the crust is unbelievably thin, rather pale, and a little bit charred on the bottom. Here, the crust is crispy but of a more bread-like colour and consistency. There, the toppings are rather sparse and thinly sliced so you can taste every single ingredient. Here, at least ten different toppings seem to be a “must-have”. Everything is cut into tiny pieces and thoroughly mixed together so you can hardly identify if you got your “Corsica” or the “Mediterranean Surprise” of your neighbour.

I do have to admit that you can find some interesting combinations on Australian menus. Using pumpkin, goat’s cheese or potatoes definitely broadens a traditional pizza lover’s horizon. However, some of those adaptations are a bit over the top – “Tandoori Chicken Pizza” or “Meat Lover’s Delight” with bacon and barbeque sauce, anyone?

To top it off, pizza in Sydney or Australia in general is a rather pricey delight compared to the excellent Asian food you can get here for little money. Therefore, it was only a matter of time to make my own pizza.

After searching through my favourite food blogs, it became pretty clear that Peter Reinhart’s Napoletana pizza dough was the way to go. I used the recipe and instructions provided on ChubbyHubby which were pretty easy to follow. My little hand mixer squealed heart-rendingly while mixing the first batch of dough – not for the first time I was longing for my old but strong Krups mixer back home in Germany. The second batch was kneaded by my bread baking machine which worked just fine. After a night’s rest in the fridge, the dough was a pleasure to work with. Stretchy yet firm, it was really easy to shape it into thin rounds.

The toppings: homemade tomato sauce, shredded tasty cheese, shredded mozzarella, ham, salami, fresh tomatoes, sliced mushrooms, capers, grilled eggplants, grilled and skinned capsicum which proved to be the favourite amongst my fellow pizza eaters. They fully approved of my first attempt in making proper pizza – mostly due to the generosity of my dear friend Nora. When I invited her for the pizza night, she said she’d like to give me a pizza stone as sort of a late Christmas present. Any serious pizza lover should have one. That’s what she told me – and she was so right! Even the male guests had to admit the superiority of the stone. Being engineers they first doubted its usefulness. Pretending it was only another gadget girls "had to have". But a quick check with wikipedia revealed everything you need to know about pizza, pizza stones, and the like.

The few pizzas I baked on a regular baking sheet (after all, there were nine hungry people to feed) were not too bad but definitely not as crispy as the ones baked on the stone. However, it was a bit tricky to lift the prepared pizza on the stone and into the oven (I got a few minor burns). Polenta was very helpful to prevent sticking; and those little yellow kernels provided an extra crunch to the crust. The oven was heated to maximum which sometimes seemed to be a bit too much as you can see on the picture. But I didn't get any complaints and my guinea pigs encouraged me to continue my search for the perfect Italian pizza. With my own pizza stone it will be only a matter of time – thank you, Nora!

Sunday, 14 January 2007

Same Procedure - all over again...

Whilst I am not willing to admit defeat, I had to throw away the remains of my sourdough culture. Despite a few bubbles it didn't look very lively anymore and started to smell bitter in the end. Something must have gone terribly wrong. I don't know yet what it was but I am determined to try again. However, I want to spare yourself more pictures of brownish-grey bubbles. Therefore, I'm presenting my recent attempt in learning how to plate properly.

Having bocconcinis in the fridge without knowing what to do with them, I found this tasty yet easy to prepare salad with bocconcini and prosciutto at Cream Puffs in Venice. A pretty and satisfying dinner - even my boyfriend rated this salad as "excellent" and requested more of those little bocconcini-prosciutto-rolls for the future.

To be honest, it took me ages to arrange everything properly... And now I can't make up my mind which shot I like best. So please help me, dear reader, provide some constructive criticism and tell me what you think about the plating and the photography!